|
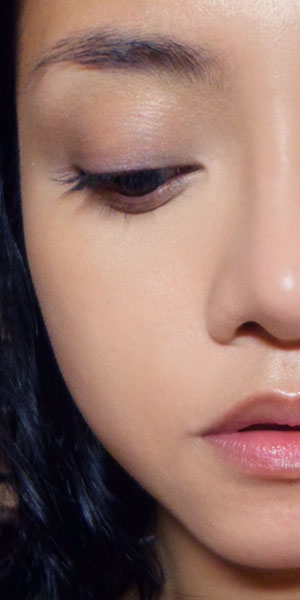
| Before |
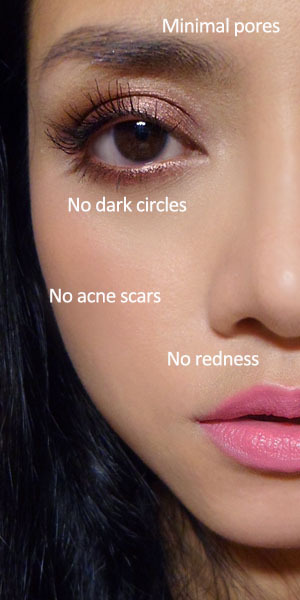 |
| After |
Ok, I'm not saying I have a lot to cover. Neither do I have flawless skin, obviously. I have dry spots, some areas with obvious pores, some unevenness, old acne marks, and dark circles.
This is not a tutorial for covering serious acne (I always recommend you get that treated rather than covered) or scarring. It's just a quick way to look as flawless as possible, without caking up your face with lots of unnatural-looking makeup.
You want products that can give maximum pigmentation with minimal texture, so it still looks and feels like skin up close.
The products:
Unfortunately, in my experience, good "fake" real skin does not come cheap. But if you are doing this for your wedding or a special occasion, I think it's ok to consider a once-in-a-blue-moon splurge to feel really confident.
Make Up For Ever HD Foundation: The best balance between lightweight texture and high pigmentation. It sets into a real skin texture, so you get coverage but not that powdery, mask-like texture of matte foundations. A tiny bit goes a long way so this is an investment if you're willing to shell out. If you're lucky, you'll find a perfect match. I don't have one, so I have to mix 123 and 117 for a perfect match. Ouch.
Estee Lauder Double Wear Maximum Cover Camouflage Makeup: I don't use this as a foundation. I use it as a concealer because it's SO high coverage. I prefer it over some other products because it lasts a lot better but doesn't feel TOO dry on the under-eye area for my combi/dry skin. If you're on the market for a good liquid/cream concealer, I highly suggest checking this out because it comes in a huge 30ml tube and lasts FOREVER.
Sigma F05 brush: You can use any duo-fiber stippling brush, but I find this works a lot faster and blends the foundation out a lot more flawlessly for that really airbrushed finish.
MAC Fix+: Or any alcohol-free toner or setting spray
Step 1: I pump out a small amount of foundation on the back of my hand and then lightly dip just the tips of the brush hairs into it. You want the tips of the hairs to have a small bit of product, so that the fibers are still pretty much separated from each other. Avoid wetting chunks of fiber so they clump together.
Step 2: Stipple the brush onto your face lightly to distribute the foundation and then very lightly buff the tips of the brush into your face in circular motions. Some people like to just dab-dab-dab, but I find the swirling helps to "airbrush" away your pores. Just don't be too rough if you have dry, flaky skin as this can make it worse.
Step 3: Apply dabs of concealer on dark marks. In general, I like to use my finger to pat and blend undereye concealer. For spots, I like to dot onto the spot directly, and then use the F05 brush to stipple lightly. This once again "air-brushes" the area without looking like you have a patch of heavy product.
Areas to look out for include:
- Inner corners of eyes
- Outer corners of eyes
- Uneven areas
- Spots
- Veins around the nostrils
- Corners of the mouth
Step 4: Set the T-zone. I don't powder all over at this point. I just use a transparent setting powder like Silica, Make Up For Ever HD, MAC Prep + Prime, etc on a sponge wedge and lightly press (not rub!) onto the T-zone, chin and sides of the nose where the pores are more obvious.
P.S. I also like to do my brows at this point. It's not important; just a personal preference.
Step 5: Adding some glow back into the skin so you look fresh and dewy. I apply some highlighter onto cheekbones and brow bones.
Step 6: Finish with a hint of pink blush along the temples. The softer and looser your brush, the more natural your blush will look.
And that's it! You can move on to the rest of your makeup!