|
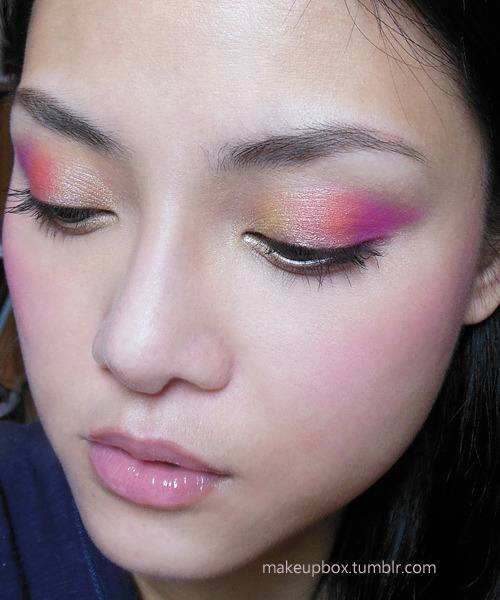
| Huge lashes, lavender cheeks, and a berry-stained "jelly" lip! |
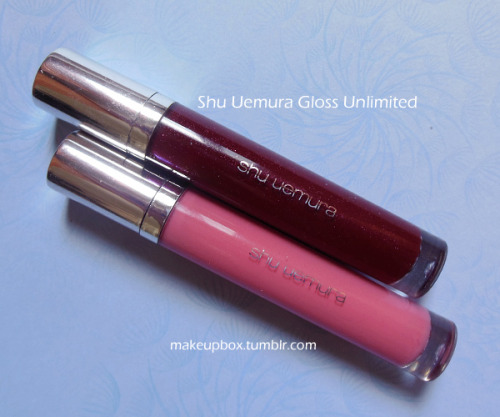 |
| Shu Uemura Gloss Unlimited in WN 20 S (top), PK 70 C (bottom) |
Apparently, two-toned lips are in this season. (Apparently, I've been doing them for 2 years while they were completely out of fashion; boohoo...) I don't usually use glosses to do ombre lips, because there usually isn't enough of a visual contrast. But when I saw a very dark shimmery wine shade in the Shu Uemura Gloss Unlimited range, I immediately thought "stained jelly lips!"
The Lips
In the grand tradition of the great Uemura-san himself, I swopped things around and did my lips before my eyes. Uemura believed a lip color could be applied first and thereafter be the deciding factor for the eye and cheek makeup you choose.)
Step 1: I applied a soft beige pink, PK 70 C (translates to "Pink 70 Cream" for you and me) over the lips. (Try MAC's Please Me Lipglass if you can't find this in your country.)
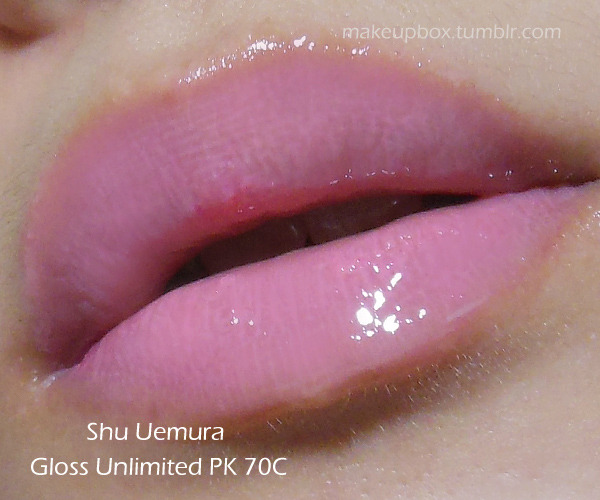 |
| Shu Uemura Gloss Unlimited in PK 70 C |
Step 2: Next, I applied a deep berry gloss (you need to use something quite pigmented or it won't have this level of contrast) WN 20 S (translates to "Wine 20 Shimmer"). (Try MAC's Desire or Rebel Lipglass if you can't find this.)
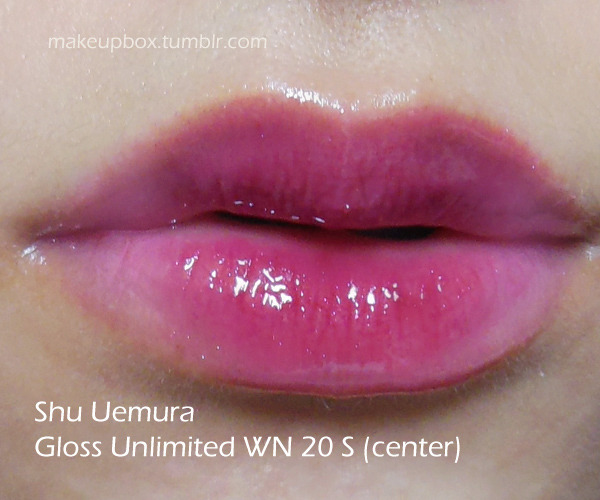 |
| Shu Uemura Gloss Unlimited in WN 20 S |
*The US range seems to be slightly different from Asia (is anyone seeing a recurring pattern here???) so I listed alternatives with a similar color if not the same texture.
---
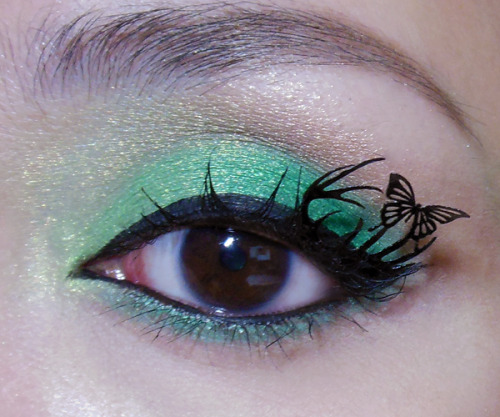
The Eyes
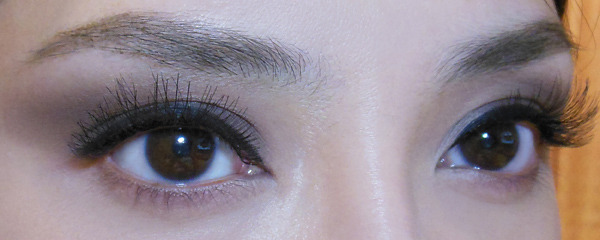
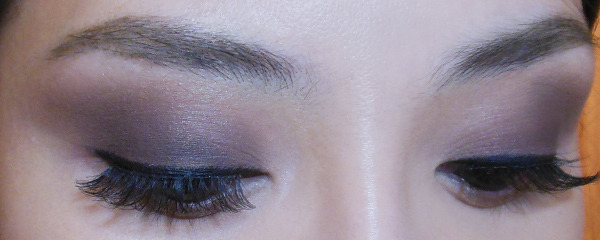
The modus operandi is "doll-like". Rounded, widened, with huge lashes. You can apply lower lashes if you want, but this isn't meant to be a super-dramatic look, so I skipped that.
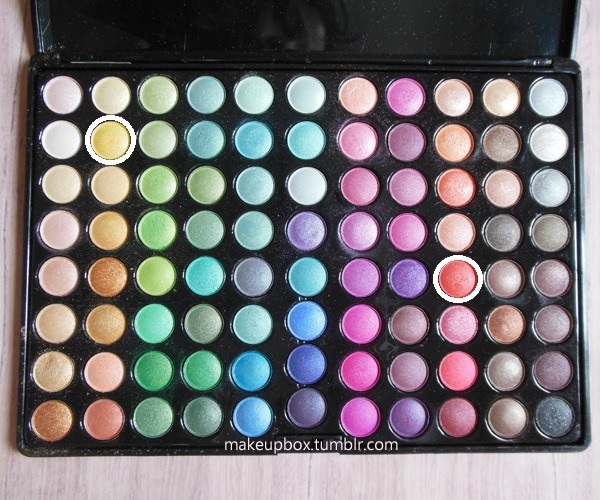
Step 1: To create a rounded eye shape, I used the 88 Warm Palette and mixed up a few of the medium browns just to create a warm matte tone that's about 2-3 shades darker than my skin color. This I applied to the entire lid in a rounded shape, blending upwards almost to the brow near the center.
Then on the inner corners, I applied a little pale beige.
Step 2: Line your lower eye rim with a pale yellow liner like NYX Yellow. Next, use a dark grey or charcoal pencil to create definition and emphasize a rounded shape. You want to line it such that it's thick at the center of the eye, and then tapered to a thin point at both ends.
On the lower lash line, run the charcoal pencil along the outer half of the eyes, making it thicker at the outside.
Step 3: Here's one trick to easier eyelash application. Apply the glue directly along your lash line. This can be done if you're using one of the brush-applicator lash glues, or with a liner brush if you're using regular tube glue.
Step 4: Apply long, dramatic clustered lashes (I used Red Cherry #16s) and push them up at the center of the eye for doll eye.
The Cheeks
I wanted a "glowy" sort of effect to go with the eyes and lips, so I used a lavender blush (MAC Full of Joy just on the upper areas of the apples and up long the cheekbones.
Why don't you pick a lip and then decide your makeup today? ;)