Showing posts with label concealer. Show all posts

Sunday, May 24, 2015

The Creaseless Concealer Trick: How it works, Why it works, What Products work best!


The other day on Dayre (https://dayre.me/makeupbox/d9k1gH9VIh), I did an "epic concealer post" going through almost my entire collection of concealers and briefly comparing performance between each. And while sharing a few tips about getting concealer to last, someone asked a question about how to keep things "creasless".

I don't think it's possible to keep concealer completely creaseless. We have natural folds and lines under our eyes that are there even when our eyes are closed, so it's usually not possible to get a completely flat, line-free coverage in the first place.

BUT - the real annoying things are those expression lines that form in your makeup AFTER you smile or frown, etc. Even after you relax your face and your actual lines disappear, those creases in your makeup stay there and make you look 10 years older. And to make it worse, they are almost impossible to rub and even out without removing quite a lot of makeup. 

THIS is what we're trying to prevent. At least for as many hours as we possibly can. And there is a way to do it.


One of you mentioned a video Nikkietutorials did fairly recently on Youtube, and after several experiments I found it's not so much about the concealer that she used (MAC Pro Longwear) or the sponge (Beautyblender), and more about HOW the sponge was used to apply the powder.

Plus not everyone wants to use exactly the same products, so I tried many different variations using different concealers, camouflage foundations, etc, AND also different powders and sponges, to find out why it works, and what you can switch out according to your own preference. 
  • Rule 1: It doesn't matter what concealer you use. I used non-setting creamy concealers like Marc Jacobs Re(marc)able concealer, crease-y cream camouflage foundations like Kevyn Aucoin Sensual Skin Enhancer, and also heavy-duty setting formulas like Estee Lauder Double Wear Maximum Cover Foundation. They all work.
  • Rule 2: Choose a powder that is translucent and not tinted. This method of application causes any color in your powder to become more visible. So use a silica-rich invisible setting powder (e.g. those slippery Make Up For Ever HD types) that goes clear when damp, or at least doesn't darken when wet.
  • Rule 3: It is all about the damp sponge. It doesn't matter whether it's an expensive beauty blender or a cheap tear off wedge sponge. They all work. Just make sure you dampen it and squeeze out all excess water so it's moist to the touch, but no water drips out when squeezed.

On to the demo!
Below I used a cheap sponge (drugstore disposable wedge), a mid-range concealer (MAC Pro Longwear), and a high-end powder (Laura Mercier Secret Brightening Powder).

At this point, it doesn't actually matter how you apply the concealer onto your face. The key thing is not to apply the concealer directly onto your sponge. A lot of people get lazy and do this, but you end up soaking your sponge with product, which makes it not only harder to clean, but also wastes a lot of product. A sponge always does a better job of blending things out when it isn't already loaded with thick product.

The goal of using a damp sponge to blend is to get as even a layer of product over your skin as you can. The point of not dragging or rubbing it across your skin is so you do not remove any coverage. You can just as well use your finger or a brush to blend out a product if you are in a hurry, but a sponge DOES even things out more thoroughly.

And as for a Beautyblender type sponge? It's shaped for easier blending, but there is nothing magical about it aside from the nice shape and slightly firmer texture. If you're on a budget, don't feel you have to use one to get good results. Most disposable cosmetic sponges have the same fine-grained smooth porous texture that blends out makeup beautifully.

REMEMBER! Whatever creases are in your concealer now will be "set in stone" once the powder goes on, so it pays to even out as many as your skin allows.


Just pat and pat until most of the powder "melds" into the concealer and don't miss any spots. You also don't need a TON of powder. Just make sure there is enough to cover and set everything. If you have too little, some areas of concealer will remain "fluid" and crease later. If you have TOO much, it can look very cakey, so don't keep layering on more and more powder.

Also, if you want to use this technique, don't use pigmented powders. Remember you are applying a concentrated amount and any color in your powder formula will show up. Powder foundations and mineral powders with coverage will grab on to the concealer and darken. You don't want to end up with an orange or deeper undereye area than you started with. The best powders are the translucent and paler-than-your-skin shades because they also help add a subtle highlight to the undereye area. 

(I tried Bourjois Java Rice Powder once and it was a disaster. I got a deep pink-toned eye area because the powder has a pink tint. It goes on clear most days but in concentrated amounts, it's definitely pink.)
My favorite powder for this trick? Laura Mercier Secret Brightening Powder. It's clear like Make Up For Ever HD and will not affect the color of your concealer, but unlike pure silica powders, it has some brightening pigments as well to give an extra boost. But it's not a must.

So are there creases? Of course. There are natural folds/lines under my eyes which are there to begin with. This way of applying powder can minimize the appearance of those lines, but it will not completely erase them.

BUT - this is the best method for minimizing further creasing that I've tried. And what I love about it is the same method works for preventing creasing around your nostrils (nasolabial lines), beside your mouth (smile lines), AND is great around the nose and inner cheeks where you have more visible pores. It actually helps hide them and makes it look like you have baby pores.

Why it Works 
If you're curious, the reason it works is the damp sponge picks up a concentrated amount of powder - way more than you would be able to pack on with a brush - and presses it into the concealer. The pressing forces the large amount of powder into the concealer without moving/smearing it, effectively sealing and setting it the way normal puffs and brushes can't. It doesn't smear and crease because there is no room and no "flexibility" for the product to move after this point.  
At the same time, the dampness in the sponge prevents the large amount of powder from looking chalky and dusty. I tried using a dry sponge and it looked chalky and horrible as anything. So it's definitely the water that helps the powder to not LOOK like powder.
Try it out and let me know how it works for you!

Tuesday, September 17, 2013

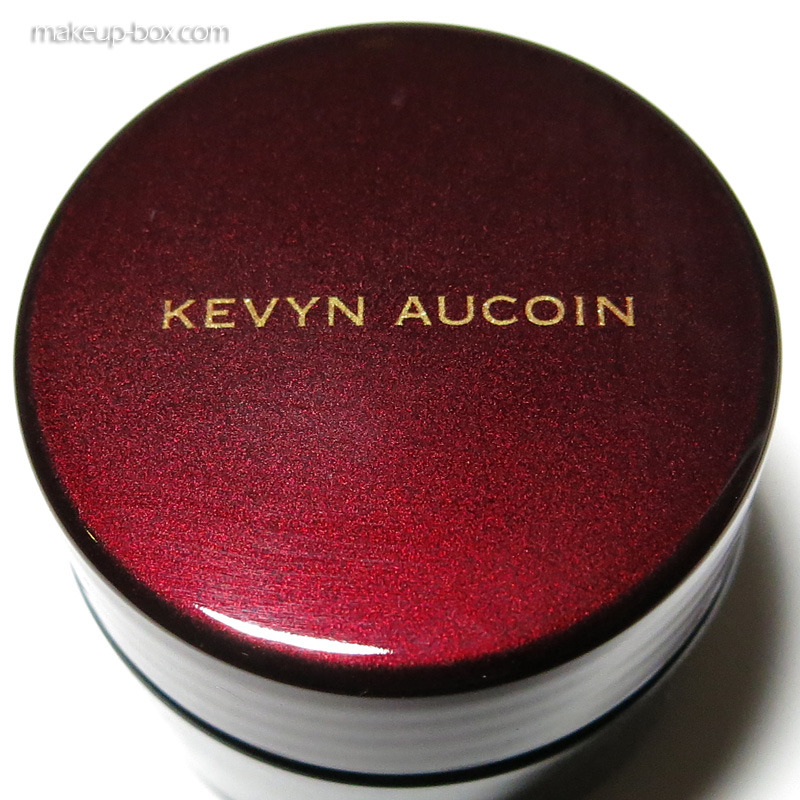
Kevyn Aucoin Sensual Skin Enhancer Demo and Tips

Is it worth the hype?

Kevyn Aucoin Sensual Skin Enhancer, capped

I hate to say this, but... yes.
And yes, I’m kinda late to the game. But Kevyn Aucoin is not available where I am, and I only just realized FragranceX carried it.

So I did some swatch searches online and purchased a jar of this super-high coverage camouflage foundation for myself. It takes a little know-how to use if you’ve never tried something like this before, so if you’re wondering about investing in a jar of this wonderful product, then below are some tips and a demo.
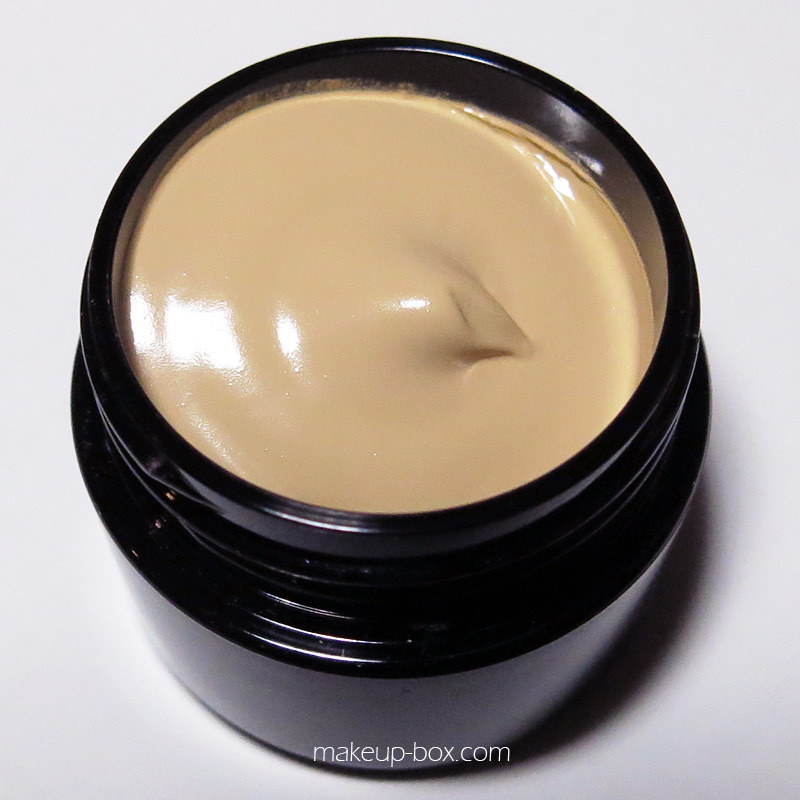
The shade I use is SX 06 which is a fair yellow that’s probably closest to a MAC C25/NC25.

Kevyn Aucoin Sensual Skin Enhancer SX06

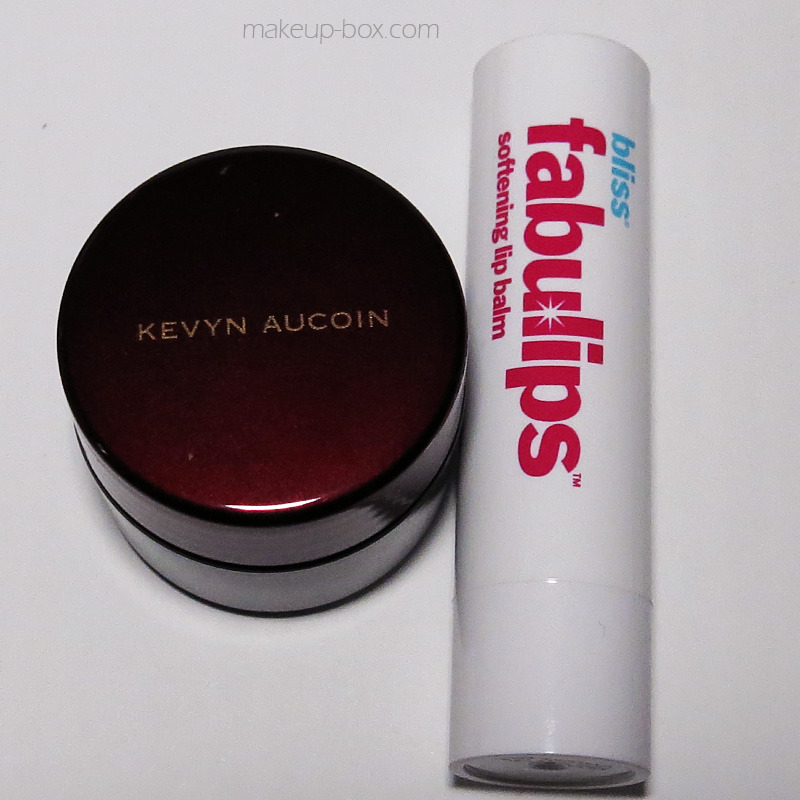
Pictured with a tube of lip balm to show how small the jar is!

  1. First thing you’ll notice is how tiny the jar is considering the US$50 retail price-tag. It’s literally the size of a jar of eye cream.
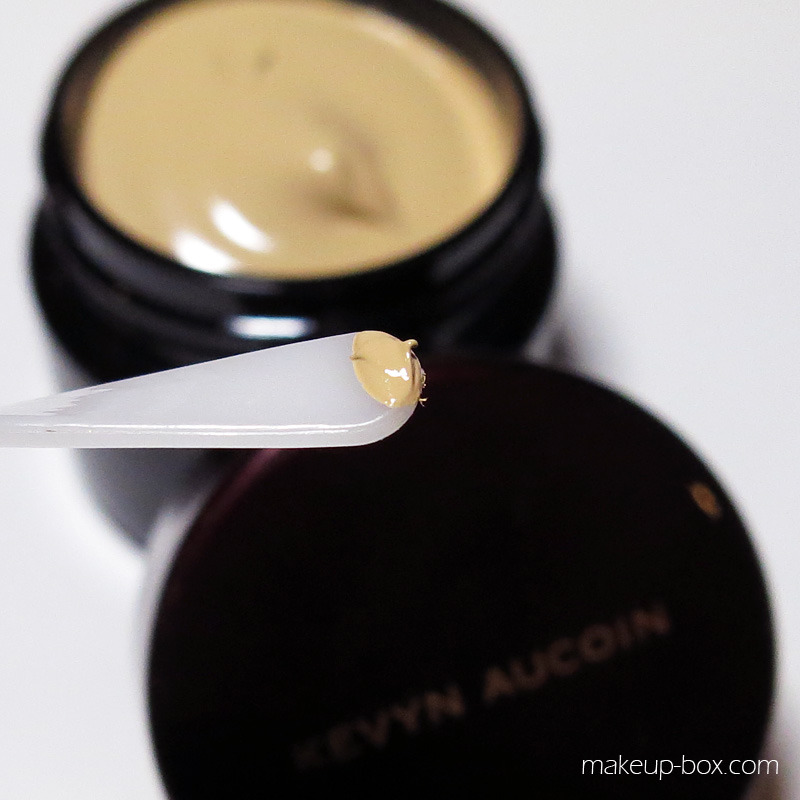
  2. But second thing you should know is: You need a lot less than you think, which explains the size. See that little dab on the spatula below? That’s usually more than enough for basic dark circle and blemish coverage over my entire face. That little jar will probably last you longer than most of your foundations.
  3. Most of these camouflage products are oil-based. This isn’t a bad thing because it keeps the product blendable and supple-looking even if you layer and layer it on to cover scars and tattoos. It also works fine on drier skin, including under the eyes. In Sensual Skin Enhancer’s case, it is mainly mineral oil (non-comedogenic, doesn’t go rancid), and jojoba oil (this is actually a natural skin-protecting wax, so it ALSO doesn’t clog pores or go rancid).
  4. Sensual Skin Enhancer comes in both yellow-based and pink-based shades so make sure you read the descriptions before you purchase, especially if you’re shopping online.

A "dose" of Sensual Enhancer on a plastic spatula; this is all you need to cover dark circles and do a little concealing all over...
Usage tip: To use it for everyday, don’t just try to apply it all over the face straight from the pot. You’ll end up with a cakey, heavy mess. You can take a tiny amount and mix it with about 5-6 parts lotion or more for a lightweight foundation or tinted moisturizer. I mix it with my SPF50 sun screen just so I can take care of sun protection and foundation at one shot.

If you want fuller coverage, mix it with 3-4 parts lotion. (Mix it with an oil-control lotion if you prefer a more matte finish.) I simply rub everything together on the back of my hand and then apply to the face with brush or fingers.

To see the application process, follow this link and scroll to the bottom of the post!

Monday, August 15, 2011

How to Conceal: Product and Tools Overview

Skin Food Salmon Darkcircle Concealer
Since there were some questions recently regarding concealing products and tips, I decided to do a 3-part general guide to Concealing for common problems like spots. uneven tones, and dark circles. 

Part 1: Overview
Part 2: Undereye Concealing
Part 3: Spot Concealing


PART 1: Concealer Overview
General Rule-of-Thumb: Concealer should itself be concealed. 

If I had to walk into an important interview wearing only one thing on my face, Concealer would be it. While I'm addicted to color makeup like eye- and lip-products, concealer is the #1 confidence booster. 

Unless you are one of those who have permanently spot-free skin, no uneven tones, and no darkness around the eyes, you will likely need some, if not all, of the products listed below. Please reference this as an overview of the TYPES of products that will help to fix specific issues, rather than a definitive listing of must-have products. 

1. Skin-toned Concealer 
  • This should be TRUE to your real skin color or just slightly yellower. If you use powder, you can get one just slightly lighter than your skin tone. If you don't, get your exact shade.
  • Used for: Spots, fresh acne-scars, slightly-dark or red areas of your skin
  • Recommended coverage: High
  • Good Texture: Waxy, thick, dry until warmed up
  • Suggested Products: Laura Mercier Secret Camouflage, MAC Studio Finish Concealer SPF35, most concealers in a stick form
  • NOT GOOD FOR: Trying to cover dark circles completely

2. Salmon-toned Concealer 
  • A product that is pinker than your actual skin color, but not lighter as there needs to be enough peach pigments to counteract dark pigmentation. 
  • Used for: Under-eyes, veins, bruises, dark purplish/plum spots
  • Recommended coverage: Moderately-high (go for the very thick textures only if you need to cover tattoos)
  • Good Texture: Semi-creamy, not hard to spread and blend
  • Suggested Products: NYX Concealer in a Jar (there's an orange shade), Amazing Concealer, Bobbi Brown Corrector, Skin Food Salmon Concealer (pictured at top)
  • NOT GOOD FOR: Covering redness and acne

3. Setting Powder
It can be:
  • slightly more yellow-toned (not TOO yellow) than your skin, 
  • slightly luminous rather than flat matte, and 
  • a shade or so lighter than your natural skin color, if not translucent. 
Concealer, especially opaque ones applied thickly over blemishes, will grab powder and result in a dark, cake-y patch, so setting it ahead of time with a lighter shade locks in the concealer and allows you to apply the rest of your makeup easier.
  • Used for: Setting concealer and providing extra correction
  • Recommended coverage: Sheer
  • Good texture: Fine-grained, dry and light
  • Suggested Products: Powder in Bobbi Brown's Creamy Concealer Kit, Laura Mercier Translucent Loose Setting Powder, MAC MSF Natural, Everyday Minerals Kaolin Powder Sunlight (for setting spots), Everyday Minerals Luminizing Sunlight (for setting eyes)

4. Good Tools

  1. Tiny eye liner or lip brush for applying concealer precisely under and around spots

  1. Very loose, fluffy, tapered eyeshadow blending brush (left) for gently stippling setting powder over concealer in small areas
  2. Spatula (or any other plastic/metal tool) for scooping/scraping concealer out of its container
For under eye areas, I recommend just using your finger, as this is where you need smoother, thinner coverage, and your ring finger is better for warming and sheering out concealer.

IMPORTANT TIPS!
  1. If you are keen to avoid acne, you want your concealer to stay as pristine as possible, which means no "double-dipping" with brushes and fingers straight from the jar. Get a disposable plastic spoon or spatula to scrape a bit of product from the container, and take the product from there. Then clean it with soap or rubbing alcohol after every use.
  2. Clean all brushes used for cream/liquid products AFTER EACH USE. Concealer left on a brush for a day or more will have accumulated bacteria, dirt, and dead cells from your skin. Why would you ever want to reapply that back onto your face??!
  3. If you are having an active breakout, clean all tools that touch your face after each use. Even the powder brushes. The last thing you need is to perpetrate the "breakout - conceal - breakout - conceal" cycle by reapplying bacteria to clean skin. 

Makeup shown above:
  1. Bourjois Healthy Mix Foundation #52
  2. Bourjois Healthy Mix Concealer #52
  3. MAC MSF Natural in Medium
  4. Maybelline Eyestudio Brow Pencil in Grey
  5. Sasa Super Dolly Shining Powder in #01 Silver (dabbed onto center of lids) 
  6. No 7 Extreme Length mascara in Black
  7. NYX Lip Pencil in Fuchsia
  8. Revlon Colorburst lipstick in Fuchsia
*No blusher, eye liner or shadow used.

Stay tuned for Part 2!

Sunday, February 27, 2011

Out of The Box: How to use Make Up For Ever HD Powder (Silica Powder)


There have been so many horror stories about getting a white cast from using this infamous, much-hated, and much-loved powder.
Well, I have to say that if you do, then you’re probably applying too much and not buffing out enough. That said, I think we do deserve to have products (especially ones that cost this much) work easily for us.
MUFE HD powder is 100% silica, which is a spherical mineral that gives a silky slip to your skin, absorbs oil, and helps to diffuse light, much like a silicone primer. Brands like MAC, E.L.F., Laura Mercier also carry similar products. However, while I do love how this feels, I can say that I will never buy this product from MUFE again. This is simply because 100% silica costs a mere fraction of the price they are charging; this is a common, cheap mineral ingredient in a lot of makeup products, and we’re being grossly overcharged.
That said, I probably have to thank MUFE for introducing me to silica powder, as I love it and will probably never stop using it for its ability to set products without changing their color, mattify skin and diminish lines.

HOW TO USE IT?
As a dry primer before powder products.
If you use wet/moist products as part of your routine (creams, sunblock, serums, foundations, concealers, cream blushes, moist highlighters), you probably apply them before you apply any powder ones (mineral powder, powder blush, powder highlighters).
 Now, as some of us know, applying powder right over wet or creamy products can cause them to really cake up and grab in areas, darkening what we want to lighten up in the first places.
BUT, if you set your creams/bases with silica BEFORE applying your blusher and face powder, etc, they will not only go on really evenly, but it gets rid of any white silica cast you may have.
Of course, if you’re heavy-handed with your powders in general, anything will give you an unnatural cast, so don’t blame the silica.
Below, I have a little experiment to demonstrate.
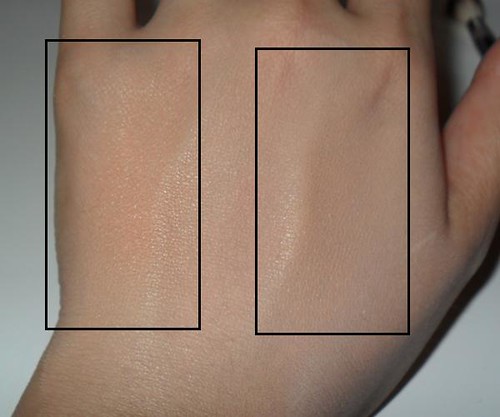
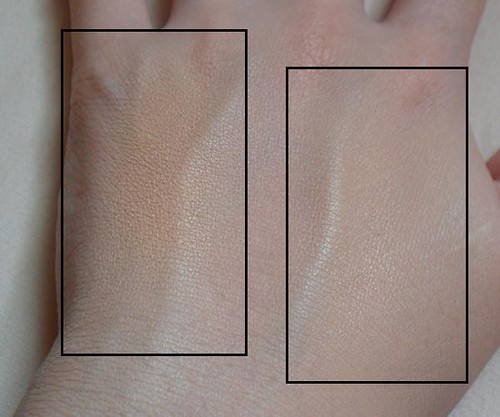
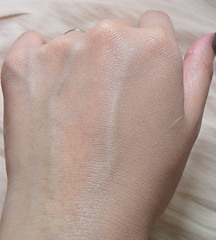
I’m applying concealer all over the back of my hand, then applying silica to set the right half.
Then I’m applying a patch of salmon-colored corrector powder (Everyday Minerals Abbott’s Perk Me Up) and buffing in with a soft fluffy eyeshadow blender.

What you’ll see in the series of pictures below is how the powder will grab on the concealer and darken in the patch (left side) that has not been set with silica.

Pic 1: Artificial light, with flash. 
See how the powder is already orange-looking. And see how the peach powder on the right side has not grabbed, and does NOT have the white silica cast that we are all so afraid of.

  Pic. 2: Natural Light, no flash. 
In natural light it’s worse. The cakiness comes out, the powder is obviously darkened, and skin texture is dull and dry-looking, which can be a disaster for the eye area and zits. (And this is right after application, before sweat and oxidation makes it worse.)
The right side, however, looks as perfect as before, regardless of lighting.


REMEMBER:
  1. Silica acts as a non-sticky surface which prevents powder from sucking up the moisture or oils in your skin and darkening in the process. This is especially important for areas where you tend to apply more products, such as zits and under the eyes. It also helps to prevent overly-strong blush as you’re forced to slowly build up.
  2. After you apply your powder foundation, etc, don’t forget to use a clean brush or powder puff to buff off any excess. Because you have a layer of silica, the excess will slip off easier, leaving you with just enough product. If you skip this step, it’s likely that there is too much powder in areas of your face, which will oxidize and cake over the day, and look horrid in photographs, regardless of what you use.

Saturday, February 26, 2011

Review: Bourjois Healthy Mix Foundation and Concealer


1. Healthy Mix Foundation
VERDICT: BUY IT!
PROMISES: 16-hour, perfect coverage, semi-matte, oil-free, sensitivity tested, glowing and toned skin
This is a highly-rated foundation on MakeupAlley and Youtube, and I’ve been using it almost exclusively for a little over 2 months, in both de-humidified chilly air-conditioned environments, and sweltering, rainy tropical weather.
I’m pleased to say that this IS a great foundation, but there are a few things that you need to note before you take the plunge.
  • What I think it is? This is semi-matte, oil-free, caused zero breakouts and sensitivities for my slightly-reactive skin, and does not clog pores.
  • What I think it’s not? Full coverage, 16-hour, or toning in any discernible way.
  • Best Applied With? Fingers. Really work it in for the most natural look.
This is the best foundation if you have skin that borders on either side of normal on most days, and want a nice matte-but-glowing complexion. (By glowing, I mean like you have more even-toned and clear skin which light bounces off of.) If you are looking for a moist or super-matte finish, want opaque coverage, or have extremely dry or oily skin, stop reading this post. 
Do note the below images are taken with flash, and the foundation will be less visible in natural light.

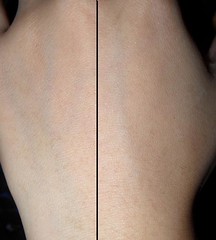
Above, without.
This is one of those foundations that you can wear without powder for a natural look, as it sets and does not slip and slide for the most part.The coverage feels light and uncomfortable, but it does do a pretty good job of evening out skin tone while looking and feeling natural.

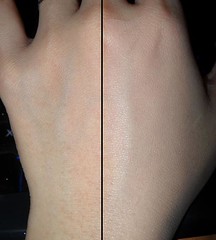
Above, with 1 coat, using flash. (Note: My hand is darker than my face, so excuse the color.)
It has not oxidized on me throughout the day, but I don’t find it to be particularly build-able. If you layer on more and then blend, I found that it just spreads out to about the same coverage as before (see image below).

Above, 2 coats.
It does start to sink more into your lines if you apply too much, so I’ve found that one coat is the best amount. If you need concealing, use concealer. Don’t layer on more foundation. Only some cream formulas work well that way.
Best thing? This looks good in natural light (below), where so many foundations tend to look unnatural. See how the darker “spots” (which are my hair follicles) are no longer visible?


________________________________

2. Healthy Mix Concealer

VERDICT: Ok if you your circles aren’t too bad,
PROMISES: Radiance, anti-fatigue, activates micro-circulation
  • What I think it is? This is powdery, medium coverage undereye concealer that does a fair job, but is only slightly build-able. Like the foundation, the powdery silicone-based formula just spreads and sheers out if you try to apply more.
  • What I think it’s not? A good cover-up for zits and serious dark circles.
  • Best Applied With? Fingers.
That said, it IS a nice feeling concealer if you don’t like sticky, creamy or heavy things under your eyes. This does not crease as much as heavier formulations tend to, and I like how it doesn’t feel like you have much on your face.
Do note that the concealer is ever so slightly lighter in shade than its coordinating foundation, and like the foundation, I experienced no oxidization over time, so don’t buy anything too much lighter than your skin-tone unless yo need to neutralize dark spots.
Recommended for those with normal to oily skin and mild to medium dark circles, as it is a matte finish concealer, medium-opacity, and is not peach enough to correct significant blue or purple undertones in the skin.