Monday, May 28, 2012

Golden Bronze Cat Eye Tutorial (88 Warm Palette)


My 88 Warm Palette has been in cold storage lately, as tends to happen when you are always trying new things. This is a look you don't need the 88 palette to create, as there are lots of similar shades in other palettes as well. 
The shades you'll need to pick are
  • A soft beige- or malt-gold that isn't too far off from your skin tone
  • A warmer, stronger amber-gold with some orange in it
  • A soft burgundy with a pearl sheen (surprise; this gives the whole look more depth than just sticking with a deep bronze or brown)


Step 1: Apply the soft gold all the way from inner corners up to the brow bone, leaving just the outer-most corners of the eye clean.


Step 2: Pack the warm ambery gold onto the outer 1/3 of the lid below the socket, and then extend up to the brow bone. Notice I extended the color inwards more along the deepest part of the socket line. This will give your eye more definition instead of allowing all the bright colors to wipe out your contours.


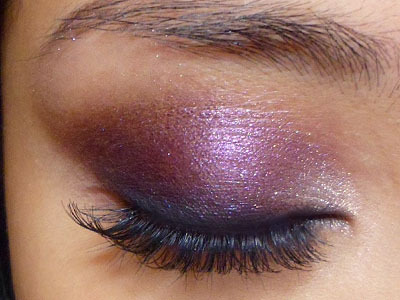
Step 3: Pick up a warm, rich burgundy and pack that right in the outermost corners of the lid, then also lightly sweep the remaining pigment on the brush up towards the end of your brow as well. This will make the look a lot richer and stop the eye look from going too brassy and yellow.


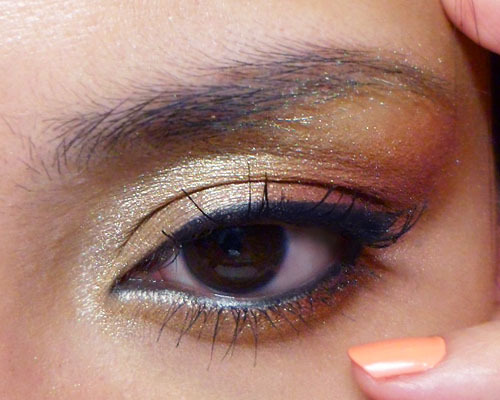
Step 4: Apply a black pencil along the tightline and waterline, and then use black liquid or gel liner to apply a thick flick at the outer corners. Finish with black mascara.


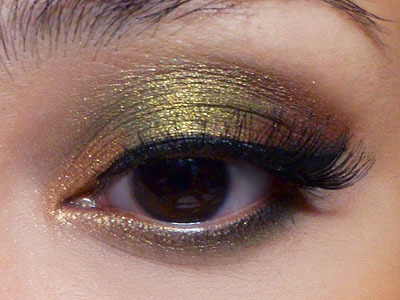
The finished effect is polished, dramatic, but at the same time not over-the-top because it should work with your natural skin tone. You can choose to pair this with a strong lip, but I prefer just going the natural route with this.
On Rest of Face:
  • TheBalm Hot Mama blush (my favorite warm coral blush)
  • NYX Iced Honey lipstick (metallic beige/nude)
  • Revlon Super Lustrou Lipgloss in Coral Reef (sheer coral creme)
*Quick tip: Applying a creme gloss over a metallic or pearly lipstick is a way to juice up your pout without adding a lot of obvious shimmer and sparkle.

Saturday, May 19, 2012

Sultry Candy: Matte Pastel Evening Look (using Lime Crime Palette D'Antoinette)

If you want to wear colorful makeup, I always find matte shades to be an fun option because they are so color-true.

Lime Crime's Spring palette D'Antoinette is a collection of sugary pastels that are pigmented but not so crumbly and chalky that you can't apply them with a regular shadow brush. I decided to give it a test run by creating a slightly dramatic eye so you can see for youreslf if you like the color-payoff and textures.

The palette is not cheap at $34.99, but if you are in the market for a collection of blossom-y matte pastels that are so fun for spring and summer, this is a good-quality option, and actually quite a good deal if you consider that a single 1.5g MAC pan costs $11.50 without a case, and a regular shadow costs $15, while each color here is 1.6g and costs less than $7.

The only criticism I can think of is that all 5 shades are pale, bright colors, and most people would need a deep color in order as a definer shade. This is NOT an idiot-proof palette. You can't just slap on the colors in any ol' combination and walk out the door.

Unless you have extremely deep sockets, very pale skin, and full, dark lashes, you can probably benefit from using a deep brown, grey, or black, etc along with it.


Step 1: I ran a matte chocolate brown shadow (Revlon 009 Rich Sable) along the upper and lower lash line with a flat angled brush.


Step 2: I picked the soft bright peach (Macarooned) and packed it onto the center of the lids. 


Step 3: Then I swept the matte pastel pink (Royal Flush; this shadow is like the shadow version of MAC Saint Germain lipstick) along the inner half of the socket line above the peach shadow.


Step 4: Now with the only sparkly/shimmery silver shade in the palette, I dabbed around the inner corners of my eyes using a ring finger. (Mercurious; Bourjois's little round pot in Argent, below, is a dupe if you can't afford Lime Crime.)


Step 5: Finish by outer corners by packing the matte lavender shade (Ribonesque) in a rough in-ward facing "C" around the eye socket.


Step 6: And just because pale or bright shades all over the lids can really "flatten" your eye and sometimes make your lids look puffy, I added a bit of definition and contour back by running the matte brown from earlier very lightly along the socket line and blending it out to just a soft line.


Step 7: Finish by reapplying lavender and pink outside and above the contour line in the above shape. This helps to soften out the brown even more, and reinstates color without erasing the contours.


Step 8: Apply black liquid liner thinly along the upper lash line, avoiding any flicks. This is just a base for applying a strip of false lashes. (I used Fairylash once again because they are so black and beautifully-dramatic, and go so well with this look.)

Tuesday, May 15, 2012

YSL Rouge Pur Couture Glossy Stains (Swatches, Review)


With Chanel's Rouge Allure Laque being out of stock globally, this seemed like the next best thing, especially as it's a rather innovative formula designed to be transfer-resistant.

Long-wearing glosses tend to be stickier, thicker and generally more uncomfortable to wear than regular glosses. Plus, they do still kiss off on anything and everything, so I never really got the point aside from the fact that some formulas marry high pigmentation with shine.

YSL Rouge Pur Couture Glossy Stains are a new breed of glosses that promise to be something different, and I must admit a line of lightweight, pigmented glosses that actually stay on and feel comfortable on the lips sounded a bit too good to be true.

So on my recent trip to the States, I picked up a couple of shades at Sephora.


Verdict? 


These are great, and I would pick these over Chanel Laques (or ANY other high-end gloss currently on the market) in a heartbeat. Unfortunately, YSL Beaute is not readily available in many countries.

The texture is very interesting because it's like jello; extremely light and cool to the touch when applied. If you've ever used Make Up For Ever Face and Body foundation, you'll know what I mean about a gel-like  product that thins out into a watery texture during application.
The best thing is how comfortable it is to wear. I don't get gloopy bits congealing in the corners of my mouth, and it doesn't feel heavy.

This product will "set" after application, but NOT completely, so while the color and shine can survive a full meal and drinks quite well, you can still wipe everything off with a tissue and some pressure. The color does seep into lines a little, so I don't suggest applying more than 2 coats or it will start to get very patchy and uneven-looking.


The pigmentation is medium (above, 17 Encre Rose), so you're not going to get opaque coverage but the color will definitely be strong.
I've been able to wear this for half a day without any touch-ups until after a big meal, so while this is really expensive, I expect one tube will last you quite awhile unless you keep reapplying.


The 2 shades I bought were the two medium pinks; 15 Rose Vinyl (warm petal-pink) and 17 Encre Rose (light mauve-pink). All available shades are non-shimmery.

One note when you're shopping in the stores though; the colors do stain your lips a little, so the product will wear a tone or two deeper than they look straight from the tube.


The packaging is pretty lightweight as it's actually plastic, but the window helps you identify shades quickly, and watch your product levels. The only problem is they're a little square and bulky if you want to stuff them into a slim little pouch to bring around.
These go for US$32 and are available in select Sephoras and DFS's around the world.


P.S. Maybelline Super Stay 24 Hr Gloss Stains are NOT the same thing though they sound like they might be. The color range and performance is very different, although they are both gloss stains. If you are on a tight budget and like non-sticky glosses, those are ok to pick up, but you won't find lighter, creamier colors (they all go on quite deep) and they also don't stay on very well compared to these.

Sunday, May 13, 2012

Antique Gold Lids: Olive-Gold Eye Shadow Tutorial


---
This is a makeup look that will work on mono-lids and hooded lids, as the color curves up along the eye socket. The basic technique you need to note is just stacking "V's" next to each other with your shadows.
I used 4 shades: Black, Brown, Olive-green and Bronze
---

Step 1: To maximize the intensity of the shadows, I first laid an olive green base on the lids (MAC Moss Scape Paint Pot). I ran it quite thickly along the lower lash line from outside in as well.
---

Step 2: Using a small brush, stroke black shadow diagonally downwards from the outer corner of the eye inwards. It will look like a little triangle at the outer corner. Stroke black along the outer half of the lower lash line as well.
---

Step 3: Pack a soft, warm brown beside the black diagonally downwards, and also up and in along the socket line (hollow line above your eye ball) so it makes a side-ways "V". (See Step 1 in the numbered diagram above if you are not sure how this should look.
---

Step 4: Pick a metallic olive green and apply it parallel to the brown you applied earlier. (I used an Antique Gold pigment and you can find a similar shade from many brands, both cheap and expensive, but MAC's Sumptuous Olive is a reference if you aren't sure what shade to look for.)
---

Step 5: On the inner corners, add a touch of soft peach-bronze, like MAC Honeylust (for reference). I used a bronze I mixed myself so unfortunately I have no name for it.
---

Step 6: Use black liquid liner to apply a simple line, extending up and out following the natural curve of the eye. Then finish by applying false lashes or black mascara as needed.


Wednesday, May 2, 2012

Dark Violet Wing Tutorial


---
Step 1: Apply a base and then pack a matte black shadow thickly along the lash line.
----
Step 2: Sweep a dark purple (I used MAC Grape Pigment) above the black, thickly along the crease line.
---
Step 3: Run a black kohl along the waterline and tightline, and reapply along the upper lash line as well.
---
Step 4: Apply wispy false lashes to complete the look.d