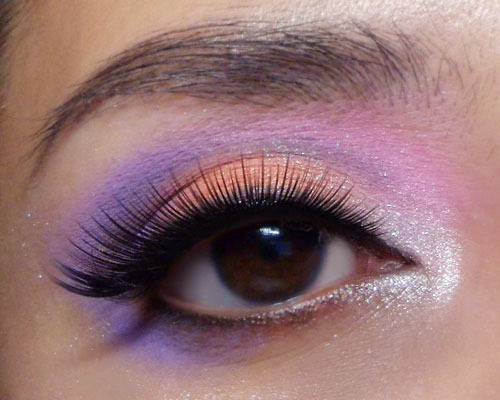
Showing posts with label pastel makeup. Show all posts

Saturday, June 18, 2016

RMK Cool n' Pop 2016 Summer Collection


RMK's Cool n' Pop 2016 Summer Collection looks like a win from the get-go. 
The marshmallowy eye and cheek colors, the sorbet-tinted lip balms, and the candy-colored mascaras and nautical-themed nail polishes.

Still, on closer look, it does strike me that this is a very quintessentially "Japanese Spring/Summer" collection. 
  • The cheek colors are very soft -  too soft to show up if you have medium to tan skin
  • The powder eyeshadow textures are very fine (and shimmery) - too fine and shimmery to be very strong without a good base
  • The cream shadow sticks pigmented but very pastel - so there is not going to be much definition around the eye area if you don't use shades from outside the collection
  • The tinted balm sticks are gorgeous for an on-the-go hint of color but not all the shades are equally pigmented

Doesn't mean it's a bad collection. If you have very pale coloring (pale hair, eyes, and skin) you will look absolutely gorgeous, which exactly explains the choice of model for the campaign. However if you have dark hair, dark skin and/or dark eyes, the colors can look a bit pastel and chalky, or simply not show up on you.


If you love the look of the collection but you're not sure how you can pull it off with your coloring, here are a few tips.

1. Make sure you have a soft matte grey shadow in your own makeup stash, or you buy the grey cream shadow stick. This is the only shade in the collection that can give you any sort of definition around the eye area, so apply it around the socket line, outer corners of lids, and along the lash line so you can retain some definition and prevent your eye lids (especially if you have typical East Asian features) from looking puffy or flat.

2. Keep the look a bit more wearable by pairing pastels with one of the neutrals like grey/silver/pearl shades in the collection. (The look below was done using shadow stick 02 (pastel blue) 05 (grey), Ingenious Powder Eyes 17 (blue) and 18 (pearl-white)


3. Be aware that if you have very dark eyes like me, colored mascaras can make your lashes "disappear" at a distance. A reason I avoid them usually. I personally feel this sort of look is more flattering for those with lighter eyes or colored lenses. 

General rule of thumb: Whatever is darkest stands out the most and makes everything else around it look "softer" in contrast. Just know that if you don't want your lashes to "fade", never go for mascaras lighter than your eye color.

That said, this tubing mascara formula is fantastic, and if you're just looking to make a statement with funky colorful lashes, or you have light eyes, go for it. It is SO pigmented you can really tint your lashes quickly. And it is so long-wearing even oil remover doesn't break it down. You need warm water to break it down.

 
And the final look re-interpreted on someone with my coloring!
I did not apply the color the exact way Rumiko did on the model of course. I'm trying to test all the colors I got in one eye look and this is what I ended up with.


I love RMK blushes and face powders in general, but I would skip the shades in this collection if you want visible blush and you are not porcelain pale. Go for other colors in their general collection.

The lip tints I really like formula-wise - they have a subtle minty feel, and aren't too squishy and soft (I hate it when balm sticks break off at the tips during application). Only thing is you need to test on your lips to see what shade is visible. Your lips are rosier than your hand so just because you can see the color on your wrist does not mean it will show up on your lips.

I love shade 05 (the soft red, worn above) because it is the one that is most visible on me. It just gives a soft warm rosy color and creates a healthier effect. I had been initially more excited by the deep berry shade 06, but the color barely showed up on my lips unfortunately. 

If you're just looking for a barely-there lip care product with a small amount of sun protection (SPF16) these are lovely though.

As for the polishes? I tried 2 - EX-48 (cool ash grey) and EX-49 (nautical blue), and they are fantastic. I've used a lot of pale creme greys before, from Revlon to Chanel, and they've always been a touch sheer and streaky until you build up 2-3 coats or even more. EX-48 is so pigmented that you CAN technically go with 1 coat if you are short on time. And I just love the soft greys and the nautical blue shades.


Sunday, January 3, 2016

MAKE UP FOR EVER Spring 2016 9 Artist Shadow Palette #3


I’m a big fan of the MAKE UP FOR EVER shadows because they have this very intense, creamy feel although I don’t always recommend them for newbies because the pricing of single shadows leans on the high side. So when they came out with the first neutral 9 Artist Shadow Palette for just SGD$69 it was a bit of a dream come true.

For 2016, they are releasing a limited edition Spring palette filled with fresh soda-pop colors. If you love colors in general, and want a mix of soft and strong ones, this is a more wearable alternative than Palette No 2 (limited edition in 2015), which leans towards strong, acidic tones.


This is a fun purchase to add to your collection if you already own some neutrals. There are lots of dusty pastels you can use for soft, sweet looks, and also some options for intense, bright peacock colors.

I especially love the gorgeous coral shade in the center, which has an iridescent gold glow. And the column of purples on the right make a beautiful trio.


This probably isn’t an item I recommend as a “first palette” purchase because you probably need a few neutral/matte shadows (brown, black, grey, etc) to use as transition and definer shades in the socket and along the lash line. That’s optional of course - if you like colors in the socket and along the lash line just go for it.

The most obvious way to wear the shades is to group them in columns top-down, and they look beautiful that way, but don't feel restricted to this. In fact, I would even suggest seeing this as a palette filled with single shadows - not necessarily that you need to create an entire look from within the palette. You also get 9 x 1.5g shades (each a full-size MAC shadow) for SGD$69 - which is incredible value considering you usually can't even get 2 full-size MUFE shadows for the price.

I did 3 different eye looks below using shades in the palette, and it's just a reference for how you can pick/pair colors, and also supplement your look with a matte color in the socket or dark pencil smudged along the lashes as a base to add dimension and definition.

Thursday, February 5, 2015

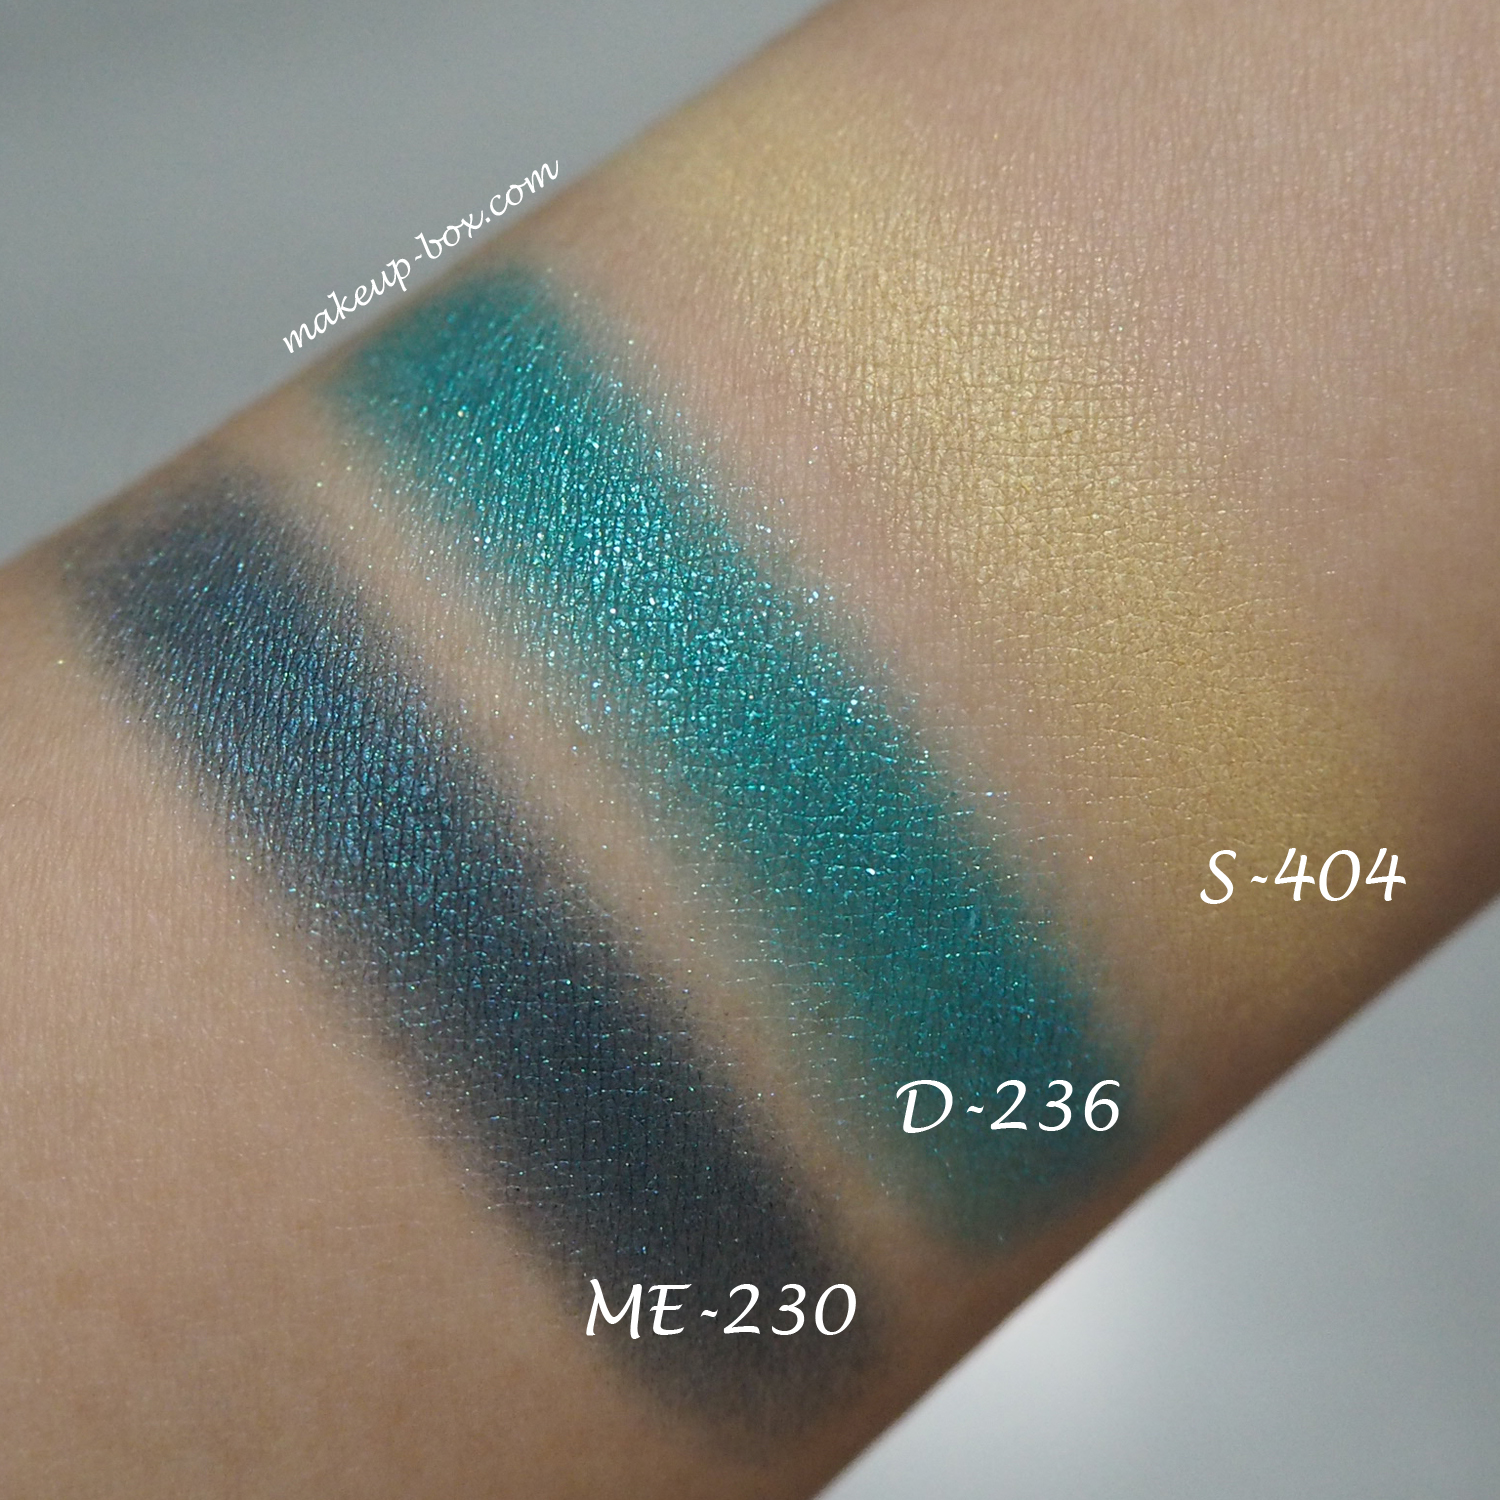
VDL Candy You Makeup Swatches


Hip Korean beauty brand VDL's Spring 2015 makeup collection is called Candy You, and features 2 bright matte lipsticks (SGD38) and an eye quad (SGD58) in shimmery spun sugar colors.

The Expert Color collection is VDL's premium makeup range, and tends to feature richer pigmentation and stronger colors, which explains the higher price compared to their more affordable general line of makeup.


The palette is Expert Color 09 Rainbow Popsicle. A very fitting name for the translucent sparkly tones.


It's not the most pigmented quad from the line by any means, but the look is mean to be translucent and girly anyway.

I would pair these with a brown liner just for a bit more definition, although that brown shade is rich enough to define the socket and lash line in most cases. I would DEFINITELY recommend pairing the pale shades with a deeper one at the lash line (so don't wear them alone). Otherwise you can look a bit puffy and rabbity, as with cases where you're wearing a lot of pale shimmery colors together.

The lipsticks on the other hand, pack a lot of wow.

The Expert Color Lip Cubes are one of my favorite Asian lip color lines around, for the intensely saturated color and long-wearing performance. Now they've come out with Lip Cube EX, and the 2 shades in the Candy You range are a "sensual matte" texture. They're similar to MAC's mattes. Very creamy and intense but also truly matte.


I applied the bright coral, 03 Heyy, over a bit of  balm so that's why it looks quite creamy here.


04 My Valentine is a bright purple-pink.

Do note that these are swatched and shot in artificial light, and because these are such bright pigments, they tend to look different in different lights. (I personally like them more in daylight.)


Wednesday, February 13, 2013

Romantic Contoured Lavender

--
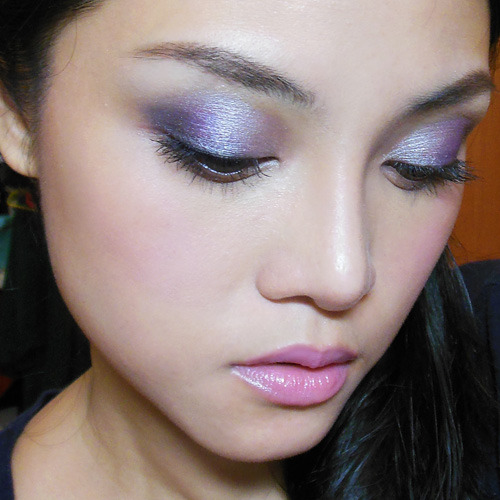
Lavender is a universally-flattering color for most eye and skin colors, and I always consider it one of those shades that functions like a neutral because it goes with everything and everyone. A contoured, pearlescent lavender eye like this one can look sultry and dreamy at the same time (as seen on Jessica Rabbit), AND you can change the entire look just by switching out your lip color.
Some tips:
  • What you want to be careful of, if you have uneven skin tone or a lot of red/pink in your skin, is to pick purples that lean more silver or blue. 
  • If you have mature lids, go with slightly less metallic/shimmery shadows than I used because a high-sheen can emphasize lines.
  • If you have very dark skin, pick a purple that is richer and stronger as a soft pastel can look chalky
  • If you are layering it over a grey/silver base like I did here (See below), remember that you need to go with a slightly more pink-toned shade than you want because the blue undertones in the grey base will make a purple look blue. 
image
I used the 88 Shimmer palette, but you can find soft pinks and purples EVERYWHERE so don't feel you need to purchase a brand new palette for this.


image

Step 1: Apply your base all over the lid up to the socket line, but don't wing it out at the outer corners. You want to keep the eye shape quite round and doe-like for this.
Then use a small brush to run the grey cream shadow along the outer half of the lower lash line as well. (I used Maybelline Color Tattoo in Audacious Asphalt.)


image
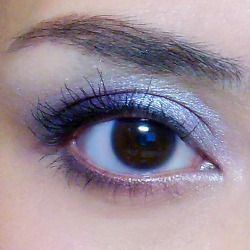
Step 2: From the 88 Shimmer palette, I picked a lavender and cool pink in the 2 center columns and mixed them together on a brush.
Then I applied this mixture onto the outer half of the lids, below. As you can see the mixture goes on a straight lavender because the grey cancels out the pink/red tones. If I'd used just the purple, my shadow would look almost blue.

image


 image

Step 3: Next I picked a warm-toned paler pink and applied that onto the inner half of the lids, blending into the pink-purple from earlier. Bring this down the inner corners to the lower lid as well. This creates a brightness at the inner corners of your eye, and is great if you have close-set eyes.

image


image

Step 4: To finish the shadow, just apply a little charcoal or black shadow right to the outer corners. I did not bother to sweep it upwards along the socket line but if you have hooded or mono-lids and want to emphasize your socket a bit more, you can do that.


image

Step 5: For extra definition at the lash line, I applied a thin line of black pencil to the outer half of the lids and then used the same shadow brush from earlier to soften and blend it out.
Then I finished with black mascara.


image
Step 6: Because I'm going with a cooler toned lip for this look, I chose a raspberry pink blush. Try something like Nyx Pinky which looks like a super-bright fuchsia, but goes on quite pretty. If you want you can apply just a little matte bronzer around the edges of your face and temples, jawline to add some dimension back to your face.


image
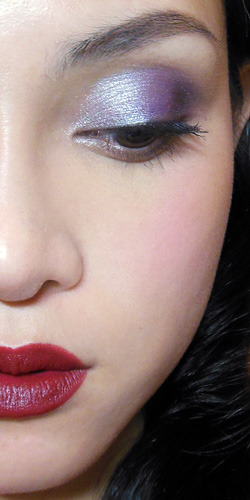
Step 7: For the lips, you have the option of using a soft pastel blue-based pink like Revlon's Strawberry Shortcake Lip Butter, OR you can apply a deep dark liver-red (MAC Diva). The dark lip instantly turns the look into a rather "Noir" one, and I didn't touch the eyeshadow or the blush at all.

Saturday, May 19, 2012

Sultry Candy: Matte Pastel Evening Look (using Lime Crime Palette D'Antoinette)

If you want to wear colorful makeup, I always find matte shades to be an fun option because they are so color-true.

Lime Crime's Spring palette D'Antoinette is a collection of sugary pastels that are pigmented but not so crumbly and chalky that you can't apply them with a regular shadow brush. I decided to give it a test run by creating a slightly dramatic eye so you can see for youreslf if you like the color-payoff and textures.

The palette is not cheap at $34.99, but if you are in the market for a collection of blossom-y matte pastels that are so fun for spring and summer, this is a good-quality option, and actually quite a good deal if you consider that a single 1.5g MAC pan costs $11.50 without a case, and a regular shadow costs $15, while each color here is 1.6g and costs less than $7.

The only criticism I can think of is that all 5 shades are pale, bright colors, and most people would need a deep color in order as a definer shade. This is NOT an idiot-proof palette. You can't just slap on the colors in any ol' combination and walk out the door.

Unless you have extremely deep sockets, very pale skin, and full, dark lashes, you can probably benefit from using a deep brown, grey, or black, etc along with it.


Step 1: I ran a matte chocolate brown shadow (Revlon 009 Rich Sable) along the upper and lower lash line with a flat angled brush.


Step 2: I picked the soft bright peach (Macarooned) and packed it onto the center of the lids. 


Step 3: Then I swept the matte pastel pink (Royal Flush; this shadow is like the shadow version of MAC Saint Germain lipstick) along the inner half of the socket line above the peach shadow.


Step 4: Now with the only sparkly/shimmery silver shade in the palette, I dabbed around the inner corners of my eyes using a ring finger. (Mercurious; Bourjois's little round pot in Argent, below, is a dupe if you can't afford Lime Crime.)


Step 5: Finish by outer corners by packing the matte lavender shade (Ribonesque) in a rough in-ward facing "C" around the eye socket.


Step 6: And just because pale or bright shades all over the lids can really "flatten" your eye and sometimes make your lids look puffy, I added a bit of definition and contour back by running the matte brown from earlier very lightly along the socket line and blending it out to just a soft line.


Step 7: Finish by reapplying lavender and pink outside and above the contour line in the above shape. This helps to soften out the brown even more, and reinstates color without erasing the contours.


Step 8: Apply black liquid liner thinly along the upper lash line, avoiding any flicks. This is just a base for applying a strip of false lashes. (I used Fairylash once again because they are so black and beautifully-dramatic, and go so well with this look.)