Showing posts with label gold eye shadow. Show all posts

Saturday, November 10, 2012

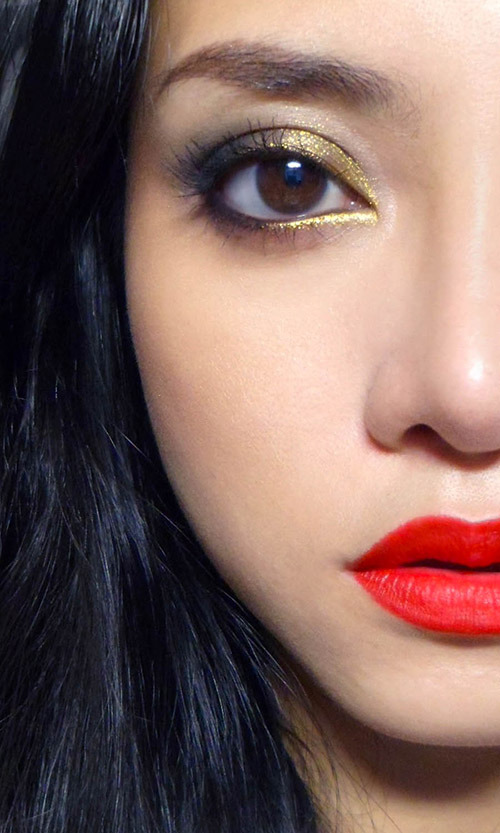
Jazzed-Up Classic: Charcoal and Gold Eye with Scarlet Lips


If you're looking at a few posh dinners or parties (as we enter the holiday season) and want something that will be noticeable but not too typical or outlandish either, it's quite easy to just add a shot of gold to a more classic red lip look.
Instead of chunky glitter, which can look a little tacky, you want to go for something that is very fine-grained, and almost like large pigment particles. The alternatives are
  • super fine micro-glitter (.04 micron and below)
  • MAC Reflects pigment in Gold
  • glittery gold liquid liner like Lime Crime Rhyme, which is made up of little gold flecks like MAC Reflects
Other things you'll need include: 
  1. A dark almost-matte black shadow. I used the purple-black shade in the Rimmel Precious Crown quad for contrast with the gold.
  2. Black liner or kajal.
  3. Matte bronzer. I used MAC Mineralize Skinfinish in Comfort.
  4. Gold shimmery highlighter for the cheeks. My pick was Guerlain's Attrape Soleil but that is expensive and might be hard to locate, so any champagne gold highlighter you can find would work.
  5. A favorite scarlet lipstick like MAC's Ruby Woo, which will more likely last through drinks and snacks. You don't want this shade to be too dark or brown. It should be RED.

 
Step 1: Just begin by applying the dark charcoal shade over your entire lid from lashes up to the socket line, right above your eye ball. Run a little along the outer halves of your lower lash line with a firm brush as well.


Step 2: Apply the gold sparkle. If you're using a loose pigment, you might want to mix a little with eye drops or some mixing medium (MAC Fix+, or liner sealant) before dabbing it on with your finger, over the inner half of the lids. 
It WILL dilute and make the charcoal shade you applied earlier a bit faded, but that's fine since you're creating a bit of a gradation from light to dark, inside-out anyway.

Step 3: For definition and contrast, run black liner along the inner rims of your eyes. This makes the gold really pop and look more vibrant.
Then finish by curling lashes and applying mascara or false lashes. I wouldn't go for dramatic lashes since they'll just detract from the whole eye look, but it's no harm if you want to wear them.

After everything sets, you might need to go back and apply a second layer of gold onto the inner corners at the lower lash line just to intensify the color further.

 
Step 4: On the cheeks, I applied bronzer for warmth and contouring, and then topped my cheekbones and brow bones with shimmery gold. This gives a beautiful sheen when the light hits and it looks even better up close.


Step 5: Finish by apply a scarlet lipstick. If you're going to be eating and drinking, then make sure you blot and reapply to prolong the wear. For a super-detailed tutorial on how to apply a perfect red mouth, watch Lisa Eldridge's video here!

Saturday, September 22, 2012

Navy and Gold Evening Look with "Frankenshadows"!


I like blending and mixing my own shadows. I do this mostly with loose mica, glitter, and binders, and sometimes I crush up unwanted shadows, mix them with other shades, and then press them into something entirely new.


In the nail polish community, your own blends of varnishes are called Frankenpolishes. Well, these are my Frankenshadows.

What I used here were:
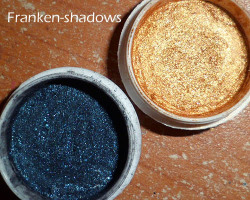
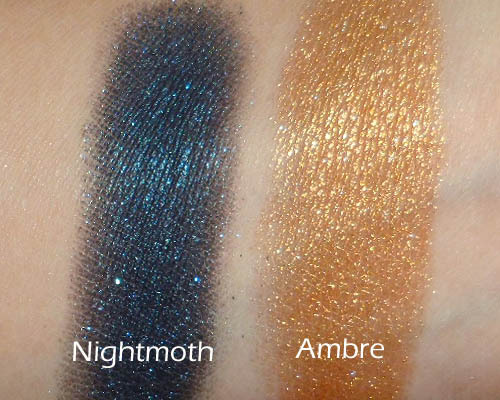
  • Nightmoth: This is a black matte pigment mixed in with metallic navy shimmer, with a pinch of aqua glitter thrown in. I can't think of an alternative in the stores for you, but any very dark navy shade would do. You can always pat a little glitter on top for a similar effect.
  • Ambre: This is more of a generic warm metallic amber-gold that you can find easily I believe. 
  • MAC Blooz pencil: A dark navy pencil

Step 1: First, lay the base. You want the shadow to always be most intense around the lash line, so I used a dark blue pencil (MAC Blooz is no longer available but they have alternatives) and ran it along the lash line, top and bottom. 
Along the top lid, make the lid very thick.
--

Step 2: Using a firm brush, very gently smoke the edges of the pencil out. On the top lid, I smudged it much further out so it fades towards the socket line.


Step 3: The navy shadow. I used a flat shadow brush to first gently pat shadow onto the outer halves of the lids, up to the socket line. I also packed it right on the lash line, to set the dark navy liner.


Step 4: With the fine smudger brush once again, I pulled the blue shadow inwards along the socket line so it faded inwards. Don't pick up any more shadow with your brush, because the line is supposed to be very soft rather than hard and precise.


Step 5: Using a smaller shadow brush for precision, I packed the warm gold metal shadow right onto the inner half of the lids in a tear-drop shape. It should fade into the blue but not be over-blended where they meet. That would muddy up the entire look. The gold and the blue should still stay very intense and clean. 


Step 6: With a fluffy blending brush, I started to soften the edges of the navy shadow, which can be quite hard against paler skins. You want to ONLY BLEND ALONG THE SOCKET LINE. If you bring your brush down any lower, you will muddy up the gold. The entire look could go from navy-and-gold to plain ol' charcoal in a second.


Step 7: Finish by curling lashes and applying black mascara! (If you need to touch up the gold or blue, go right ahead BEFORE you apply the mascara.)

Sunday, September 2, 2012

Pistachio: Green, Amber and Brown Tutorial


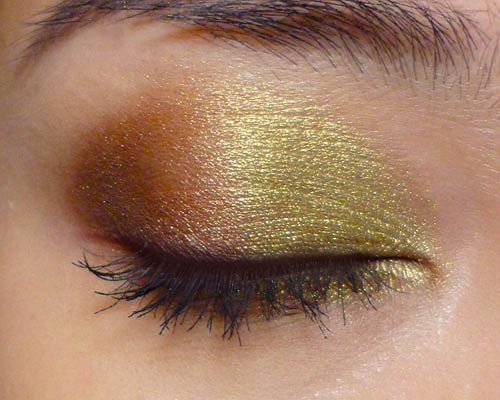
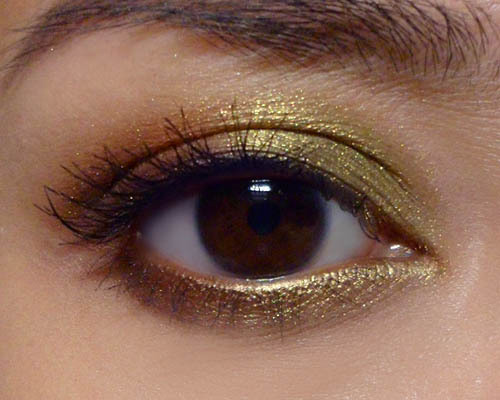
I'm featuring a slightly less dramatic and more wearable green in this look. Instead of blue-based greens, gold-toned greens and limes tend to be more subtle, so look out for shades with a bit of yellow, like NYX's roll on eye shimmer in Olive. I used I Nuovi's Moss, which might be a bit harder to locate for most of you outside of Asia.

You'll also need a very warm amber-gold (almost like a light golden bronze; try NYX Golden shadow) and a richer chocolate brown like NYX's Walnut. 


Step 1: First, pack the golden green to the inner 2/3 of the lids.


Step 2: Just outside of the center, apply the amber gold, blending lightly into the green so there are no harsh lines. This is going to be the "Transition" shade between the green and the brown.


Step 3: Finish with a richer brown right in the outer corners. The green should take up the majority of the lid, with the amber and brown sharing the outer half.


Step 4: Finish by using a plum or dark brown pencil to line the outer half of the lash lines just for extra definition. I used Rimmel Exaggerate Eye Definer in 220 Perfect Plum.


Step 5: Finish the look with black mascara and that's it!

Friday, July 13, 2012

Chanel Illusion D'Ombre in 89 Vision (Super-simple Gold Wash)

If there is just one item that I will recommend from the high-end collections if you're in the market to splurge on something this Summer season, it is Chanel's Illusion D'Ombre in 89 Vision. 

And, yes - let me first say outright that this is ridiculously expensive but MUCH better than the equivalent from Shu Uemura. Plus, you get a lot more product than you would with Shu's new cream shadows, all in a sturdy glass pot with a brush as well.

As you can see from the swatches above, this is literally a pot of the most glorious sparkling gold flecks in a completely translucent base. If gold has always been too yellow for you to wear, you will not encounter that problem here because you're not going to get a wash of solid yellow-gold.
This is a veil of fine but intense fairy dust that is going to stay on your lids rather than dust right off onto your cheeks. The silky, almost-dry texture also means that you can smooth this on over existing shadows or powders.


This is probably the shortest tutorial I have.

Step 1: Smooth on with finger all the way from lash line up to the brow bone.


Step 2: Apply black liner (I used Milani Liquif' Eye) along the water line and extend into a short flick to add sultriness to the gold-laden look.


Step 3: Apply black mascara to finish.

And that is literally all you need for a traffic-stopping eye look that takes 5 minutes to create.