Showing posts with label brown eye shadow. Show all posts

Monday, November 26, 2012

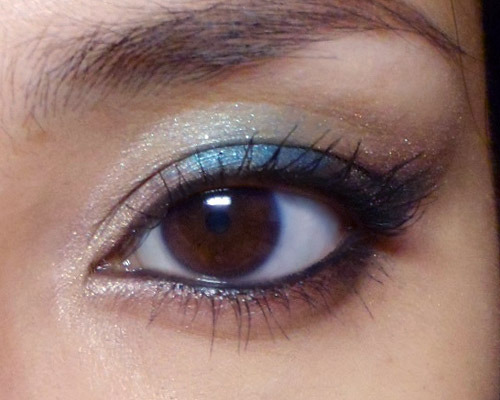
Driftwood: Seafoam Green and Rich Bronze Look for Day (88 Warm Palette)


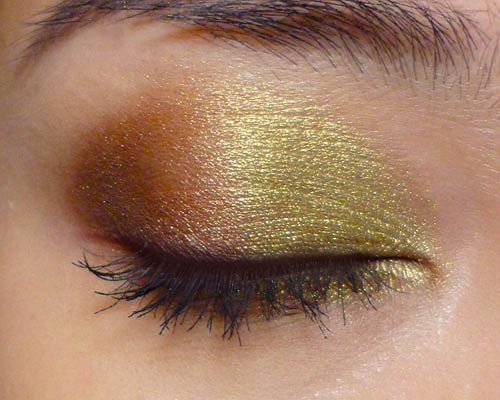
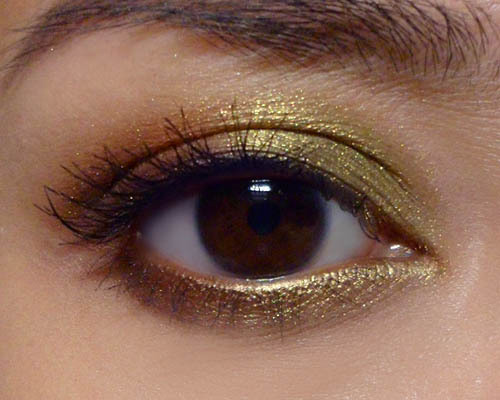
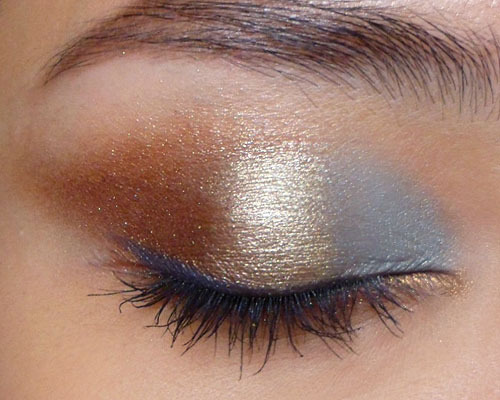
Straightforward does not need to be boring. Here's a look that you can easily wear for day because I matched a soft seafoam green with a rich brown and soft champagne. The green is almost "faded" in tone so it's definitely a bit more fun, but not too loud for work or school.

The first shade is located near the bottom left corner of the 88 Warm palette. (You can get this from both Coastalscents.com as well as BHcosmetics.com. I don't detect any difference in the quality and they're likely to come from the same manufacturers.)

The Neutrals are near the central column. The first is a deeper cocoa bronze right at the bottom, right of the middle. The champagne comes higher up to the left of the center, a little above the maroon shade near the center of the palette. Both of the neutrals are shimmery, so if you prefer mattes, you can always replace the ones I used with similar shades on the palette.


Step 1: Start by buffing the seafoam green onto the inner half of the lids.


Step 2: Now, buff the rich bronze-brown onto the outer half of the lids. (This shade looks quite similar to MAC Bronze shadow, but is slightly lighter.)


Step 3: Now, pack some pale champagne gold onto your brush and then spritz it with a little water, eye drops or Fix+. THEN pat it gently down the center of your lid, going over and building up as needed, until you get a nice gold sheen.


Step 4: For definition, I ran a bronze pencil along the inner corner of the lower lid (Sephora Flashy Liner in Flashy Copper) and a dark navy blue to the outer half of the upper lid. I used a discontinued MAC pencil called Blooz, but as with all pencils, you can use ANY similar shade from any brand you choose. As long as the pencil has good color payoff, the brand doesn't matter.
Then just finish by curling lashes and applying mascara or falsies as needed!

Tuesday, November 6, 2012

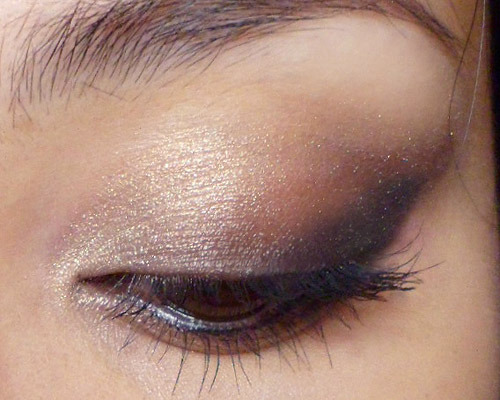
Sexy "Stacked" Cat Eye (Plus a Twist for Evening)


Long time no post on Blogspot!
I just got back from my honeymoon to NYC (left just ahead of Hurricane Sandy) and have been trying to catch up on things at work, etc. But I'm back doing tutorials, although I've only been able to update my Tumblr in the past week.
I thought it was time for something that was neutral and relatively easy to do, but still packed a bit of drama, AND converted quickly into a more colorful fun look for the evening.
This follows a dramatic cat-eye liner shape that is quite typical of Italian screen stars like Sophia Loren, but instead of using very harsh and strong black liner, it's created using black shadow instead.
You will need only:
  • A matte black or charcoal (any brand will do)
  • A soft brown (I used Coastal Scents Hot Pot in Southern Wood, which is similar to MAC Satin Taupe)
  • A soft neutral flesh-tone (Coastal Scents S29 Hot Pot)
  • [Optiona] A "converter" color that's bright and colorful; I chose Maybelline's Color Tattoo Eye shadow in 40 Tenacious Teal

Step 1: For this look, I used a single brush; a pointed pencil brush with a pointed tip. I prefer this shape because it actually allows me to apply shadow in an angular shape just by dragging the brush diagonally downward to the center of the eye.
Fill in the outer corners of the eye in a thick angular triangle using the black shadow.


Step 2: Dust off the brush on a piece of clean napkin and then pick up the soft medium brown. You want to stack this on top of the black earlier, overlapping it a bit so there is no harsh line between the 2 shades.
This time, angle the shadow down almost to the inner corner of the eyes.


Step 3: The last step on the lids is just applying the softest beige shade  from the inner corner outwards. The only difference is that instead of going straight up in a triangle like the other 2 colors, this shade curves in an arc along the socket line before straightening outwards at the outer corners.
Again, the color should fade into the medium brown without any harsh lines in-between. This shape visually elongates the eye and emphasises an almond shape.


 Step 4: Finish by lining the lower waterline with black pencil, and then applying mascara or false lashes. The final look is subtly-dramatic and goes easily with both a soft or a dramatic lip.


Step 5: The optional step for converting the neutral eye into a play-time look. I dabbed a bright turquoise cream shadow down the center of my lids using my ring-finger. Don't smudge back and forth; just tap to blend a bit. You want the color to be distinct and not muddy.
This just gives a nice pop of texture and unexpected color on the center of the lids.

Monday, October 1, 2012

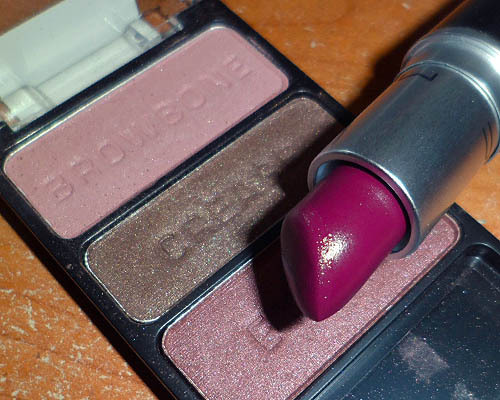
Velvet Bloom (Wet n Wild Knock On Wood Trio, with MAC Rebel Lipstick)


A rather straightforward look (which I believe will be flattering on most people) featuring soft eyes a rose-colored lips for those who want to play up their pout more than their eyes. 
It's getting to the end of Summer, so I wanted to start getting into the duskier, more romantic colors like rose, cocoa brown, dusty pinks. This made me whip out Rebel lipstick from MAC and my Knock On Wood trio from Wet n Wild. 


Step 1: I used the middle shade in the Knock on Wood trio (soft chocolate brown) and blended that lightly onto the inner and outer 1/3 of the lid. The color should go up to the hollow of your socket, so even if you have hooded or mono-lids, you can wear this look.
If you don't have the Knock on Wood palette, this is a pretty easy shade to find. I just recommend shades that aren't too metallic for this look. Go for something matte or semi-matte, to get that soft-focus finish.


Step 2: In the center of the lid, I used the softest shade in the palette, the dusty beige-pink browbone shade at the top, and just blended it on, buffing into the brown earlier so there are no obvious lines.


Step 3: To finish the eye, I simply used a pale beige/ivory shimmer pencil (Majolica Majorca #71, or ANY ivory eye shadow if you don't have a pencil) to brighten just the inner corners. 
Then I finished with black mascara on top and bottom lashes.


The finished eye should look satiny and subtly contoured, but not like a ton of eye makeup.


On the cheeks, I dusted on a soft pink (Bourjois Little Round Pot Eyeshadow #15; use any soft pink you have that isn't too strong or bright!) and then slicked on MAC Rebel over my lips, which looks really dark and vampy in the tube but goes on a lovely rose color.

Friday, September 28, 2012

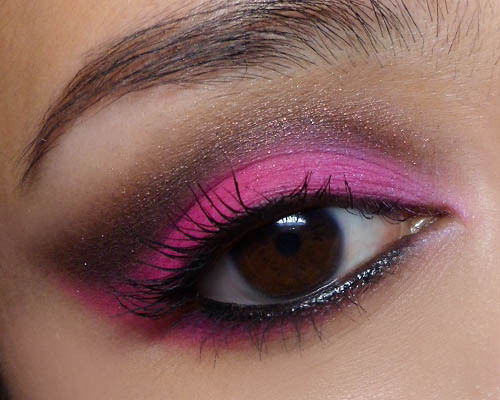
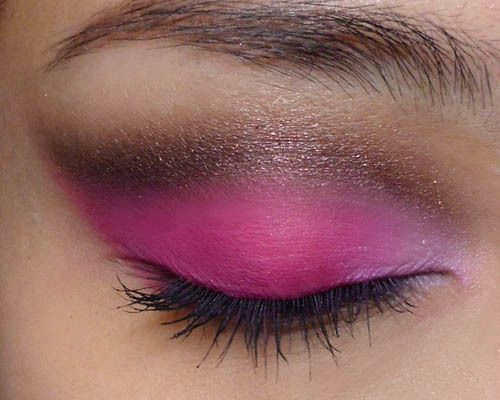
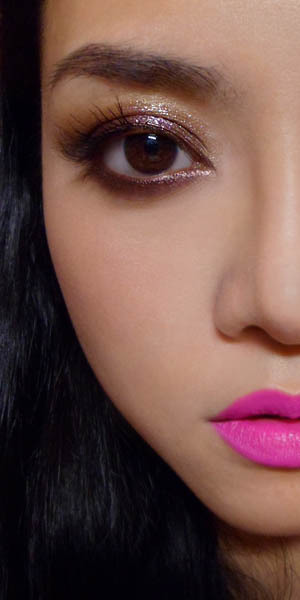
Punky-Pretty (Fluorescent Hot Pink with Smoky Cut-Crease)


This is a very dramatic look pairing hot pink with a smoky dark russet brown. Definitely more for the clubs or a party than a day out with the girls!
I used new shades from my BH Cosmetics shadows:
WM20 - An true matte hot pink
MS12 - Dark sparkly blackened red-brown
WS07 - A mid-tone satin mauve pink


Step 1: First run a black khol along your upper and lower water lines.


Step 2: Using a pointed brush for control, first draw a line diagonally up and out at the outer corner of the eyes. Then pick up more shadow and run it along the socket line, stopping before you reach the inner corners. 
Smoke the entire line out to get a really thick brown swatch.


Step 3: Pack a neon hot pink along the entire lid, leaving only the inner corners empty. Then run the pink along the outer halves of the lower lash line as well, extending the line up and out, right under the dark brown wing created earlier (below).


Step 4: To illuminate the eyes a little, apply a paler mauve pink to the inner corners of the lid. 

Step 5: Finish by checking to see if you need to touch up your black liner. (To help it last longer and look more intense, dab a matte black shadow over the pencil to set it.) 
Then finish by curling lashes and applying black mascara.

Sunday, September 9, 2012

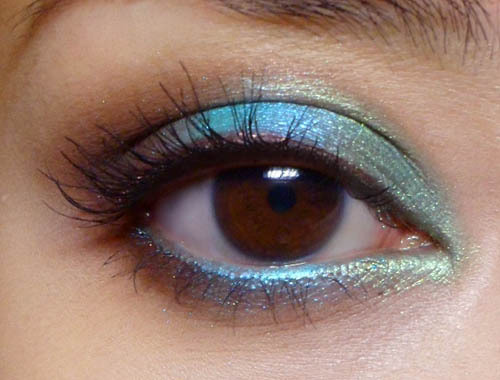
Paradise Colors: Summer-inspired Eye look


It's time to jazz things up with some brighter colors, inspired by the runways. I'm doing a tropical-paradise color scheme, with lush emerald green, rich brown, and a glowing turquoise.
You will also need a brown pencil for definition and an aqua/turquoise (optional) colored pencil to echo the blue on the waterline.


I used Coastal Scents Hot Pots on the lids and Bourjois pencils, but do use any alternatives you have. You can do a look with similar colors; they don't need to be identical.


Step 1: Instead of following the color-wheel (blue, green, brown), I wanted a little extra contrast by putting the brightest color in the center of the lid, where it will pop against the dark brown.
Apply along the inner 1/3 of the lower lash line as well. 


Step 2: Pick up the bright aqua or blue and pack it down the center of the lid. Don't blend it out too much as you want the color to be quite intense.
Apply the same along the center portion of the lower lash line.


Step 3: Pack the dark brown into the outer 1/3 of the lids, and then gently run it inwards along the socket line, until you reach about the center of the lids, above the bright aqua.
As before, run the dark brown along the outer 1/3 of your lower lash lines to finish.


Step 4: Here's the fun part. Run a brown pencil along the upper lash line for definition and some extra contrast against the aqua blue.
On the lower lash line, I actually used a bright turquoise blue pencil (Bourjois 54 Bleu Clinquant) to match and intensify it.

Then I finished with black mascara.


Sunday, September 2, 2012

Pistachio: Green, Amber and Brown Tutorial


I'm featuring a slightly less dramatic and more wearable green in this look. Instead of blue-based greens, gold-toned greens and limes tend to be more subtle, so look out for shades with a bit of yellow, like NYX's roll on eye shimmer in Olive. I used I Nuovi's Moss, which might be a bit harder to locate for most of you outside of Asia.

You'll also need a very warm amber-gold (almost like a light golden bronze; try NYX Golden shadow) and a richer chocolate brown like NYX's Walnut. 


Step 1: First, pack the golden green to the inner 2/3 of the lids.


Step 2: Just outside of the center, apply the amber gold, blending lightly into the green so there are no harsh lines. This is going to be the "Transition" shade between the green and the brown.


Step 3: Finish with a richer brown right in the outer corners. The green should take up the majority of the lid, with the amber and brown sharing the outer half.


Step 4: Finish by using a plum or dark brown pencil to line the outer half of the lash lines just for extra definition. I used Rimmel Exaggerate Eye Definer in 220 Perfect Plum.


Step 5: Finish the look with black mascara and that's it!

Tuesday, August 14, 2012

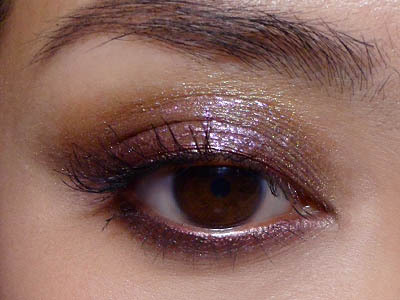
Glossy Burgundy Lids with Neon Magenta Lips (NYX Matte Lipstick in Shocking Pink)


One more look I posted on Instagram (makeup_box) a couple of days ago. This is a very simple look to recreate. The only thing about it that is different from a regular look is just the gloss on the lids and a neon pink lip.


I used
  • a plum colored metallic pencil from Bourjois (Khol & Contour 07 Praline Inventif - any one you can find would do.)
  • a deep cool brown shadow (Coastal Scents Hot Pot in Southern Wood)
  • a soft medium-light taupe (Coastal Scents Hot Pot in Goldmine - MAC Patina would be a prettier alternative)
  • Any clear gloss and a bit of pale purple micro-glitter (optional)
  • soft pink blush (any of your choice; I used my Bourjois Little Round Pot shadow #15)
  • Bright magenta-pink lipstick that is deeper than a neon fuchsia (NYX Matte Lipstick in Shocking Pink)

Step 1: Begin by shading in your lids, then lining both the upper and lower lash line.  Then use your finger to gently blend out the edges so there are no hard lines, and then touch up the pencil

Step 2: With the deep smoky brown, lightly run along the lid near the lash line and gently extend your brush past the outer corners into a slight wing. This sets the color around the lash line. If you want to, you can skip this step, but I like a bit more dimension and depth I get by layering the shadows.


Step 3: Apply a soft taupe brown to the upper portions of the lids, leaving just a small margin of skin above the lash line. If you want 


Step 4: Go back over your upper lash line with the plum pencil.
IMPORTANT: Curl your lashes now because you'll be applying clear gloss next. You can't curl your lashes once you coat your lids as you'll smear everything off.


Step 5: With a flat brush, mix a little violet glitter (this is optional; it's only visible when someone is quite close to you and looking directly at your eyes) into a dab of clear gloss, and then gently PAT that onto your lids. If you stroke your brush back and forth, you will end up smearing the shadow beneath.


Step 6: Finish by applying black mascara. IF you are using false lashes instead, then you will need to apply them BEFORE you apply the gloss. Otherwise, the latex will have problem sticking to your skin if there is any gloss there.

Thursday, July 19, 2012

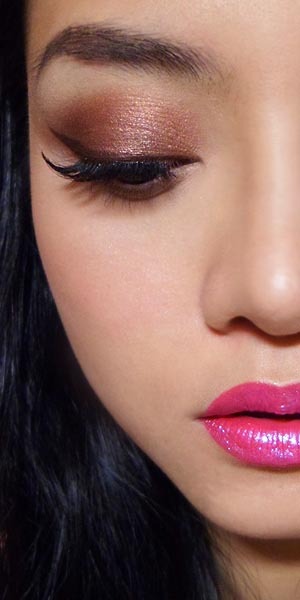
Electric Pink Glitter-Lips with Brown Eyes


This is a fun look that's flattering and dramatic. As with all glitter-lip looks, it is not going to be a good idea to eat a whole lot while you're wearing it.

Recommended for clubbing and cocktail parties where you'll mostly just be drinking through straws. 


Step 1: Apply a soft warm brown (I used MAC Sable) to the entire lid area, and then blend the color gently along the hollow of the socket line, pulling up slightly in a wing once you reach the other corners.


Step 2: Using a brown gel liner, draw on a flick at the outer corners following the angle of the lower lash line.


Step 3: Thicken the flick from the outer tip inwards, and then connect all along the upper lash line. Don't try to draw it all in a single stroke. Do short strokes and just connect and smooth it out.


Step 4: Finish the eye look by curling your lashes and then applying a strip of wispy false lashes. I'm using Ardell 120 Demis, which are longer at the outer corners.

You can leave your eye as is, or run a little beige or pale yellow/white pencil along the lower water-line.


Step 5: I applied a rich fuchsia to the lips (Revlon Colorburst Lipstick in Fuchsia), blotted, and then reapply. This gets a good stain on your lips so the color will be very saturated.


Step 6: With your finger or a flat synthetic brush, gently press a translucent duochrome blue glitter to the surface of the lips. Try any fine-grained glitter that reflects blue, such as MAC Reflects Blue pigment or Reflects Very Pink. 

On the cheeks, just keep it soft with a light pink. You've already got a dramatic lip going, so you don't want to have your cheeks be too bright at the same time.