Showing posts with label metallic eye shadow. Show all posts

Saturday, January 31, 2015

My Fledgling NARS Eyeshadow Duo Obsession

NARS Alhambra and Habanera swatches
 I have a bit of an obsession with NARS eyeshadow duos. Well - not all, but several of them.
Especially the neutrals and metallics.

My most recent acquisitions are Alhambra (soft apricot-gold beiges) and Habanera (silver-sage and -charcoal-plum).

NARS Eye Shadow Duos in Alhambra (left) and Habanera (right)
Now, many people criticize them for often not being wearable together. E.g. 2 of my absolute faves are Cordura and Kalahari (below), or Isolde - another one of my faves - and the colors are close enough that if you wore them both on the lids, you might not see a huge difference.

Well, compared to typical duos which are designed to be worn together, I see NARS duos as "themed colors". They may or may not work together, but it's a theme. I.e. if you like the left shade in Kalahari, you'll probably also want to own a shade like the one on the right. So they give you both together, even if you wear them separately.


My recommendation is to see them all as single NARS shadows in a more economical format. This opens up your options. I'd pair any of the shades in Alhambra with the dark prune color in Habanera. And I'd wear the silver-sage green in Habanera with any other dark shade from any other palette.

Anyone have a similar weakness for these?

Thursday, October 24, 2013

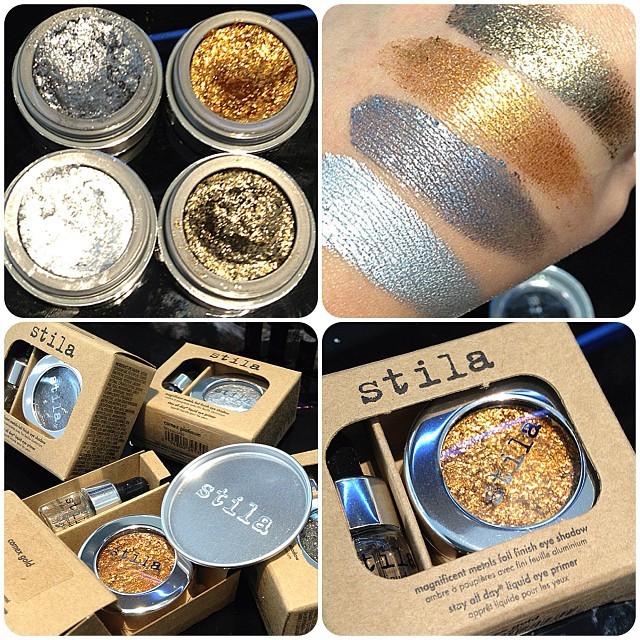
Stila Magnificent Metals Foil Finish Eye Shadow Review and Swatches

Stila Magnificent Metals Foil Finish Eye Shadows: Comex Platinum, Titanium, Comex Gold, Vintage Black Gold
What they are:

These are neither cream shadows nor loose pigments. They are very interesting and unique. These are intense metallic pigments suspended in a light fluid silicone/wax/crosspolymer base. It’s more like curdled milk than a cream shadow, because the dry pigments are not soluble in the silicone base.

The pigments and silicones both dissolve in the priming liquid thpugh, so they blend and smooth out once you mix all 3 things together.

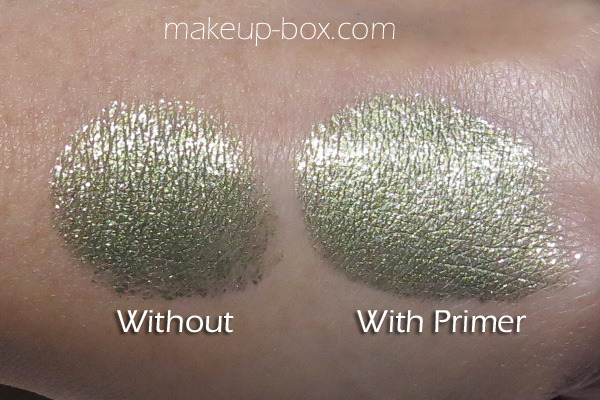
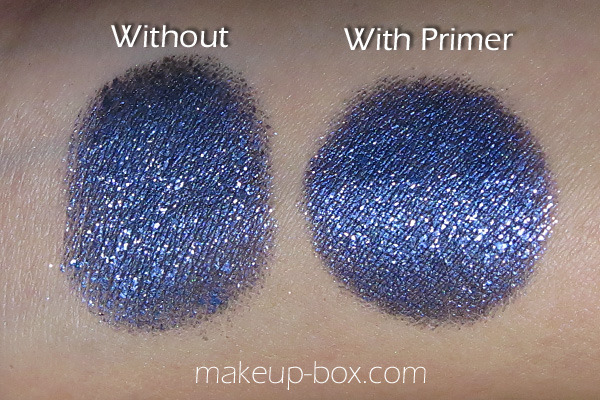
Without getting too technical, I’ll just say they can be used on their own without the “primer”, but they can flake, look uneven, and won’t set and stay in place. With a tiny bit of the liquid primer, they smooth out like Chanel or Dior cream shadows, build up and apply more evenly, and last much better as well.

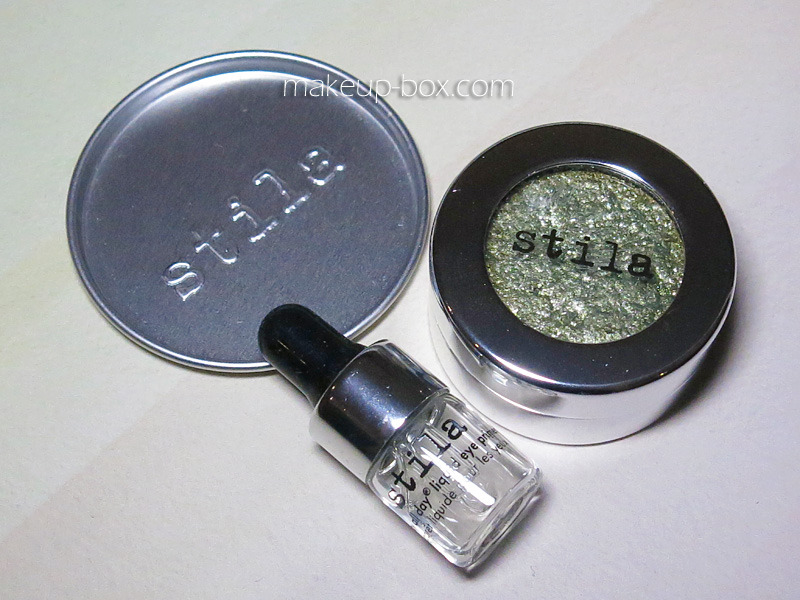
The Kit:
Stila Magnificent Metals Eye Shadow in Metallic Laurel, shown with items in a full kit
You get a little box including:
  1. A pot of metallic pigments
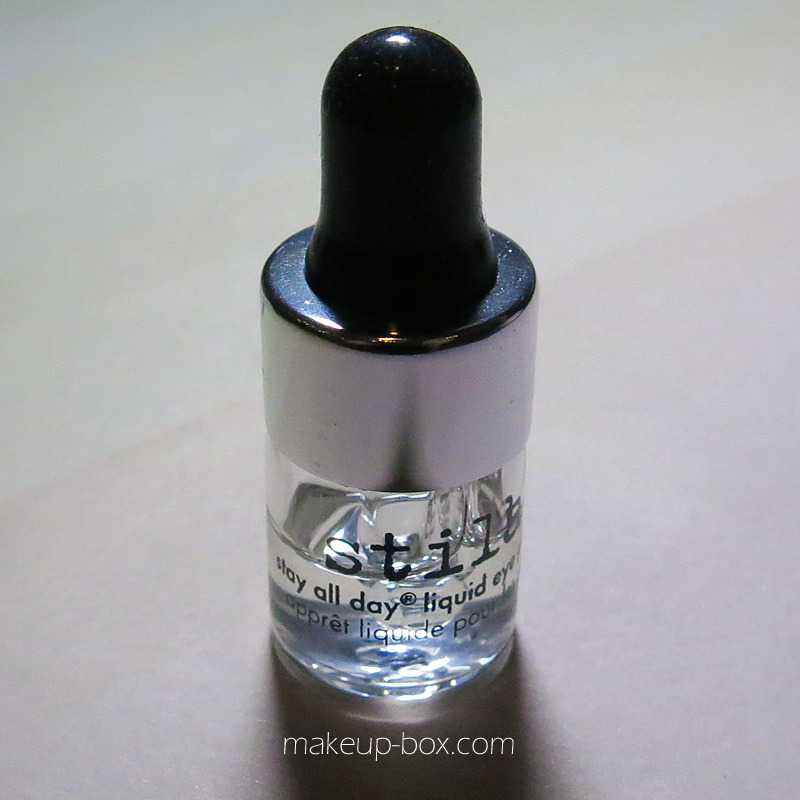
  2. A tiny dropper bottle of the confusingly-named “primer” liquid (it’s more a liquid sealant because you don’t use it to prime your lid)
  3. A small flat metal pan for blending the 2 together

Stila Stay All Day liquid eye primer for Magnificent Metal pigments

Application:

Definitely not recommended to wear the pigments on their own without the base because they can smear, flake and crease quickly. While the instructions are for you to add a drop of priming liquid to some shadow and blend on the metal pan, I find it hard to control the proportions and and leads to a lot of product wastage.

Stila Metallic Laurel swatched with and without the liquid primer
Stila Metallic Cobalt swatched with and without the liquid primer
Tip: My preferred method is to dab a tiny bit of sealing liquid onto the center of your lid, then use a finger to apply pigment over, and blending right on the lid.

To see detailed pros and cons of these, click here

Saturday, September 22, 2012

Navy and Gold Evening Look with "Frankenshadows"!


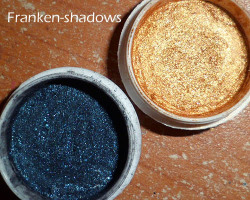
I like blending and mixing my own shadows. I do this mostly with loose mica, glitter, and binders, and sometimes I crush up unwanted shadows, mix them with other shades, and then press them into something entirely new.


In the nail polish community, your own blends of varnishes are called Frankenpolishes. Well, these are my Frankenshadows.

What I used here were:
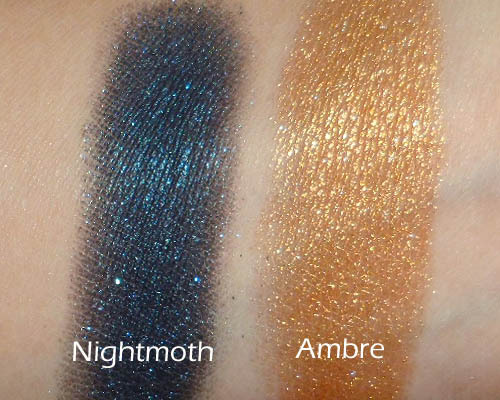
  • Nightmoth: This is a black matte pigment mixed in with metallic navy shimmer, with a pinch of aqua glitter thrown in. I can't think of an alternative in the stores for you, but any very dark navy shade would do. You can always pat a little glitter on top for a similar effect.
  • Ambre: This is more of a generic warm metallic amber-gold that you can find easily I believe. 
  • MAC Blooz pencil: A dark navy pencil

Step 1: First, lay the base. You want the shadow to always be most intense around the lash line, so I used a dark blue pencil (MAC Blooz is no longer available but they have alternatives) and ran it along the lash line, top and bottom. 
Along the top lid, make the lid very thick.
--

Step 2: Using a firm brush, very gently smoke the edges of the pencil out. On the top lid, I smudged it much further out so it fades towards the socket line.


Step 3: The navy shadow. I used a flat shadow brush to first gently pat shadow onto the outer halves of the lids, up to the socket line. I also packed it right on the lash line, to set the dark navy liner.


Step 4: With the fine smudger brush once again, I pulled the blue shadow inwards along the socket line so it faded inwards. Don't pick up any more shadow with your brush, because the line is supposed to be very soft rather than hard and precise.


Step 5: Using a smaller shadow brush for precision, I packed the warm gold metal shadow right onto the inner half of the lids in a tear-drop shape. It should fade into the blue but not be over-blended where they meet. That would muddy up the entire look. The gold and the blue should still stay very intense and clean. 


Step 6: With a fluffy blending brush, I started to soften the edges of the navy shadow, which can be quite hard against paler skins. You want to ONLY BLEND ALONG THE SOCKET LINE. If you bring your brush down any lower, you will muddy up the gold. The entire look could go from navy-and-gold to plain ol' charcoal in a second.


Step 7: Finish by curling lashes and applying black mascara! (If you need to touch up the gold or blue, go right ahead BEFORE you apply the mascara.)

Sunday, September 16, 2012

Neo Noir: Dramatic Metallic Look


I wanted to revisit the classic dark-eyes-dark-lips noir look, but update it a little with muted, mysterious colors on the lids. It's actually quite a simple look to recreate.
I'm using limited edition crushed metallic pigments from MAC, but you can easily find alternatives in the permanent range. You will need:
  • Black pencil
  • Bright teal-green (Rain Drop pigment; alternative: MAC Steamy shadow)
  • Pale silver-green (Moss Garden pigment; alternative: MAC Reflects Transparent Teal)
  • Mascara
Alternatively, you can choose any color as long as you pair a bright medium shade and a coordinating pale glittery shade. Just remember that because you are applying the shadow over a black base, the shades you choose need to be a shade lighter/brighter than you intend them to be. If you're not sure, just test it over black pencil on the back of your hand first.


Step 1: I began by applying a very thick coat of black kajal to the entire lid, up to the socket line. Then I ran it along the loewr lash line as well.


Step 2: Using a finger, very lightly smoke out the edges of the liner so you don't have any harsh lines. It should just look like a smoky eye.


Step 3: Laying the first shade; apply the medium shade onto the entire lid, over the black, leaving only the center empty. I used my fingers because that controls crushed metal pigments better, but if you're using regular pigment or pressed shadow, just use a shadow brush.
When you're done, just brush or gently smudge the color out at the outer corners to create faint wings.


Step 4: With a damp flat brush, I picked up the more glittery, pale shade and smoothed it onto the center of the lid. Blend slightly into the first shade, but not too much.
Next, apply the pale shade to the innermost corners of the eyes as well.


Step 5: Finish by touching up black liner along the water line, and then applying mascara.


For the lips, I applied a dark liver-brown (MAC Amplified Lipstick in Deepest Wish), then kept the cheeks soft with a very light pink (Bourjois Eye Shadow #15).

Sunday, August 26, 2012

Product Highlight: Coastal Scents Paradise Rose Sky Mica


Pure Micas don't tend to work as well as some pressed shadows and pigments from brands like MAC, because they don't adhere very well to the skin. Under most circumstances, I wouldn't recommend buying micas for use straight-up as a shadow since they don't perform that well.
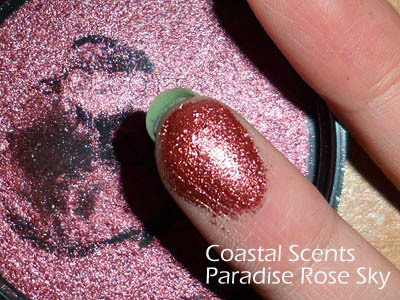
BUT - that said - Coastal Scents' Paradise micas are actually blended with cetyl dimethicone and metals to give them that incredible sheen and intensity on the skin, similar to pigments like MAC's Tan. (Although you should still wear a primer on your lid to minimize fallout and fading.)


The shade I'm featuring today is Paradise Rose Sky (a sample costs only $1 right now), a gorgeous burnished wine-red with rose undertones and a coppery sheen. This would contrast very well with blue and green eyes, but as I always remind everyone; don't limit your shade choices based on your eye color because eye makeup is NOT JUST about having max contrast with your eyes shade.


Step 1: For definition and that cat-eyed wing, I'm using a plum colored pencil first. To create the shape I did, you just run the pencil from the center of the lower lid outwards along the lash line, and then extend straight up at the same angle.


Step 2: Draw a line from the outer end of the line you drew earlier, and pull it diagonally in and down, until it touches the inner corners of our eye. As you draw the line, it will be quite straight. It just appears curved in the image due to the contour of my eyes.
Finish by coloring in the space within the wing.


Step 3: Using a flat brush, I packed Paradise Rose Sky pigment onto the lid from outside in, first filling in the mobile lid area, within the socket line (hollow curve arching above your eye ball).
I colored higher than the upper edge of the penciled wing earlier and only covered the upper portions of the purple pencil. This is to give the color a slight gradient effect, from defined plum below to smoky red at the top. 
Leave the inner corner of the lids bare.


Step 4: To lighten up the look a little, I packed a softer peach-pink (L'oreal Infallible in Forever Pink) onto the inner corners of the lid, smoothing into the coppery-red.


Step 5: Finish with black mascara!

Tuesday, July 17, 2012

Evergreen Metallic Winged Eyes (L'oreal Color Infallible Shadows in Permanent Kaki and Endless Chocolat)


Time to whip out some of my drugstore loves, after the recent features of high-end products!
Since I've been on something of a green kick recently, L'oreal Color Infallible Shadow Permanent Kaki (which had up to now been passed over repeatedly when I played around with the testers at the drugstore) suddenly caught my eye.

Now, let me first tell you not to trust what you see in the pot. The beauty of this beautifully-metallic sage-green gem only comes out when swatched on the skin.


You can wear this shade on its own as a soft wash as it's got some good dimension to it, but I wanted more contrast, so I'm pairing it with the rich chocolate shade in the range. (Once again, this brown looks a little red in the pot, but goes on a perfect neutral dark cocoa when swatched.)


Step 1: Because the best way to pack this binder-rich shadow (it's somewhere between a loose pigment and a cream) is to use your fingers, work it on gently in the outer 1/3 of your lids, going up just to the socket line but no further.


Step 2: This is where a brush comes in. Take a fluffy brush and quickly start blending the brown straight outwards into a wing. The binders in this shadow will set after awhile, so the faster you work, the easier it will be to blend.


Step 3: Using a flat brush, apply the brown to the lower lash line as well, pulling it out to meet the bottom of the wing.


Step 4: With your finger, carefully dab some shadow onto the inner corners. I'd usually use a brush for precision, but because it doesn't go on well with a brush, I used my hands. Just be very careful not to smudge any shadow all over.


Step 5: The star of the show is the green, but you won't need to use that much of it. I just gently patted it around the center of the lids and outwards lightly into the brown. Don't rub back and forth or you will muddy up the green and the brown. You want the green to stay very rich and "pure".


Step 6: Don't forget to dab a little onto the center of your lower lids as well, BUT if you have very prominent bags under your eyes, you might want to skip this, as applying a lighter shade in the center of the lid emphasizes contours more.


Step 7: For a touch more drama (but not too much), I applied natural-hair lashes (Ardell Wispies).