Sunday, August 25, 2013

Aqua and Cobalt: Marine-themed Liquid Liner Look


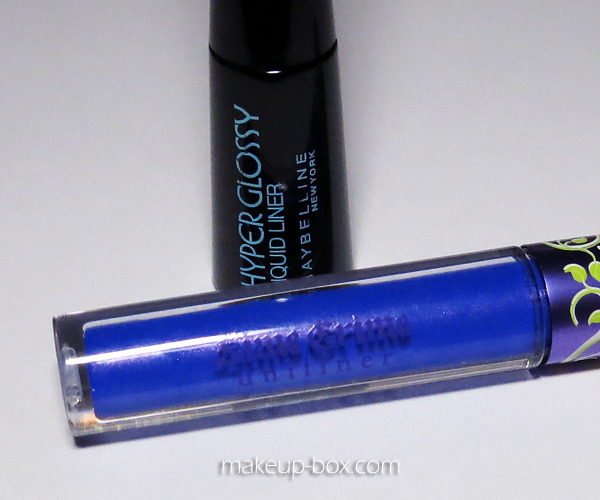
Liquid liner is always a quick way to make a statement/. This is a duo-tone liner look using two shades I love; a pearly aqua (Maybelline Hyper Glossy Liquid Liner in Turquoise Blue) and a rich cobalt blue (Lime Crime Uniliner in Lazuli)

I also used 2 pencils; a black (Shahnaz Husain black kajal) and a matte beige (Nars Rue Bonaparte), and 2 matte shadows (a beige called Nude and a navy called Navy Baby from Coastalscents.com).


IMPORTANT: If you're not sure about liquid liner but would like to get a similar/softer look, just use pencils or gel liner.

--

Step 1: First apply 2 matte shadows in the above way, with the navy in the socket first, sweeping from outside in so the color softens inwards, then blended out so there are no hard lines. The beige is just there to "tidy up" the navy, and to neutralize any darkness or discolorations on the lid.

Tuesday, August 13, 2013

Gossamer Veil: Pearl-Pink Shimmer on Lids, Cheeks, Lips, and Nails


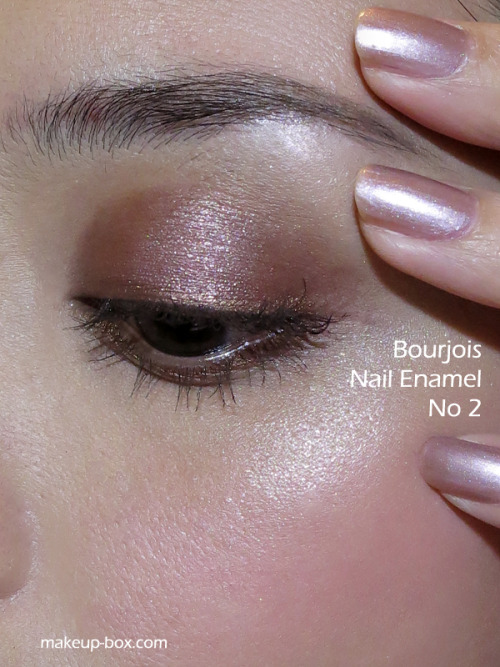
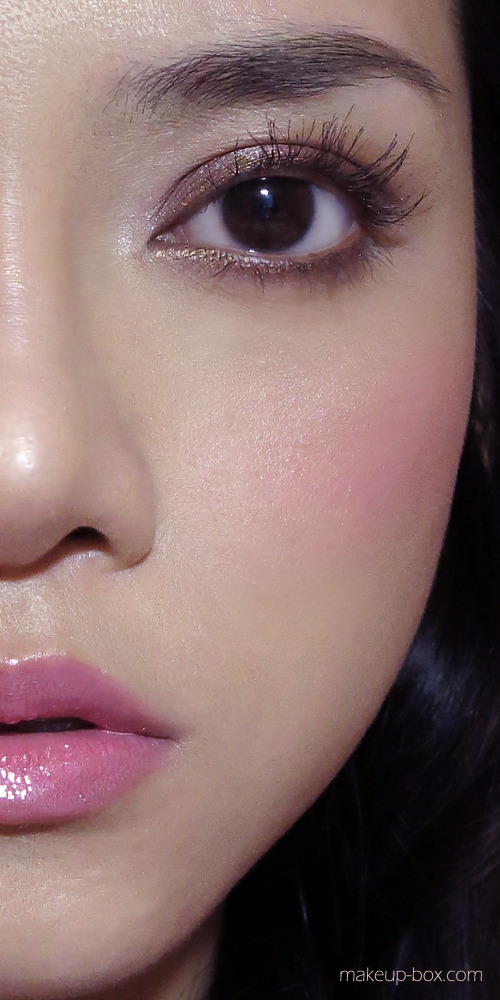
Most of the time, we try to avoid applying shimmer on every feature in order to avoid looking like a discoball, but if you pick the right highlighter and apply it in the right areas and pair it with matte textures, it can just look like radiant skin.
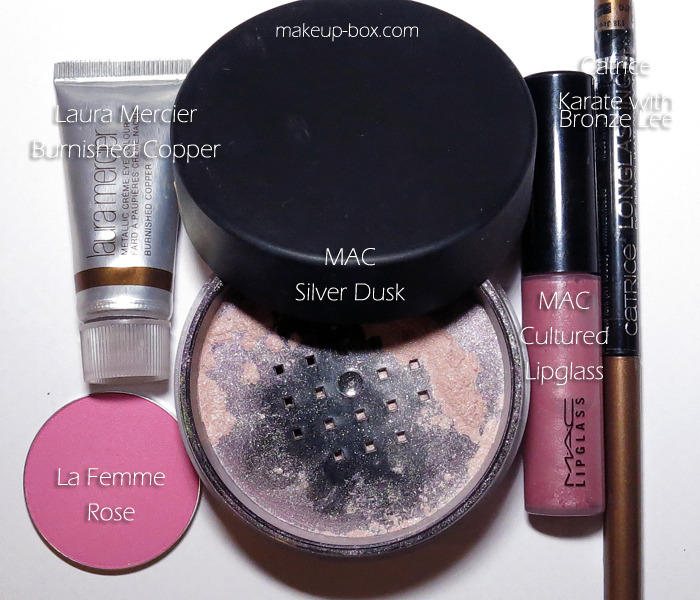

Products used: Laura Mercier Burnished Copper, La Femme Rose blush, MAC Silver Dusk highlighter, MAC Cultured Lipglass, Catrice Karate with Bronze Lee pencil

The Skin
I began by evening out the complexion and concealing flaws. (Below is a reference to where I usually apply a highlighting corrector.)

You do want to ensure an even base (below) before attempting to highlight specific areas. Otherwise, the highlighting can contrast with dark areas and blemishes and make them even more obvious.

IMPORTANT: If you are combination/oily, it's especially important to apply setting powder on your T-zone, inner cheeks, chin, and any other oily area. To prevent creasing and a "crepe-y" texture due to laugh lines and crow's feet, powder only under the inner corners of eyes, and at the outer corners.

To mimic a glowing complexion, apply highlighter (I used MAC Silver Dusk) to the brow bone, and ABOVE the peak of the cheekbones, concentrating under the temples, and then fading inwards. Avoid shimmer too close to the inner cheeks or wherever pores are more obvious.

To choose a highlighter shade that is flattering on your skintone, you can check out some suggestions here.

Tip: Using the same brush you used for foundation application will allow a less powdery application. The last bits of moisture and the flat surface of the brush helps the highlighter to meld with the skin and look more like natural sheen. (A dry, fluffy brush will dust sparkles all over the cheeks, which can emphasize pores on your lower cheeks.)

Apply a matte pink to the peaks of your cheekbones, overlapping some of the highlighter. This creates a nice transition from matte to shimmer, and mimics the glowy effect of a cream blush, without the greasiness.


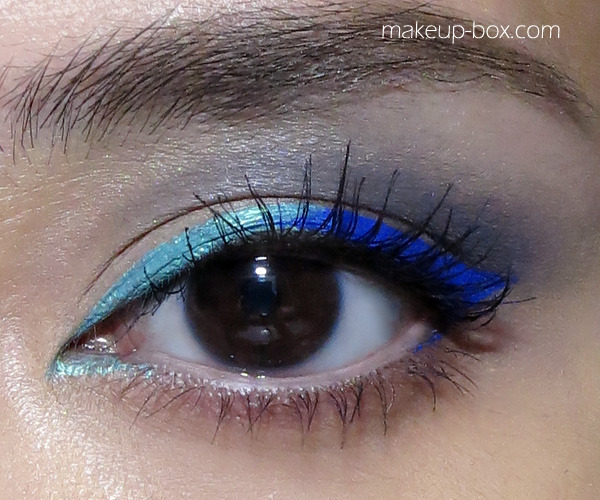
The Eyes
Saturday, August 10, 2013

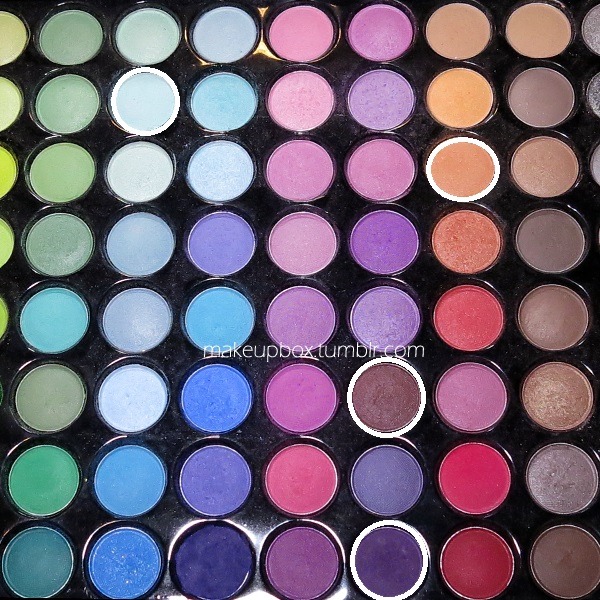
[Requested] Dramatic Cool and Warm Cut Crease Look (88 Matte Palette)

Sky-blue shadow with a warm Cut Crease, with tawny cheeks and caramel lips

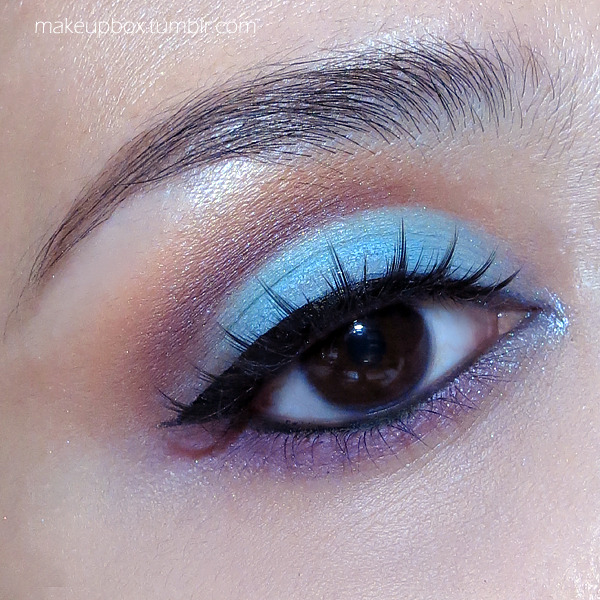
There were some requests for a specific cut-crease tutorial, but I didn't want to use a typical black for the crease shade. Here's one where I pair a pale sky-blue with warm shades like burgundy and orange on the socket, then cool shades like purple and silver on the lower lash line. 


The first thing you need to remember if you're doing a cut-crease look is that you don't actually cut your CREASE. Everyone's crease is in a different spot and if you mono-lids, or hooded eyes, part or all of your crease might be hidden. You should always follow the hollow of your SOCKET line instead. (Close your eyes and feel for the hollow right above your eye ball.)


Saturday, August 3, 2013

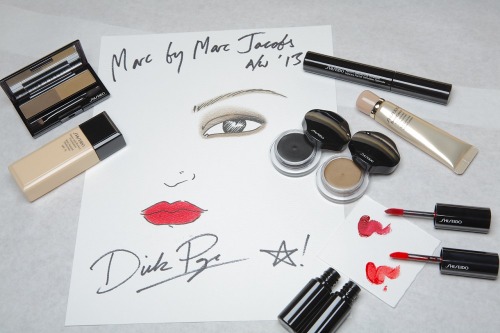
Marc Jacobs F/W 2013 Lacquered Red Lip (An Intro to Shiseido's F/W 2013 Makeup!)


To my mind, Shiseido is more known for their top-notch skincare and those incredible sunblocks. (To my knowledge, they put the "lightweight" in sunblocks long before the rest of the world did.)
Only during 2 periods did the brand seem to cast more of a spotlight on "color", and that was during Serge Lutens' time (1980s), and now with Dick Page at the helm. 

Dick Page applying Lacquer Rouge in Sanguine, backstage at Marc Jacobs' F/W 2013 show.
They brought out those incredible Lacquer Rouges a while back, and this season they're bringing out 6 new colors. I'm really into a red lip right now, so my pick of the lot HAD to be that warm red RD413 "Sanguine", which was used at the Marc Jacobs show this season. 


The Red Runway Lip

Friday, July 26, 2013

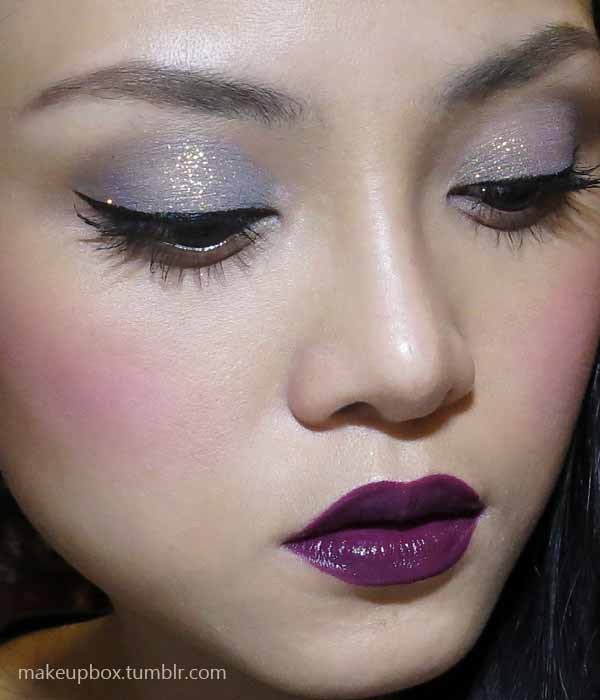
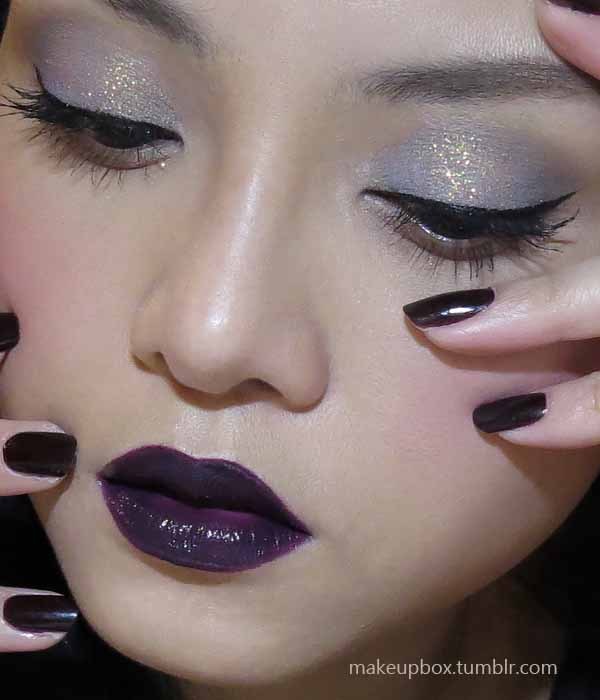
New Pulp Fiction: Dark Lips and Nails, with soft Glittery Lids

Uber-dark lips are incredibly dramatic, but can look sophisticated at the same time. Here are a few quick tips to wear super-dark lips AND nails without going all goth or emo.


  1. Wear a bright blush. Many people don't think to do this, but dark lips can really drain your face of color, and the pop of a glowing pink or peach on the cheeks adds some life and prettiness so the look isn't too severe.
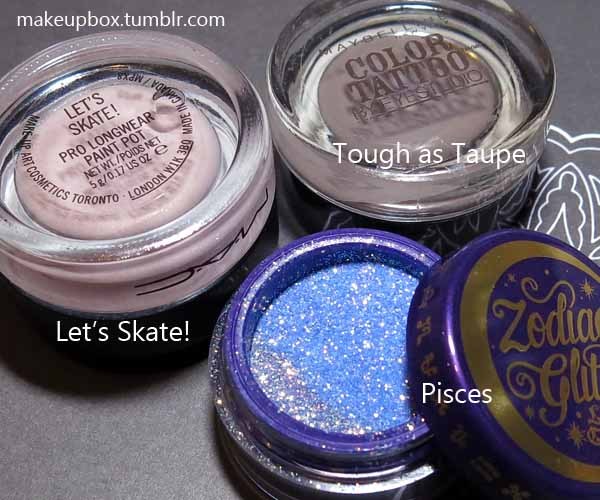
  2. Choose soft, cool colors for the lids. A very dark lip is almost a neutral shade in itself, so if you do a brown or taupe eye, the whole thing can look very monochromatic in a 90's sort of way. Not a bad look per se, but we're trying to keep things modern here.
  3. Add a little texture into your look. Whether it's a bit of sparkle or a metallic sheen to your lids, it helps to again liven up and lighten the look.
  4. Go purple/plum rather than brown when choosing a dark lipstick. That tends to be more flattering on most skins, including the very fair and the very dark. A dark brown can be more aging and draining.
  5. Go for a creamy texture rather than a matte, for a more accessible look.
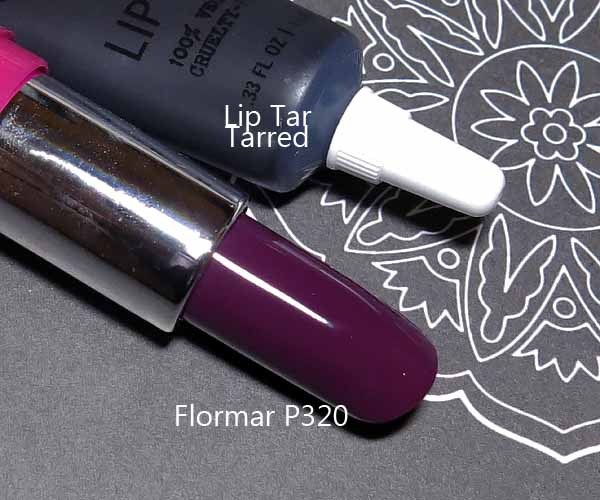
Tips: Invest in a black lip mix or lipstick. (I used OCC Tarred for this, but my favorite black lip product is actually MAC Pro lipmix in Black.) You don't need 4-5 shades of dark lipsticks. Just add varying amounts of black to change it a bit.


image
Tool: I used a synthetic concealer brush for this.

Thursday, July 18, 2013

Makeupbox takes on Katy Perry! (Oh My and Ka-Pow lash reviews, plus a quick tutorial for an eye look that can stand up to huge lashes)


I think Katy Perry has a really fun and out-there style. It's sometimes borderline tacky, but let's face it; she's so hot she can get away with many things that would be faux pas on others.


So of course, when it came time to pick among the numerous lash designs bearing her name, I picked the 2 that I felt were dramatic and the least "normal"-looking. ("Normal" meaning "this shape is sold by 10,000 other brands and it's no point reviewing it again".) If you are going to shell out for Katy Perry lashes, no point buying a shape that Red Cherry does for a few dollars.

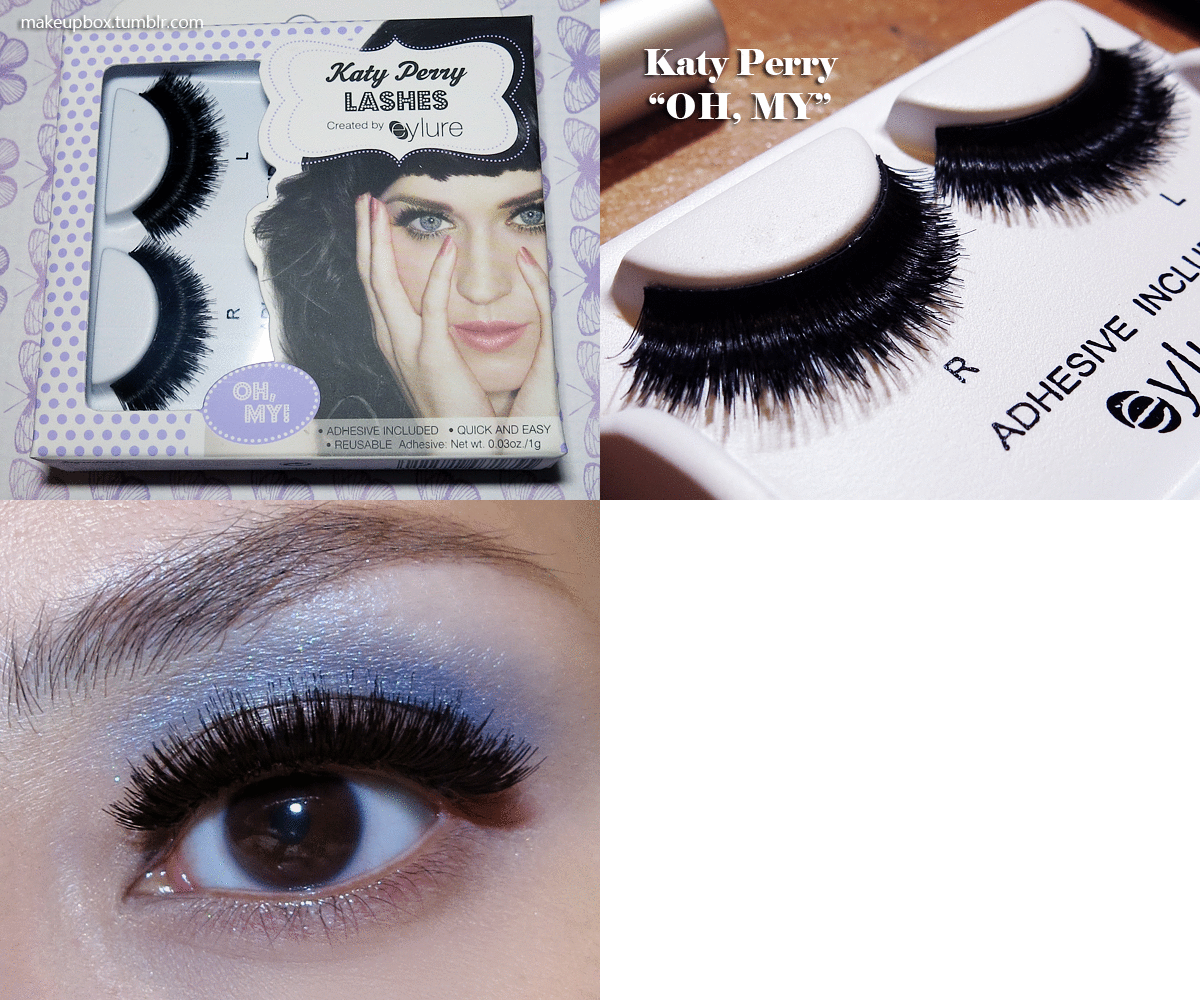
OH, MY!
Full, dense, double-stacked lashes. (These are 2 strips of lashes laid on top of one another.) Super thick and dramatic.

Verdict:

  • Girls, these are some kuh-raaazzzy lashes! They're so dense I felt like I was wearing 2 sun-visors on top of my lids and everything was dark. "Who turned off the lights???"
  • These lashes will cast a huge shadow over your eyes. If you have smaller eyes, or want to widen them, DO NOT - I repeat - DO NOT - buy these. Like any huge, thick lashes, they can make your eyes look droopy and overwhelmed instead of larger and brighter.
  • The lash band is super thick and stiff because of the double-stacking, although Eylure was pretty good at making them as malleable as possible. STILL, they're not the easiest things to apply, and without a super-strong glue, you will struggle with keeping these on all day.
--
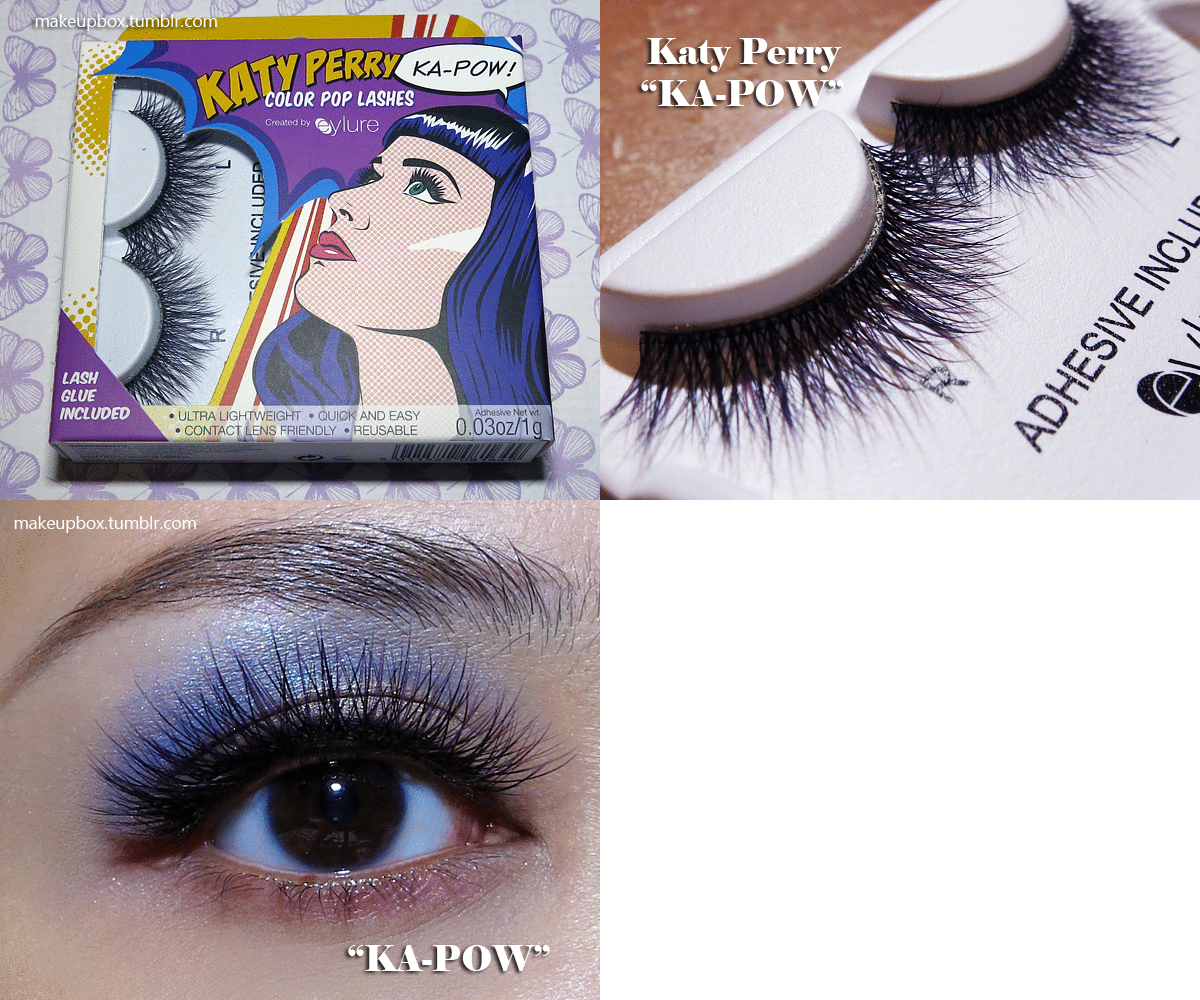
KA-POW


Purple tipped criss-cross wispies meant to bring out brown and hazel eyes. (There are versions for blue/grey/green eyes called Ka-Ching and Ka-Boom, but these aren't available in Asia.)

Verdict: 
  • Now THESE I really like and will re-use. They're dramatic but not too dramatic.
  • The purple does nothing to bring out my dark brown eyes. As you can see in the image, all it looks like is black. I'm not sure if you'll have better luck with lighter brown or hazel eyes. 
  • That said, the color at the tips really helps to soften the look of the lashes and keeps them looking wispy and pretty even though they are so long.

Conclusion:
I'd definitely go for the Ka-Pows (or Ka-Ching/Ka-Boom depending on what color tips you want). The Oh Mys are WAY too thick and looked kinda tacky on my eyes. I don't mind the length and shape, but it was just the density that was a bit much.
Possibly good if you're trying to shield your eyes from glaring lights or you're going to a costume party as a doll, but otherwise, it has a tendency to weigh the eyes down and make them look small and dull.


Simple Eye Look for Wearing Huge Falsies With (below)