Showing posts with label eyeshadow tutorial. Show all posts

Tuesday, November 24, 2015

Some NARS x Steven Klein collection swatches and tutorial


For the holiday season, NARS has teamed up with photographer Steven Klein for a collection that celebrates individuality and power.

Despite the very avant garde campaign, the collection is actually extremely wearable, and great if you love bombshell slash femme-fatale makeup with strong lips and neutral eyes.

Case in point? The Dead of Summer Dual-Intensity palette.
The An Abnormal Female lip bullet set below is LITERALLY a giant bullet case which you can re-use (I can't imagine bringing it out, so it would really just be a display piece more than anything).
null

For review, I received some of the individual items, along with the NARS x Steven Klein Magnificent Obsession Lip Set, so these are what I'll swatch for you.


The lip set comes in a small glossy metal-lined cardboard case (top right above), and contains 3 lip products. Flamenco lipstick, Velvet Matte lip pencil in Mysterious Red, and Velvet Lip Liner in Misdemeanor.

The liner is a true red, whereas the other 2 have I feel a touch of neutral brown in them which makes these very flattering on a majority of skin tones. This is more apparent in Mysterious Red. In Flamenco, which is glossy and semi-sheer, it's more of a deep and subdued red tone, and not as bright as a true red.


I'm always up for a good red, but I was actually more wow-ed by the other lip products I swatched.
Lipstick in No Shame is a gorgeous deep berry which goes on so smooth and rich that it feels almost like butter. I'm totally in love with this shade right now.


The glosses Special Force and Provoke, are also pretty darned pigmented, and are that nice new non-sticky texture.


The single shadow I received, Mortal is a crystalline white. It's pretty, but I personally feel it's more of a shade which can easily be found from any other brand, including drugstore ones, so it wouldn't be where I would invest my money unless you absolutely love NARS and want a pearlescent white which layers well over other shades.


I received only one shadow, so I decided to work it into a look paired with another NARS duo, Habanera, which contains a soft aqua and a deep prune purple. Then I paired it with No Shame lipstick.


Eye Tutorial below!


I used Maybelline Color Tattoo Leather in 90 Vintage Plum
Tip: because this was a rather cool toned look, a warm matte transition shade helps make it less harsh, and adds contrast with the cool shades too.

I forgot to add that I also ran the color lightly along the outer 2/3s of the lower lash line!
Note: It's optional applying the white sparkly shade to the inner corners and below the bottom lash line. I just wanted a brighter look, but if you have pronounced eye bags or your upper lid fold covers the inner corners (many Asians), skip this step.


If you're curious about the lashes, I used Dolly Wink No 9 lashes, but just in case it's not available to you, just look for wispy natural lashes that are longer at the outer corners.


P.S. For the lips, I did use a little of MAC's Cyber World pencil (a very deep dark prune/plum) along the outer corners of my upper lip, and along the bottom to add a little 3D definition. You want to cover up most of the liner with the lipstick so there isn't a hard obvious deep purple line ringing your mouth. The effect should be subtle.

Tuesday, December 3, 2013

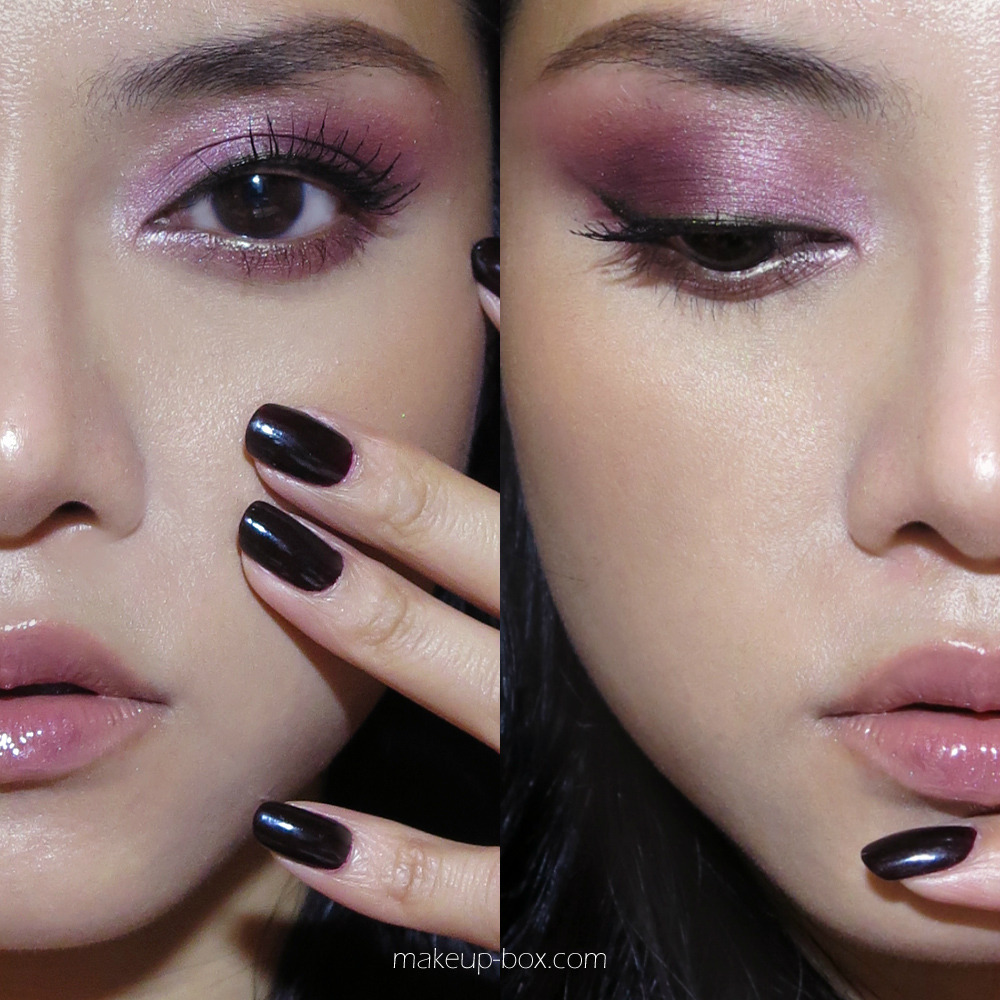
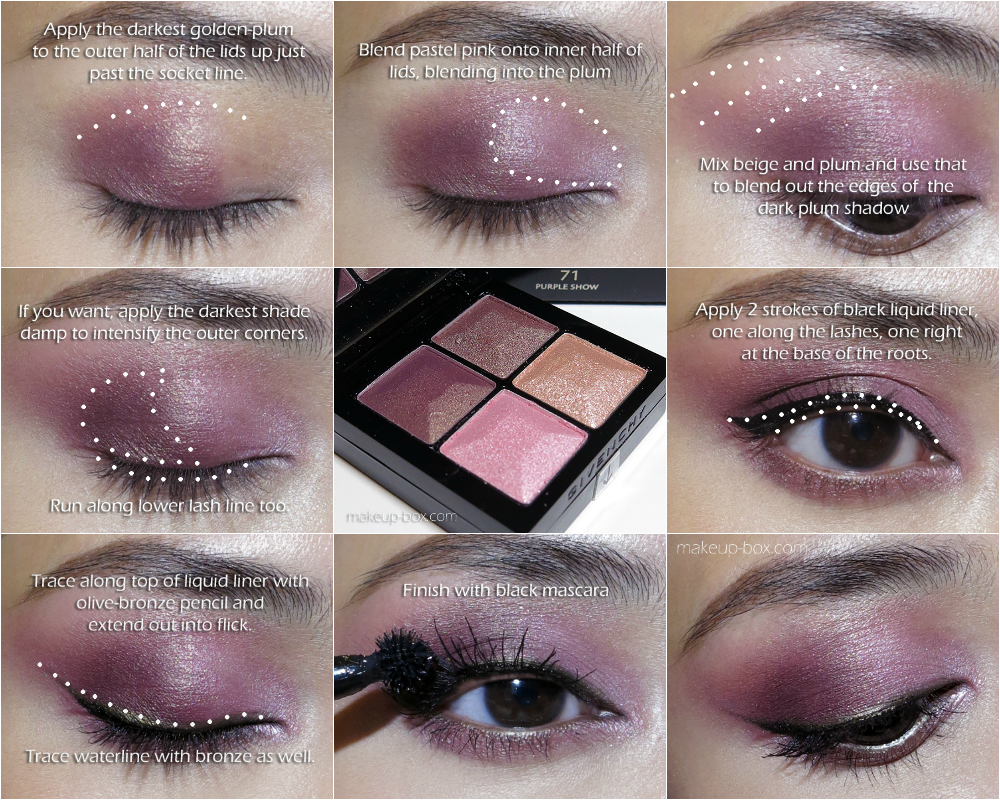
"Midnight Rose" Tutorial (Dramatic Pink/Plum Smoky Eyes using Givenchy Le Prisme Yeux 71 Purple Show)

Rosy pink tones are not typical colors for the eyes, because it can go so wrong and make your eyes look tired and swollen. Do it right, and it can be pretty and dramatic with a slight “goth”/gothic feel.

Here are a few tips:
  • Make sure you conceal any unevenness and redness in your skin. Rosy shadows will bring those out, and make them more obvious. 
  • Blend a rose colored shadow with softer, more pastel tones AND make sure you ground it with dark definition at the lash line. 
  • One other trick is to use a bit of liner in a contrasting tone (I used an olive-bronze pencil since there are so many red tones and green is on the opposite end of the color wheel). A brown or plum pencil complements the rosy shadows better but they would fade right into the background instead of standing out.
  • Pair it with soft blush and neutral/nude lips. Rose everywhere can look quite scary and over the top.

Products used:
  1. Foundation: Makeon Chokchok Shining BB Cushion (smoothed on with fingers)
  2. Concealer: MAC Studiofinish Concealer in NW20
  3. Powder: Bourjois Poudre de Riz de Java
  4. Contouring: The Body Shop Matte Bronzer 01
  5. Blush: Benefit Rockateur (I keep using this recently; it goes great with most looks…)
  6. Eyeshadows: Givenchy Le Prisme Yeux Quatuor in 71 Purple Show (it says purple, but the colors are more rosy-plum)
  7. Liquid liner: Givenchy Parad’eyes Liner in 1 Dream in Black
  8. Pencil: Givenchy Magic Khôl in 5 Bronze
  9. Mascara: Givenchy Phenomen’eyes Waterproof in 1 Water Black (this is fantastic for very separated wispy looking lashes and good lift because it catches every lash)
  10. Lipstick: The Body Shop Colour Crush lipstick in 220
  11. Lipgloss: Clinique Long Last Glosswear in 18 Mystic (a purple grape). This was applied just around the center of the lips for some dimension. 
  12. On nails: Lancôme Rouge Reglisse, which is a dark blood/red but looks black here.)

Wednesday, October 16, 2013

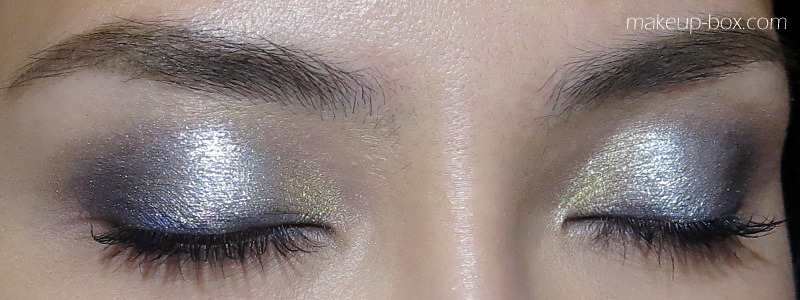
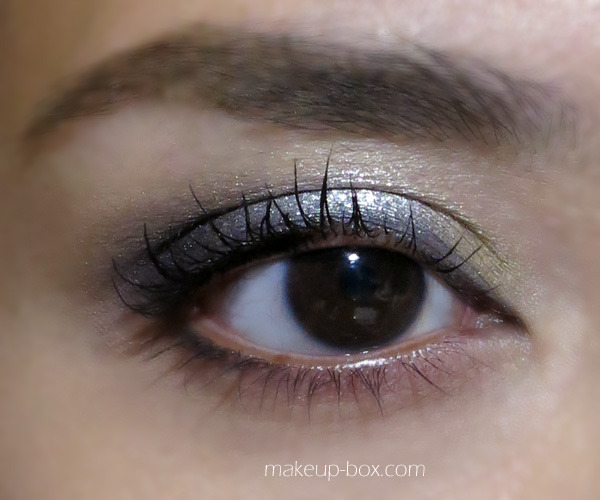
Urban Decay Vice 2 Palette Eye Tutorial: Quicksilver


I wasn't actually intending to do a 4th eye look using the VICE 2 palette, but it just happened!
If you haven't seen Shellshock, you can see all the close-ups of swatches here. It's a super-intense, molten silver that makes everyone go "whoa" when they swatch it for the first time. Silver can look very harsh and dramatic, but this is a rather wearable look - without muting or dulling down the silver - so I'll mention some tips that make it easier to pull off.


Aside from the 3 shades shown above, you will need:
  1. a nude or soft silvery cream base for the lids
  2. a charcoal grey pencil like NYX Charcoal
  3. black mascara

image


image


image
 Tip: Keep silver just under the socket line instead of spreading it up too high. This allows you to pack on the color intensely while keeping things quite wearable.

image
 Tip: Silver can wipe out your eye contours if you apply it over the entire lid. Make sure you add a darker shade around the outer corners, the lashes, and/or the socket line.

image
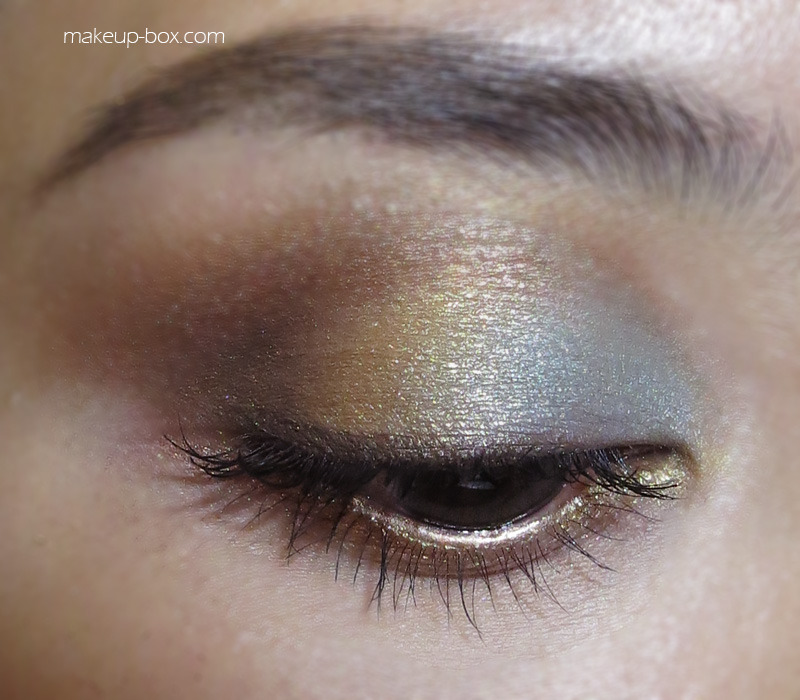
Tip: One other way to soften the harshness of silver is to pair it with a soft color in the opposite tone (warm), like a pearly peach or gold. 

image
And there's that! The color that people notice is still the silver, but the soft gold and dark charcoal purple at the outer corners just balance it out and add the definition back.


Other Vice 2 Palette Posts:

Wednesday, October 9, 2013

Fall Shimmer Tones Tutorial: 88 Metal Mania Palette

88 Metal Mania Eyeshadow Tutorial for Fall

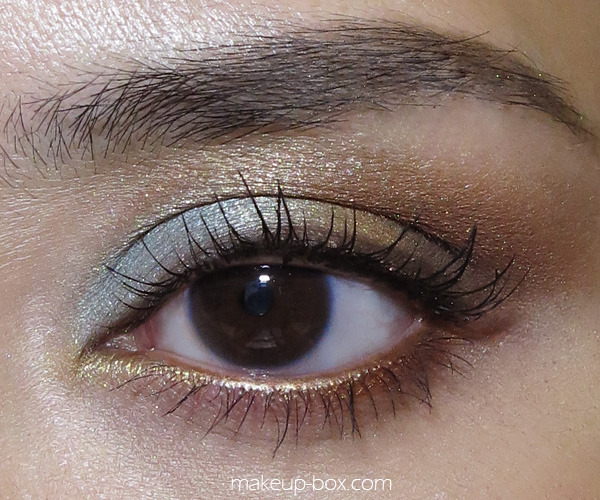
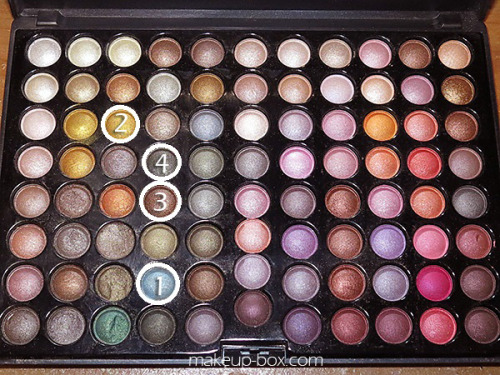
One of the things you can consider investing in (if you haven't already) is the Metal Mania palette from Coastal Scents. This is an all-shimmer collection, and it's filled with rich, high-pigmented Fall-appropriate shades ranging from neutral to violets, to teals, and pinks. 
For this soft, richly-colored look, you will need 4 shades from the palette, along with black mascara and brown pencil:

Add caption

image

image

Thursday, July 18, 2013

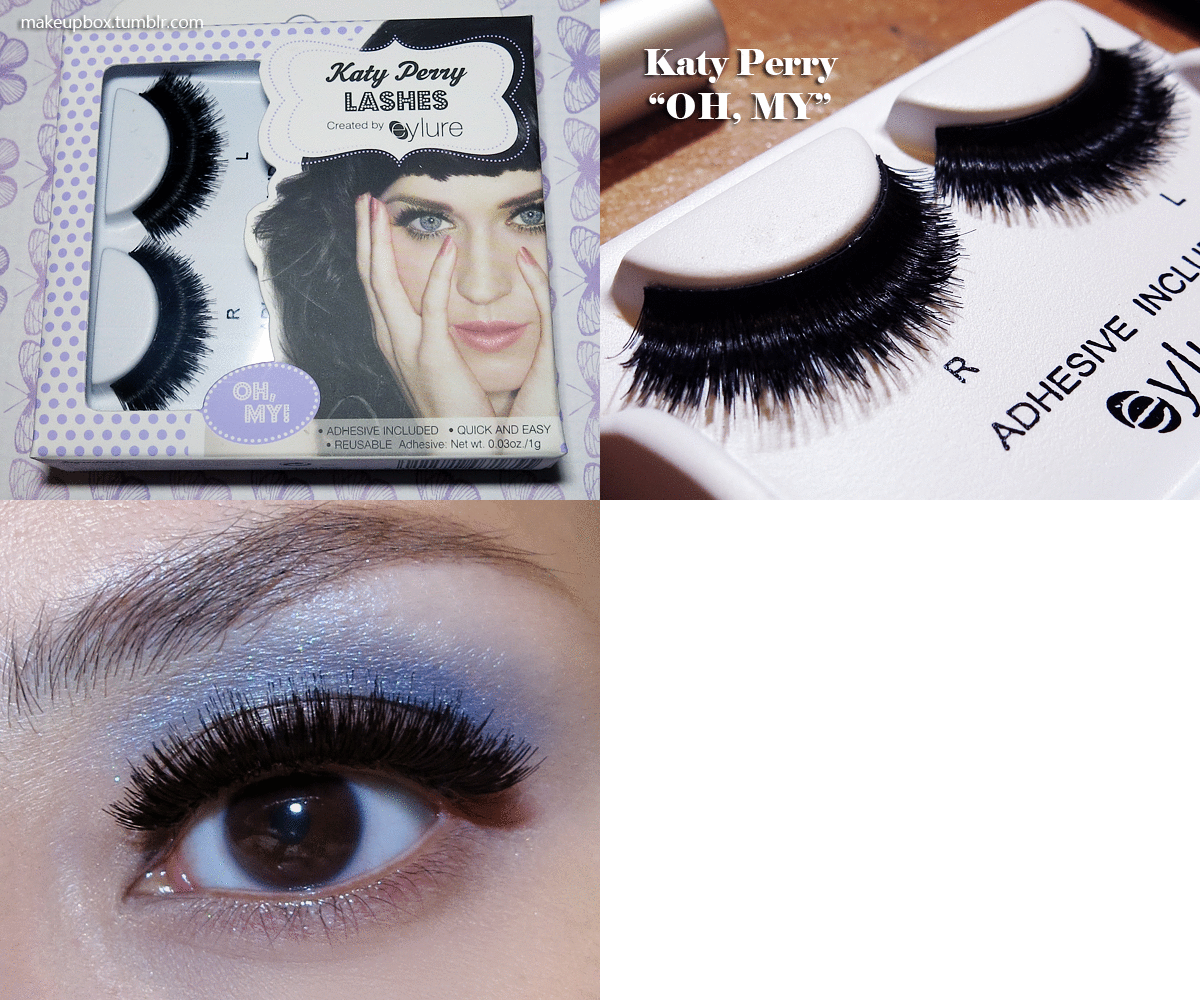
Makeupbox takes on Katy Perry! (Oh My and Ka-Pow lash reviews, plus a quick tutorial for an eye look that can stand up to huge lashes)


I think Katy Perry has a really fun and out-there style. It's sometimes borderline tacky, but let's face it; she's so hot she can get away with many things that would be faux pas on others.


So of course, when it came time to pick among the numerous lash designs bearing her name, I picked the 2 that I felt were dramatic and the least "normal"-looking. ("Normal" meaning "this shape is sold by 10,000 other brands and it's no point reviewing it again".) If you are going to shell out for Katy Perry lashes, no point buying a shape that Red Cherry does for a few dollars.

OH, MY!
Full, dense, double-stacked lashes. (These are 2 strips of lashes laid on top of one another.) Super thick and dramatic.

Verdict:

  • Girls, these are some kuh-raaazzzy lashes! They're so dense I felt like I was wearing 2 sun-visors on top of my lids and everything was dark. "Who turned off the lights???"
  • These lashes will cast a huge shadow over your eyes. If you have smaller eyes, or want to widen them, DO NOT - I repeat - DO NOT - buy these. Like any huge, thick lashes, they can make your eyes look droopy and overwhelmed instead of larger and brighter.
  • The lash band is super thick and stiff because of the double-stacking, although Eylure was pretty good at making them as malleable as possible. STILL, they're not the easiest things to apply, and without a super-strong glue, you will struggle with keeping these on all day.
--
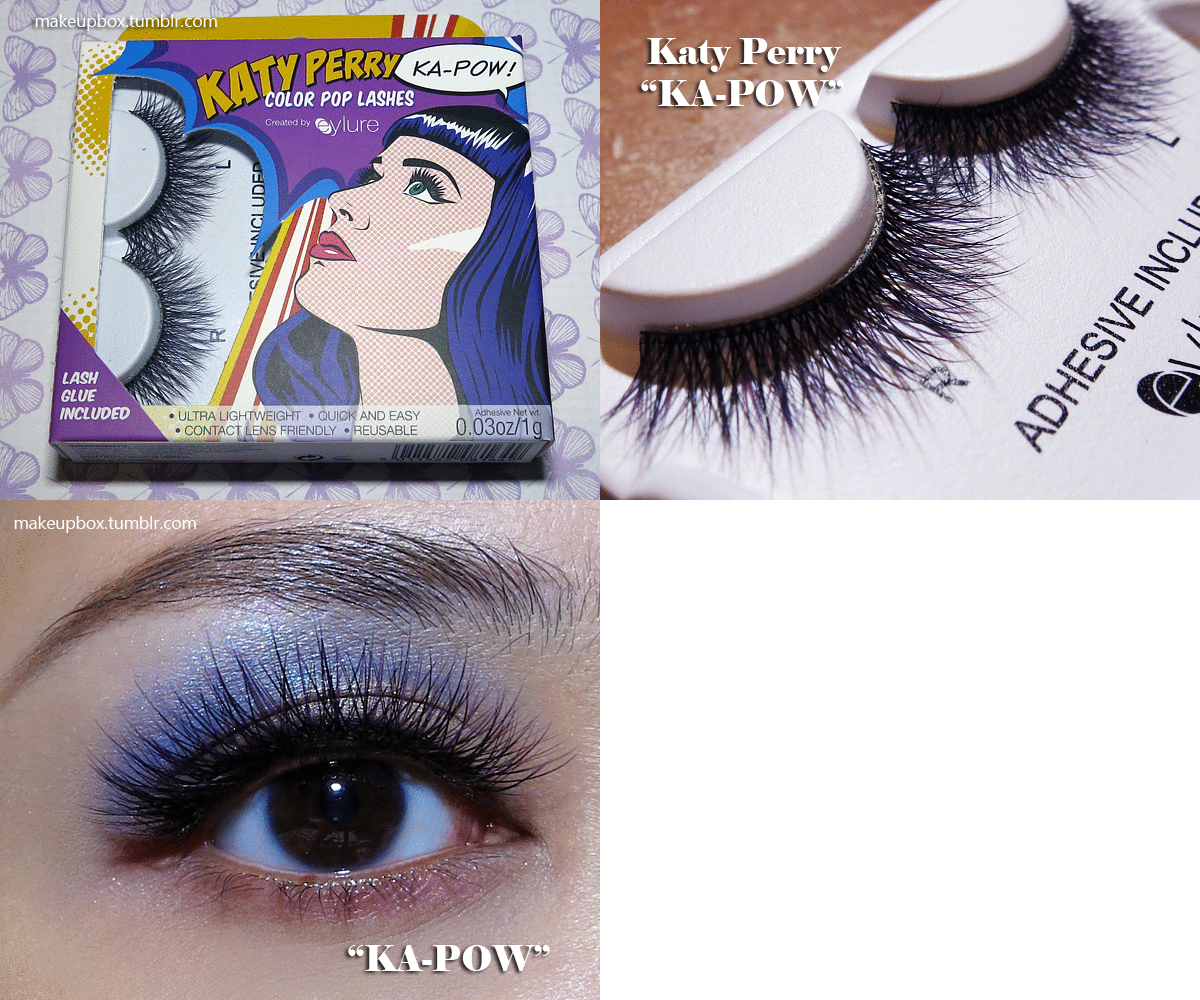
KA-POW


Purple tipped criss-cross wispies meant to bring out brown and hazel eyes. (There are versions for blue/grey/green eyes called Ka-Ching and Ka-Boom, but these aren't available in Asia.)

Verdict: 
  • Now THESE I really like and will re-use. They're dramatic but not too dramatic.
  • The purple does nothing to bring out my dark brown eyes. As you can see in the image, all it looks like is black. I'm not sure if you'll have better luck with lighter brown or hazel eyes. 
  • That said, the color at the tips really helps to soften the look of the lashes and keeps them looking wispy and pretty even though they are so long.

Conclusion:
I'd definitely go for the Ka-Pows (or Ka-Ching/Ka-Boom depending on what color tips you want). The Oh Mys are WAY too thick and looked kinda tacky on my eyes. I don't mind the length and shape, but it was just the density that was a bit much.
Possibly good if you're trying to shield your eyes from glaring lights or you're going to a costume party as a doll, but otherwise, it has a tendency to weigh the eyes down and make them look small and dull.


Simple Eye Look for Wearing Huge Falsies With (below)

Saturday, July 6, 2013

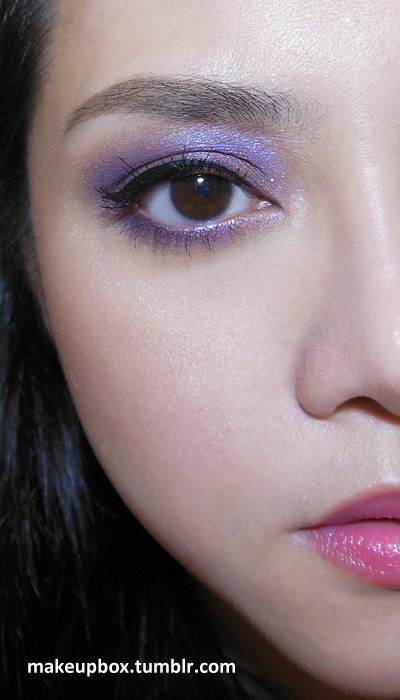
Club E: Smoky purple look feat. VDL cosmetics


At present, VDL has confirmed it is not internationally available (bummer...) but if this ever changes you will be the first to know! In the meantime, you are free to substitute similar colors.

image
This is a browny plum. If you can't find VDL, CoastalScents.com's Tyrian purple is a slightly cooler version.

image
Alternate options: Coastalscents.com's Violet Echo or  NYX Purple. 
(read more below)

Sunday, June 9, 2013

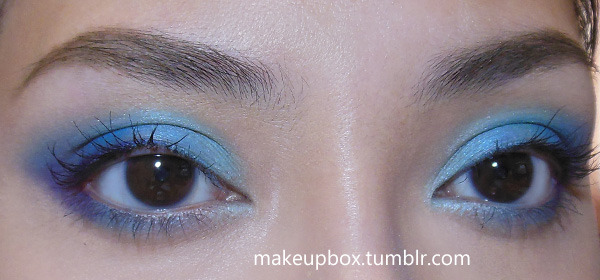
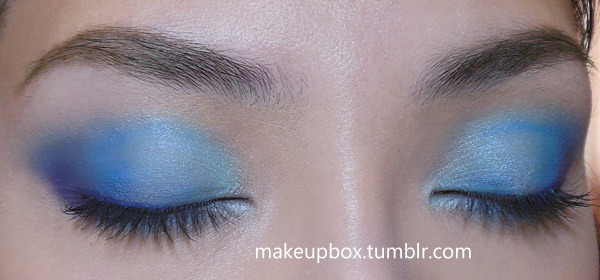
Pacific Blue: Simple, Colorful Winged Eyes (88 Original Palette)


Simple look featuring 3 shadows: 
  • A light aqua, a medium bright blue, and a dark purple.
  • Dark blue/purple liner optional.
  • Black mascara.


Steps below!


Apply mascara to finish!

Monday, May 27, 2013

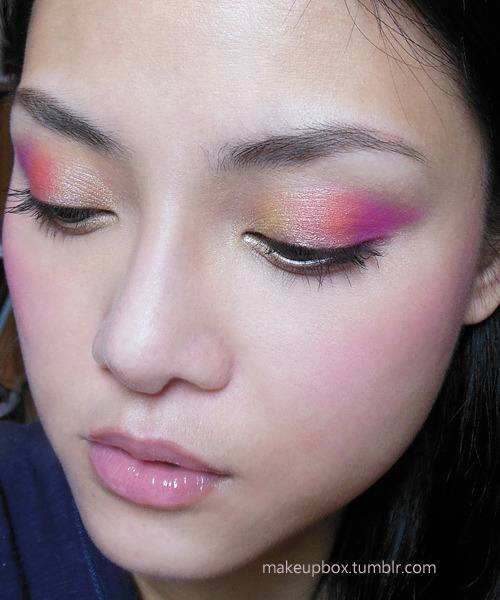
The Summer Wing: Easy Gold, Coral and Neon-Pink Winged Eyes


This is an easy gradient winged eye and actually more flattering than you might think neon pink shadow would be.
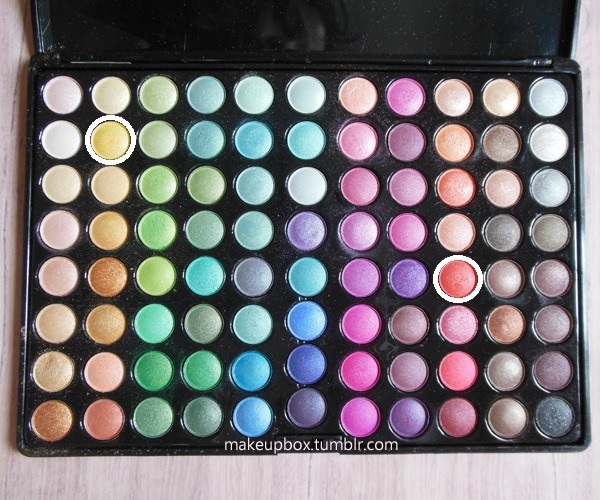
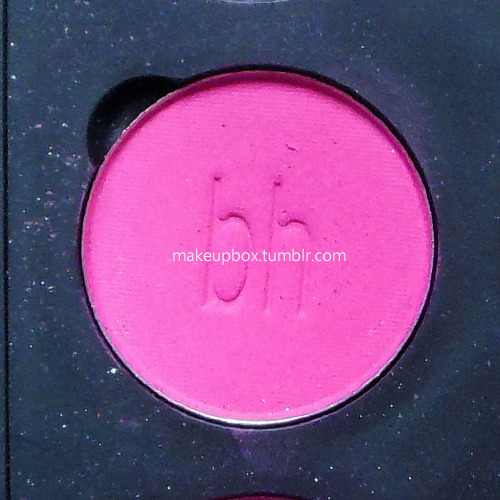
The 3 main shades are yellow, coral, and fuchsia, but the key to the look is that I used 2 shimmers in the 88 Shimmer palette for the yellow and coral, then switched to a matte neon pink (BH Cosmetics WM20) at the outer corners. 
This creates more strength to the look, although you can also use one of the fuchsias in the shimmer palette if you want to save the trouble. A matte is just more flattering when you're wearing a neon pink on the lids, in my opinion.

Thursday, May 23, 2013

The Most FABULOUS Glitter Liner In The World (Glitter Foil Liner Tutorial)


When you need a whole party on your eyelids, nothing but the most intense glitter liner will do. And what can be more intense of transfer foil?

This is much simpler than the foiled-lid look I did previously, and you can also simplify it further by using a single foil color rather than two like I did. The main item you need to pull this off is a good eyelash glue, like Eye Charm or DUO. (I prefer Eye Charm just because it's cheaper and comes with a convenient eyeliner brush.)

When choosing the foil, I would pick glitter patterns because larger patterns aren't going to show up nicely on a thin strip along your lash line. 
  • I picked a bright green holographic glitter foil from Dollarnailart.com, called Lime Glitter.
  • For the inner half of the lids, I used a bright yellow holographic called Aztec Gold.