Showing posts with label coastal scents. Show all posts

Thursday, July 18, 2013

Makeupbox takes on Katy Perry! (Oh My and Ka-Pow lash reviews, plus a quick tutorial for an eye look that can stand up to huge lashes)


I think Katy Perry has a really fun and out-there style. It's sometimes borderline tacky, but let's face it; she's so hot she can get away with many things that would be faux pas on others.


So of course, when it came time to pick among the numerous lash designs bearing her name, I picked the 2 that I felt were dramatic and the least "normal"-looking. ("Normal" meaning "this shape is sold by 10,000 other brands and it's no point reviewing it again".) If you are going to shell out for Katy Perry lashes, no point buying a shape that Red Cherry does for a few dollars.

OH, MY!
Full, dense, double-stacked lashes. (These are 2 strips of lashes laid on top of one another.) Super thick and dramatic.
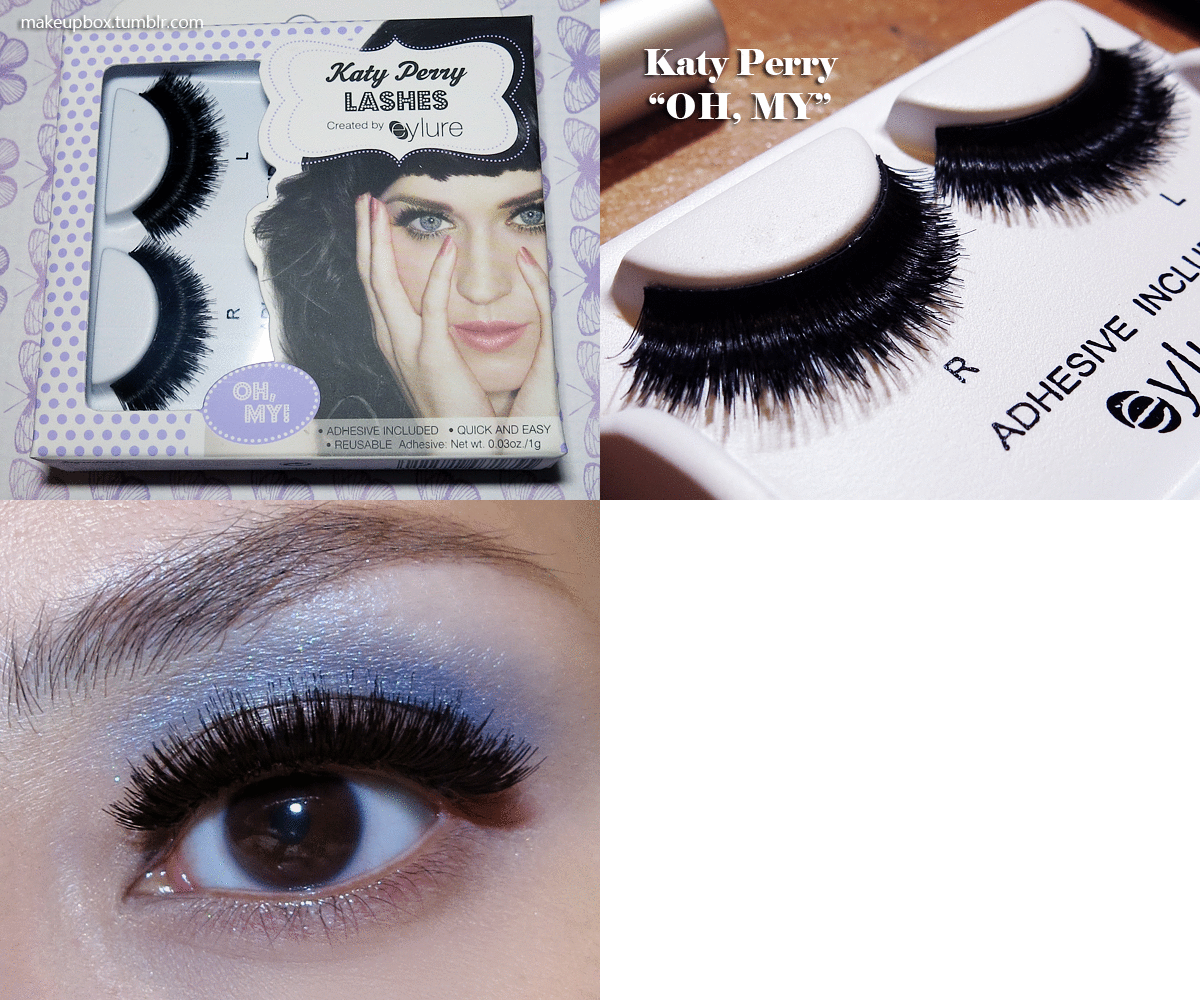
Verdict:

  • Girls, these are some kuh-raaazzzy lashes! They're so dense I felt like I was wearing 2 sun-visors on top of my lids and everything was dark. "Who turned off the lights???"
  • These lashes will cast a huge shadow over your eyes. If you have smaller eyes, or want to widen them, DO NOT - I repeat - DO NOT - buy these. Like any huge, thick lashes, they can make your eyes look droopy and overwhelmed instead of larger and brighter.
  • The lash band is super thick and stiff because of the double-stacking, although Eylure was pretty good at making them as malleable as possible. STILL, they're not the easiest things to apply, and without a super-strong glue, you will struggle with keeping these on all day.
--
KA-POW
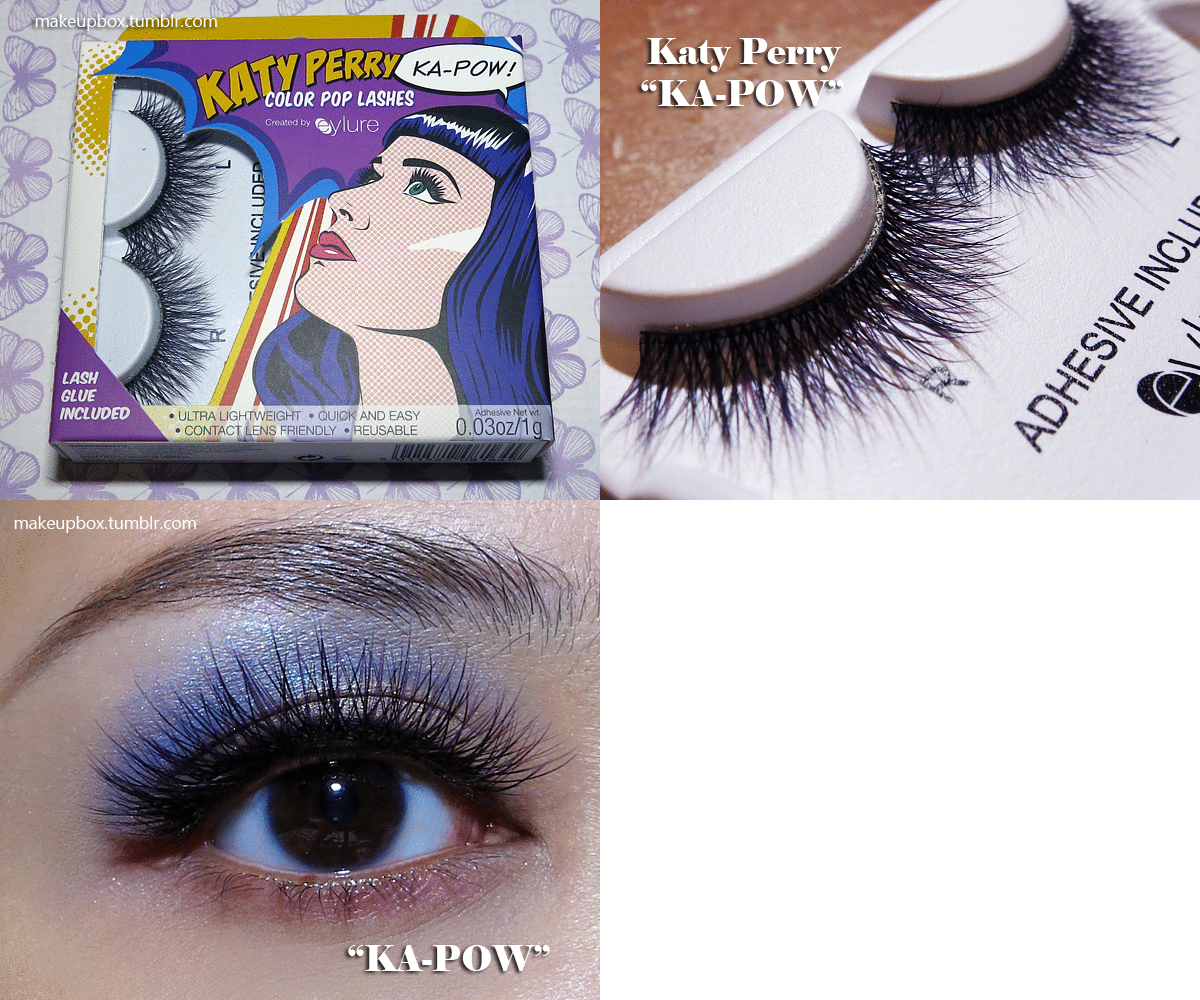

Purple tipped criss-cross wispies meant to bring out brown and hazel eyes. (There are versions for blue/grey/green eyes called Ka-Ching and Ka-Boom, but these aren't available in Asia.)

Verdict: 
  • Now THESE I really like and will re-use. They're dramatic but not too dramatic.
  • The purple does nothing to bring out my dark brown eyes. As you can see in the image, all it looks like is black. I'm not sure if you'll have better luck with lighter brown or hazel eyes. 
  • That said, the color at the tips really helps to soften the look of the lashes and keeps them looking wispy and pretty even though they are so long.

Conclusion:
I'd definitely go for the Ka-Pows (or Ka-Ching/Ka-Boom depending on what color tips you want). The Oh Mys are WAY too thick and looked kinda tacky on my eyes. I don't mind the length and shape, but it was just the density that was a bit much.
Possibly good if you're trying to shield your eyes from glaring lights or you're going to a costume party as a doll, but otherwise, it has a tendency to weigh the eyes down and make them look small and dull.


Simple Eye Look for Wearing Huge Falsies With (below)

Thursday, April 18, 2013

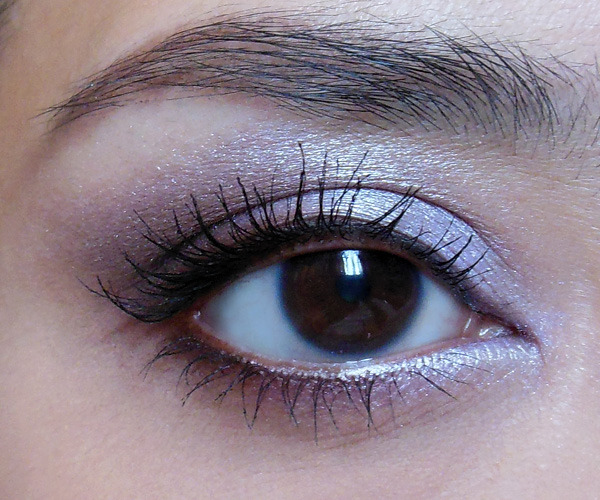
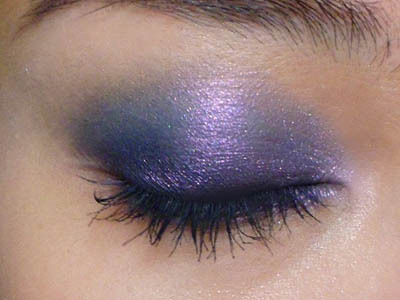
Lavender-Chocolate: Soft luminous purple andbrown eyeshadow look that goes with pretty much any Lip color


This is a color combination that is not a typical beige-toned neutral, but still goes with pretty much any lip color you want to wear. It's also soft enough that you can use a light hand (skip step 3) and just wear it in the day for work or school.
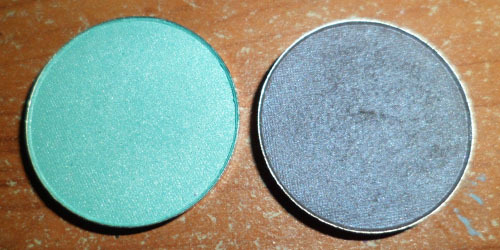
I used just 2 shadows:
  • A pale lavender (Coastal Scents Hot Pot in Ice Ballet)
  • A deep rich brown (Coastal Scents Hot Pot in Rich Walnut)
Other than this, I had a chocolate brown pencil and black mascara.

Sunday, September 9, 2012

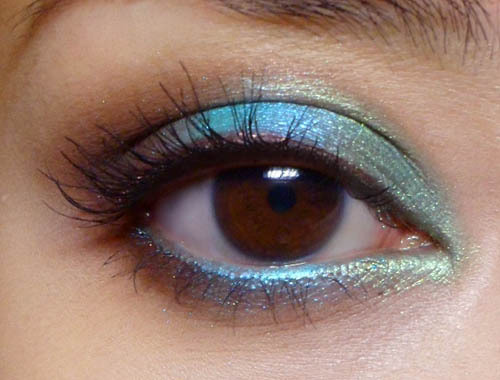
Paradise Colors: Summer-inspired Eye look


It's time to jazz things up with some brighter colors, inspired by the runways. I'm doing a tropical-paradise color scheme, with lush emerald green, rich brown, and a glowing turquoise.
You will also need a brown pencil for definition and an aqua/turquoise (optional) colored pencil to echo the blue on the waterline.


I used Coastal Scents Hot Pots on the lids and Bourjois pencils, but do use any alternatives you have. You can do a look with similar colors; they don't need to be identical.


Step 1: Instead of following the color-wheel (blue, green, brown), I wanted a little extra contrast by putting the brightest color in the center of the lid, where it will pop against the dark brown.
Apply along the inner 1/3 of the lower lash line as well. 


Step 2: Pick up the bright aqua or blue and pack it down the center of the lid. Don't blend it out too much as you want the color to be quite intense.
Apply the same along the center portion of the lower lash line.


Step 3: Pack the dark brown into the outer 1/3 of the lids, and then gently run it inwards along the socket line, until you reach about the center of the lids, above the bright aqua.
As before, run the dark brown along the outer 1/3 of your lower lash lines to finish.


Step 4: Here's the fun part. Run a brown pencil along the upper lash line for definition and some extra contrast against the aqua blue.
On the lower lash line, I actually used a bright turquoise blue pencil (Bourjois 54 Bleu Clinquant) to match and intensify it.

Then I finished with black mascara.


Tuesday, August 28, 2012

Coastal Scents Blue-Red Chrome Mica: MAC Cornflower Pigment Dupe?

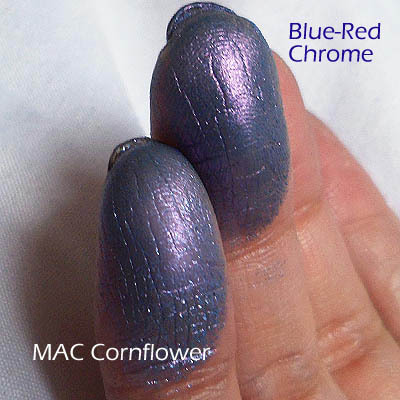
As you can see from the swatches, not really. BUT if you've ever wished that MAC's Cornflower was a little stronger, finer-grained, and looked as duochrome on the lid as it does in the bottle, then this actually performs better for a whole lot less.

The only thing you need to watch out for is to wear a good base or primer on your lids, because pure micas don't stick very well and can fade or dust off quickly. This shade is no different.

Here's a close-up of the 2 swatches over a clear base. (Both pigments don't stick all that well.) As you can see, MAC Cornflower goes on blue with just the faintest trace of violet overtone, but once it's swatched next to Blue-Red Chrome, it looks flat-out periwinkle blue. Blue-Red Chrome on the other hand, shifts very beautifully between blue and a mauve-violet. If you apply it without a base, it goes on very sheer with a violet sheen. 

For about $1 a sample baggie, this is again something I would recommend you check out OVER a MAC pigment. 


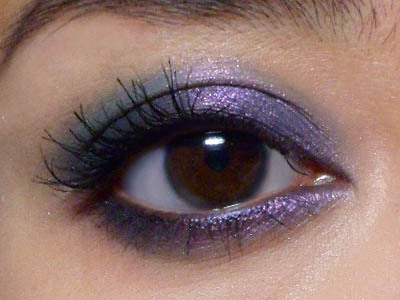
Step 1: I applied a dark blue pencil (MAC Blooz Kohl) along the lash line and diagonally up across the upper lid almost like a wing, but not extending much past the outer corners. This will serve as a dark base, which is ALWAYS a great way to bring out duochrome colors.


Step 2: Use your fingers to just lightly smudge and smoke the outer edges.


Step 3: Using a flat shadow brush so I can minimize fallout, I packed the pigment over the entire lid, from inner to outer corners, up to the socket line. Then I ran the brush along the lower lash line as well.


Step 4: Just curl lashes and apply mascara to finish!

Sunday, August 26, 2012

Product Highlight: Coastal Scents Paradise Rose Sky Mica


Pure Micas don't tend to work as well as some pressed shadows and pigments from brands like MAC, because they don't adhere very well to the skin. Under most circumstances, I wouldn't recommend buying micas for use straight-up as a shadow since they don't perform that well.
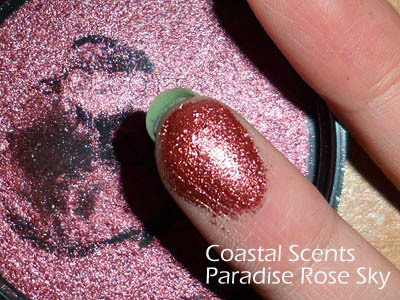
BUT - that said - Coastal Scents' Paradise micas are actually blended with cetyl dimethicone and metals to give them that incredible sheen and intensity on the skin, similar to pigments like MAC's Tan. (Although you should still wear a primer on your lid to minimize fallout and fading.)


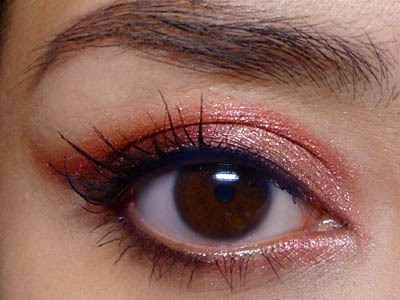
The shade I'm featuring today is Paradise Rose Sky (a sample costs only $1 right now), a gorgeous burnished wine-red with rose undertones and a coppery sheen. This would contrast very well with blue and green eyes, but as I always remind everyone; don't limit your shade choices based on your eye color because eye makeup is NOT JUST about having max contrast with your eyes shade.


Step 1: For definition and that cat-eyed wing, I'm using a plum colored pencil first. To create the shape I did, you just run the pencil from the center of the lower lid outwards along the lash line, and then extend straight up at the same angle.


Step 2: Draw a line from the outer end of the line you drew earlier, and pull it diagonally in and down, until it touches the inner corners of our eye. As you draw the line, it will be quite straight. It just appears curved in the image due to the contour of my eyes.
Finish by coloring in the space within the wing.


Step 3: Using a flat brush, I packed Paradise Rose Sky pigment onto the lid from outside in, first filling in the mobile lid area, within the socket line (hollow curve arching above your eye ball).
I colored higher than the upper edge of the penciled wing earlier and only covered the upper portions of the purple pencil. This is to give the color a slight gradient effect, from defined plum below to smoky red at the top. 
Leave the inner corner of the lids bare.


Step 4: To lighten up the look a little, I packed a softer peach-pink (L'oreal Infallible in Forever Pink) onto the inner corners of the lid, smoothing into the coppery-red.


Step 5: Finish with black mascara!

Friday, August 10, 2012

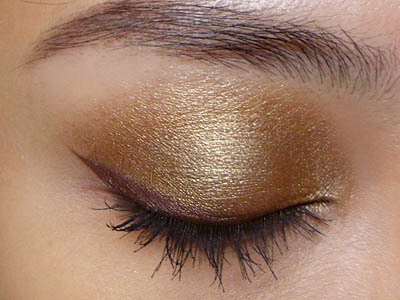
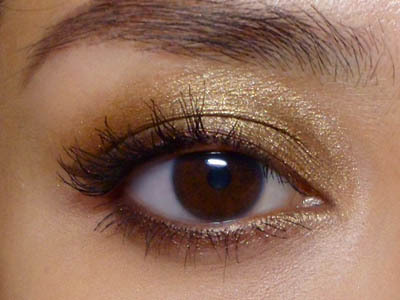
Low-cost Burnished Bronze Look for Work/Schoool: Coastal Scents Bungalow Gold

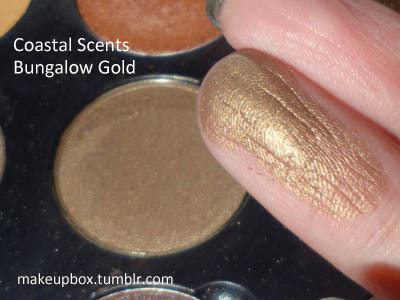
The entire look was done using extremely affordable products. I'm featuring some of my favorite products today. The images on the site aren't often accurate so I swatched them above for viewing.


  • Coastal Scents Hot Pot in Bungalow Gold - this is one of the newer Hot Pots, a beautiful shimmery metallic-bronze shade
  • Coastal Scents Hot Pot in Chocolate Brown - also known previously as S35, this is a deep taupe shade with a faintest hint of plum; often compared to MAC Satin Taupe, although this is deeper and has more grey
  • I also used Maybelline's Gel Liner in 02, which is a shimmery chocolate.

Step 1:  Begin by first using a flat angled brush to line the upper lash line from outside in using a deep taupe shadow, angling diagonally downward so there is a slight wing. Run in along the outer half of the lower lash line as well.


Step 2: Use a soft blending brush to buff a rich bronze shadow over the entire lid. Blend up beyond the socket line. Then use the angled brush to run the bronze shade all along the lower lash line as well. 


Step 3: Now for the liner. Since you've already laid down an angled line earlier using the dark brown shadow, it should be a piece of cake going over it with the brown gel liner now. 

This should give you a very neat but not-too-harsh line.


Step 4: Finish by curling your lashes and applying black mascara. I'm using Maybelline Great Lash Black. Any black mascara you like will do.


Monday, April 16, 2012

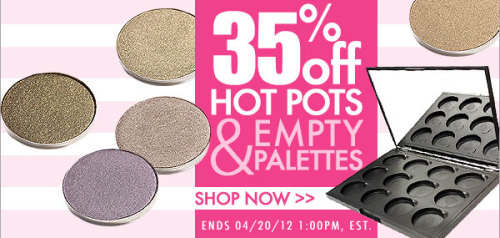
Get 35% off Coastal Scents Hot Pots and Magnetic Palettes from now to 20/4/2012, 1pm EST


Whether you're a budding makeup artist or just building up your collection of eyeshadow shades, now's a good time to check out Coastal Scents Hot Pots! These 26mm shadows are exactly the size of MAC refills, come in a big selection of shades and cost $1.99 each.

Plus, they usually give you a free 12-pan palette if you buy 12 pieces of eye shadows.
The quality has been fair-to-good for me so far, with the stars being all the metallics, though a few of the matte shades I got had lower color-payoff than higher-end brands.

P.S. Coastal Scents ships internationally.

Thursday, March 1, 2012

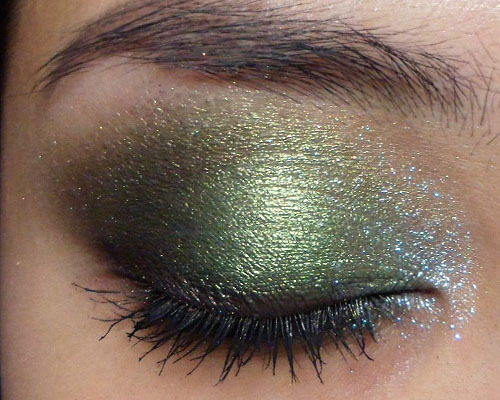
Rich Green Smoke: Evening Eye using Coastal Scents Kiwi Green


Coastal Scents Kiwi Green Hot Pot with Raisin Berry for contour, and MAC Reflects Transparent Teal in inner corners

I'm on my Coastal Scents kick, and wanted to do a strong green look, which I haven't done in awhile.
Some people do not enjoy wearing green but if you pair it with the right shades to make it richer and add more depth, it is incredibly flattering on all skin tones. This is also a great look for brown eyes.


Step 1: Apply a mossy green base to the lids. I used MAC Paint Pot in Moss Scape, but  any olive green or khaki pencil or cream shadow would work.

Step 2: Gently brush on a rich metallic forest-green like Coastal Scents Kiwi Green Hot Pot.

Step 3: To add some depth, I used a burgundy-brown, Coastal Scents Raisin Berry, to deepen the outer corners and along the hollow of the eye socket. You can use a regular brown but the green will make it olive/khaki, so I used a burgundy instead as it shows up richer.
See the rest of the tutorial here!

Wednesday, February 29, 2012

Seafoam Grey: Coastal Scents Hot Pots in Reef Blue and Gipsy Silver

Smoky, sea-foam grey lids.
I've been a long-time fan of Coastal Scents Hot Pots. These are mostly good-quality shadows that are great for beginner or those looking for colors for day-wear, as they come in tons of shades, are silky and pigmented but not too strong for those who aren't very confident with color cosmetics. If you want to quickly build up your kit without breaking the bank, I highly recommend checking Coastal Scents out, because you can get 12 Hot Pots for very little money, and a free magnetic, mirrored palette thrown in for free.
(These also fit into regular MAC palettes.)

I bought 12 of them last year, in warm browns, coppers, beiges and olive greens, but decided it was time to try softer, cooler shades this time round, especially as the company has come up with some new colors, which are currently going at US$1.99.  (And this time round, none of the shadows broke during the shipping, which was great. )

Coastal Scents Hot Pots in Reef Blue, and Gipsy Silver

2 of the shades I picked out (I'll post about the other colors separately) were Reef Blue and Gipsy Silver, from their new collections. I also got the Shadow Worx Shimmer primer since I don't own any shimmery primers and wanted to see how a $9.95 primer worked. So far it's been quite good, and I enjoy how I can wear it alone as a cream shadow, although I don't have oily lids, so I can't comment on how well it makes shadows last.


Friday, December 2, 2011

Dark Golden Olive

For most women, green shadow is something they love or hate. It's not always the easiest color to wear, but those who love it swear by its ability to be both brightening and sultry in turns.

Of the scores of greens out there, the one that is possibly the easiest for women of all skin tones to wear is a golden pistachio/olive tone that is part green, part gold, part bronze. If you want to buy just one single green shadow that you can throw on in the sheerest wash and get a beautiful, bright effect with minimal technique and skill, my suggestion would be MAC's Golden Olive pigment. If you're still a bit shy of green, then something a little more brown (e.g. MAC Sumptuous Olive would be better as a starter shade).


Of course, these 2 are just shade suggestions. I actually own neither. There are plenty of green shadows but as MAC is readily available in most countries I use it as a point of reference if you want to check out the kinds of colors I'm talking about.

Step 1: I began by using an olive green base spread very sheer over the lid (MAC Moss Scape Paint Pot). A neutral or translucent shade would work just as well, but layering green over green intensifies the color a bit.

Step 2: On the outer corners, I applied a smoky brown (literally any smoky deep brown will do) and then lightly blended the color up along the socket line for definition.

Step 3: On the rest of the lids, apply a deep, metallic olive (Coastal Scents Hot Pot in Dark Golden Olive), blending up just above the socket line.

Step 4: This is where I intensify the color. I used a very sheer, pale lemony-olive shadow (Too Faced Eye Shadow Duo in Rich Bitch blended together) in a wash all over the eye to bring out the golden sheen of the look. (MAC Gorgeous Gold or Golden Olive pigment would work just as well.) Without this step, the look would still work, but be a little less dimensional.

Step 5: To add definition back to the lash line, I applied matte black shadow to the lash line, concentrating on the outer halves.

Step 6: Run the first smoky brown shade along the lower lash line, and the  finish the look with black mascara.

---
Other products used:
  • Foundation: Bourjois Healthy Mix Foundation #52
  • Concealer: Amazing Cosmetics Concealer in Fair
  • Setting Powder: Silica
  • Brows: Maybelline Eyestudio Brow Pencil
  • Mascara: Bourjois Volume Glamour Max in Black
  • Cheeks: NYX Dusty Rose blush (applied very sheer)
  • Lips: Bourjois Effet 3D Max Gloss #63 Rose Eclat