Just because you have a quad or palette with 4, 5, 6, shades doesn't mean you need to think of how to incorporate every color every time. It can be extremely overwhelming. For daily wear, 2-3 shadow shades is plenty.
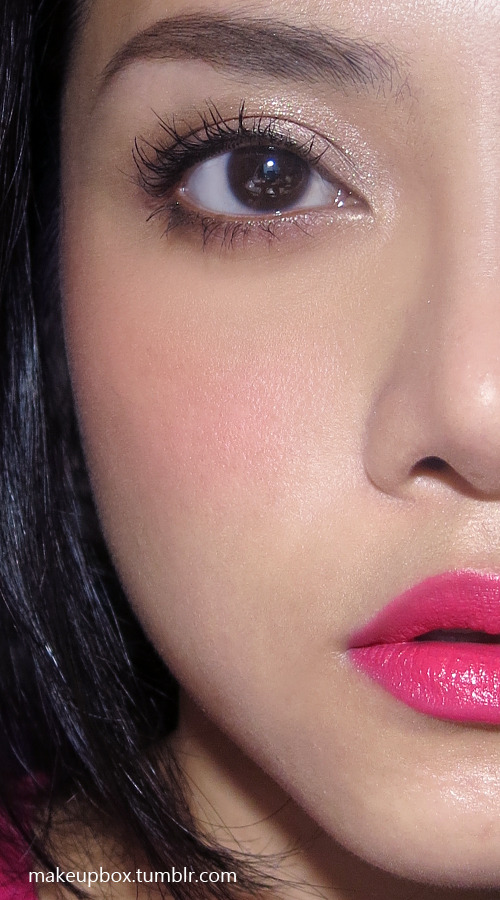
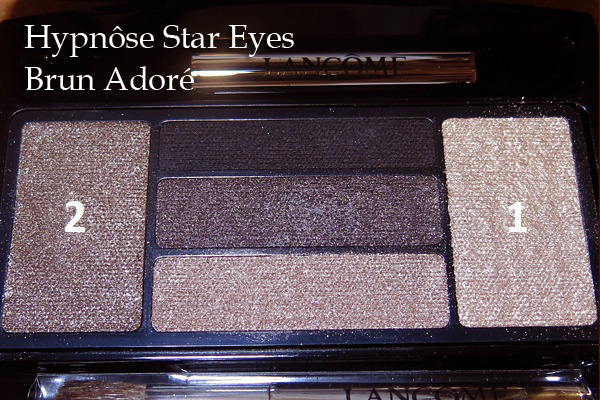
Here's a very simple look that I very often wear when I want to look polished but don't want to spend too much time. You can recreate it whether you own the same eyeshadow palette I used (Lancôme Hypnôse Star Palette in Brun Adoré), or a neutral eye palette that you already own.
Tutorial
Trick: If the shimmery beige you are using is quite sparkly or gritty, and not pigmented, pick up some shadow on your brush first, then spritz your brush with a mist of water or alcohol-free toner. Then buff it onto your lids and you should get a beautiful pearl sheen.
--
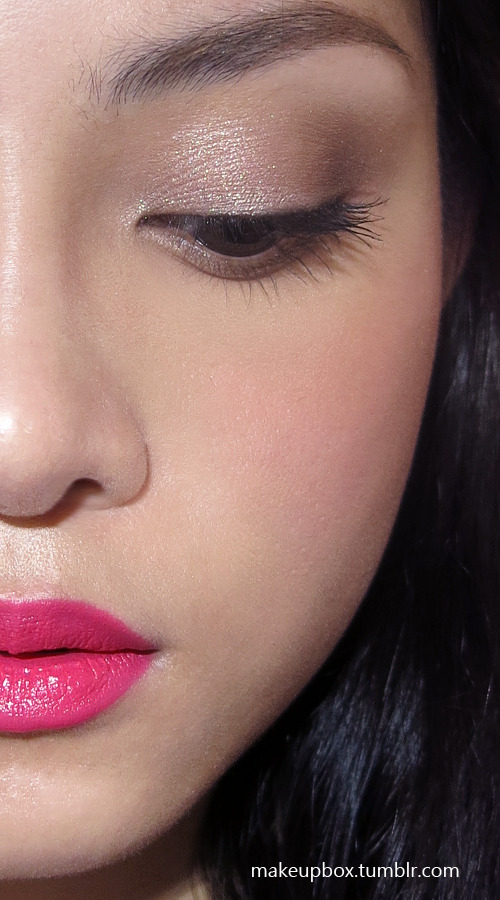
Work in circular motions and just concentration most of the color in the outer corners, before sweeping in along the hollow of your socket line just slightly.
--
You might want to switch to a thin sponge tip or a flat brush to do the lower lashes. You don't need a strong hard line. Just a hazy shadow so your lower lashes look full and your eye shape is more defined.
--
Tip: Many days, when I skip liner, I'll wiggle my mascara wand at the roots so that the black gets onto the skin at the base of the lashes. Liner + mascara in one go!
--
For blusher, I picked an intense, almost-red pink from Shu Uemura, because I already knew I'd be wearing a reddened fuchsia on my lips. If you're doing a coral or a blue-toned pink, switch up your blush accordingly.
For a slightly girly, do;l-like effect, concentrate most of the color around the peaks of your apples and sweep up and out along your cheekbones, NOT under. A pigmented blush is important if you have very yellow or pale skin (without any pink or ruddiness in it) because an intense lip can make you look very washed-out or sallow.
--
Applying a bright lip that lasts:
- Prime the borders of your lips either with a little lip primer or waxy concealer to fill in any fine lines.
- Use a brush to apply a small amount of lip color to the center of the bottom and top lip and then slowly spread it out to cover your entire mouth.
- Blot lightly on a sheet of tissue.
- I wanted a slightly more "casual" and "lived-in" effect to my lips, rather than a super-precise mouth, so I did a second layer using my finger to smooth and tap the color in rather than a brush. Always work from center outwards so most of the pigment is concentrated in the center rather than the edge.


I really want to thank you because I was so lost with putting on makeup for my Asian eyes, but you helped so much. <3
ReplyDeleteOH! and I love this look!
I love this look, it's stunning and the tutorial was really useful - thanks! I really like the colour of your lipstick in this look too :) so glad I just found your blog
ReplyDeletezara
x
lavieenrose-xo.blogspot.co.uk
Thank you for your information, your blog is so informative and intresting.
ReplyDeleteNoida packers and movers
Delhi packers and movers
Gurgaon packers and movers
Faridabad packers and movers
Packers and movers Indirapuram Ghaziabad
Delhi movers and packers