Showing posts with label subtle makeup. Show all posts

Monday, December 9, 2013

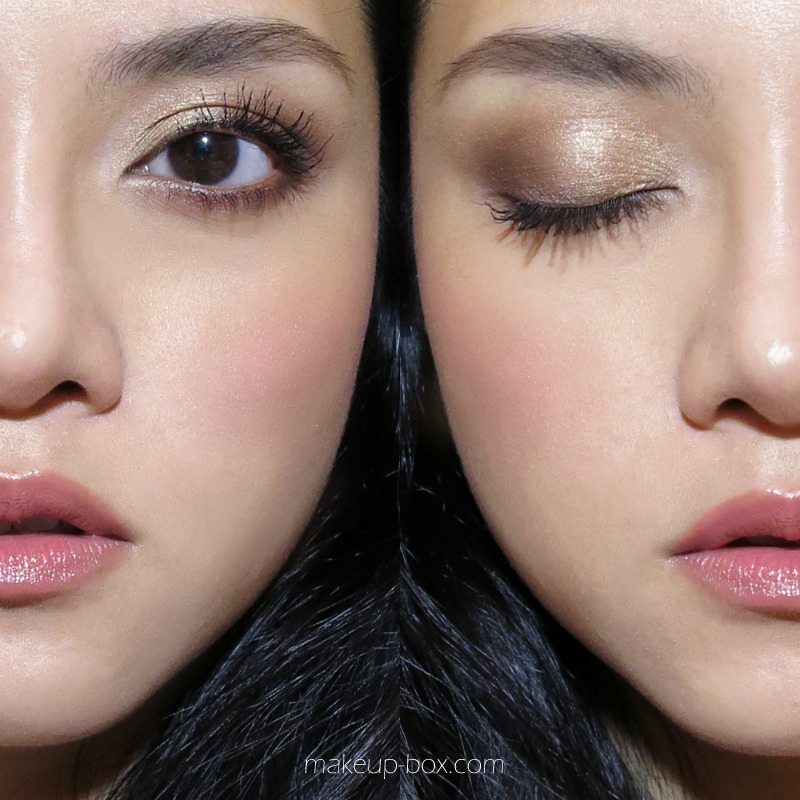
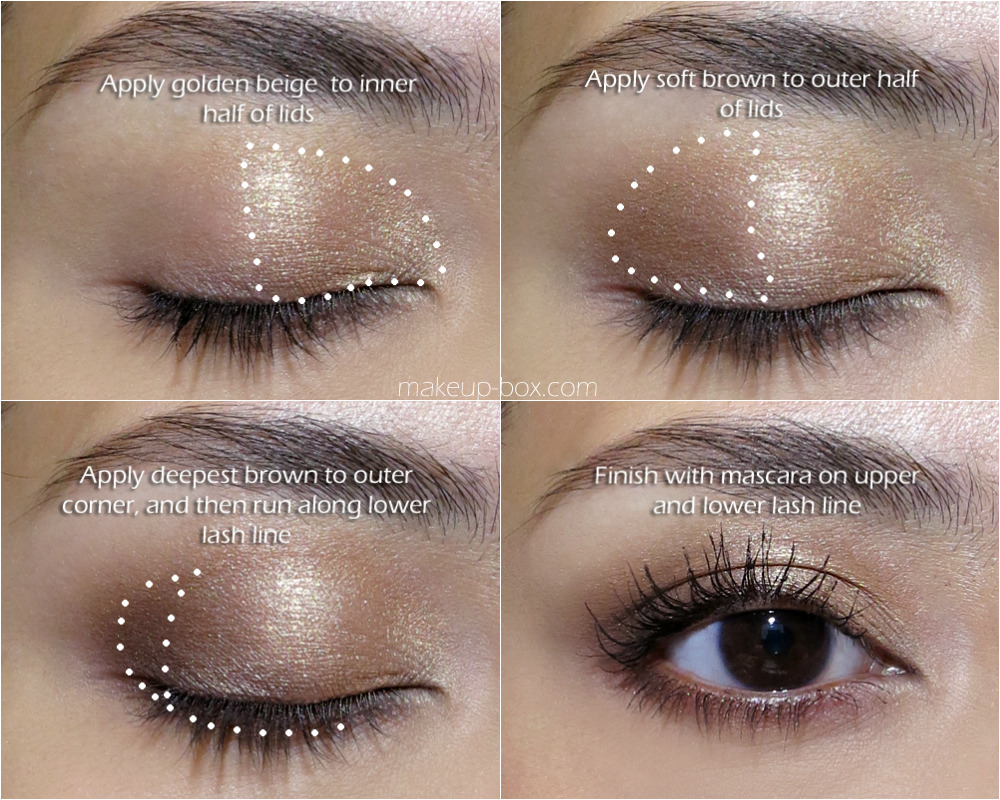
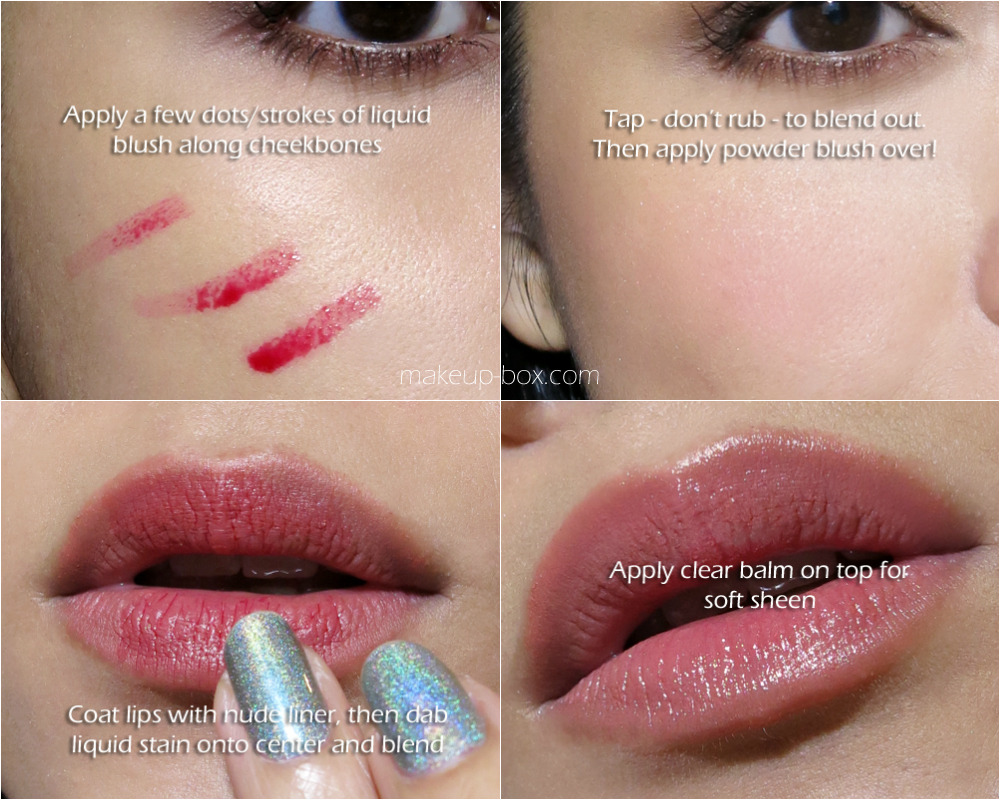
Holiday Look #3: Longwearing Soft and Glowy (feat. Benefit Groovy Kind-a Love Kit)

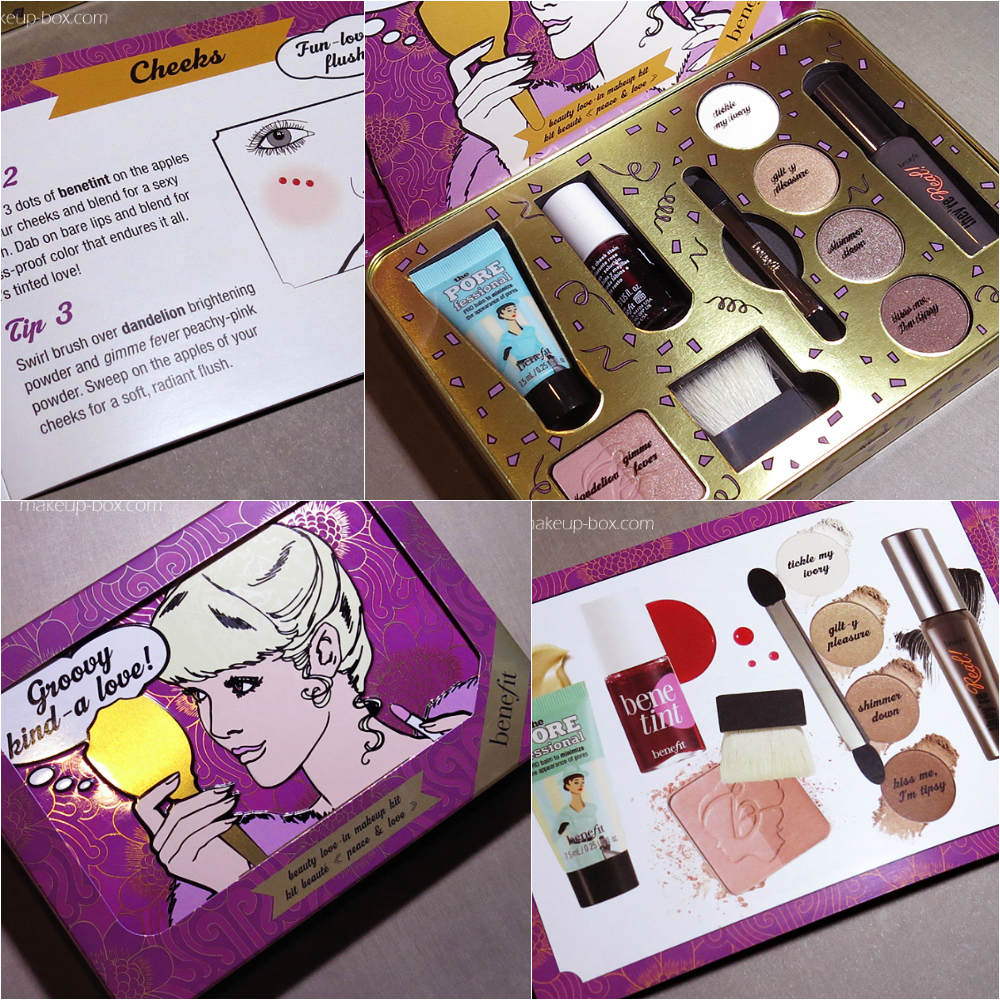
Benefit Groovy Kind-a Love kit contents

Not everyone’s into a smoky eye or red lips and winged liner. If you prefer the subtle enhancement of a low maintenance “girl-next-door” look that will last the night, this one’s for you!

I used a nifty little limited edition kit from Benefit, “Groovy Kind-a Love”, which includes minis of Porefessional balm, Benetint, 4 neutral brown shadows, a mini They’re Real mascara, and mini dandelion/gimme fever duo. Everything you need for an ultra-natural and flattering look.


Products: everything in the kit except for the concealer, lip liner and lipbalm.

  1. Concealer - Make Up For Ever Lift Concealer #2
  2. Lip liner - Givenchy Lip Pencil #3
  3. Lipbalm - use any pot balm you have that gives a slight sheen!
  4. Tips:
  5. Layering blush is a way to make it last the whole day, but be careful not to go overboard or you could end up with overly red cheeks. The thinnest layer of both will go a long way.
  6. Try Stay Flawless 15 Hour Primer on the lids as an eyeshadow primer!
  7. To avoid a stain wearing away unevenly on the lips, use a thin layer of nude liner as a base first.

Sunday, July 14, 2013

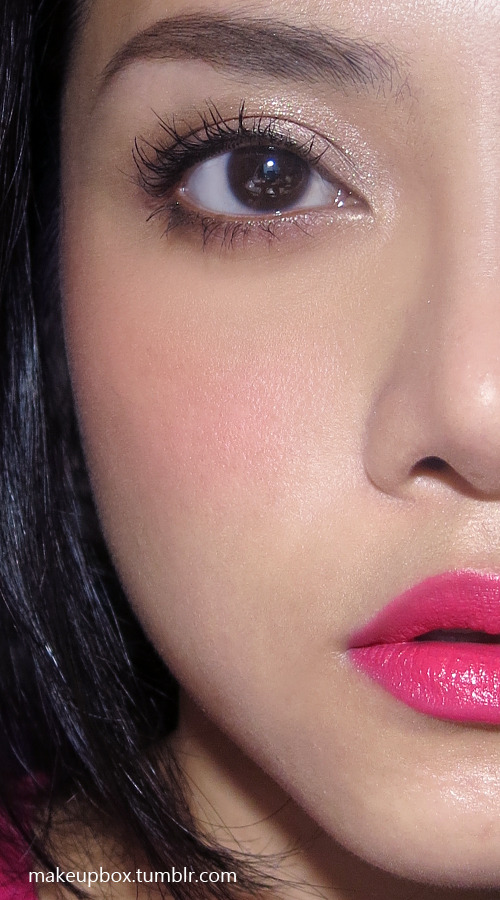
Simple and Polished: Basic Everyday Neutral Eyes and Warm Bright-pink Lips


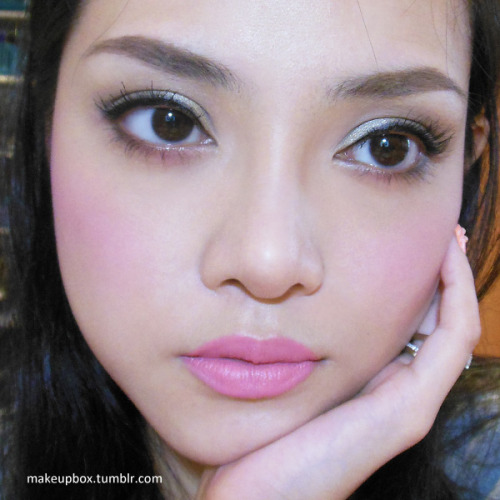
Just because you have a quad or palette with 4, 5, 6, shades doesn't mean you need to think of how to incorporate every color every time. It can be extremely overwhelming. For daily wear, 2-3 shadow shades is plenty.


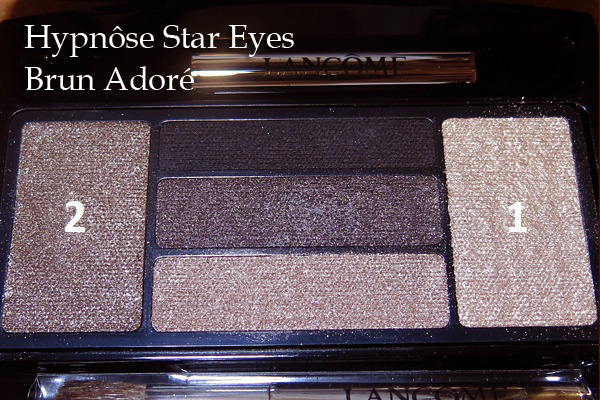
Here's a very simple look that I very often wear when I want to look polished but don't want to spend too much time. You can recreate it whether you own the same eyeshadow palette I used (Lancôme Hypnôse Star Palette in Brun Adoré), or a neutral eye palette that you already own.

Tutorial

Tuesday, July 2, 2013

"The Softie": Soft Neutral Eye with a Gold Accent, and Blooming Pink Cheeks and Lips!


The picture tutorial all laid-out with minimal text!


Sunday, January 27, 2013

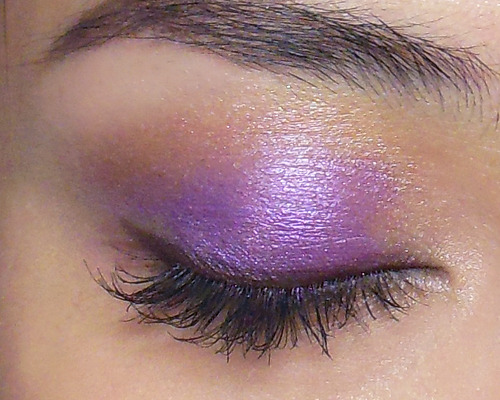
Soft Purple and Neutral Eye for Hooded Lids


Purple is a flattering color for most skin tones and eye colors, but here is a subtler way to wear if it you would like to add a little color into your day.
Great for:
  • Hooded Lids
  • Those with a wide space between lash line and brow
  • Brown, Hazel, Green eyes
You will need:
  1. [Optional] a pale shimmery cream shadow
  2. A purple shadow (may be shimmery or matte)
  3. A matte medium-brown (use a contouring powder if you have one; you don't have to buy a separate brown shadow)
--
Step 1: (Optional) Apply a creamy base in a pale silver or champagne shade. This will intensify the violet. A regular primer will do as well.


Step 2: Use a soft brush to buff a bright medium violet (try MAC Parfait Amour or I Nuovi Purple Funk) into the center of the lids, leaving the outer corner and inner corner bare.


Step 3: Using the matte brown contouring powder or shadow (I actually used TheBalm's Bahama Mama powder) and a finer/smaller brush,  run the brown along the socket line above the violet. Don't drag the brown too far out and down.
IMPORTANT: You do NOT want to connect the arc to the outer corner of your eye if you have hooded or a slightly downward-dropping lid. Just stop above it and don't bother darkening the outer corners of your lid 


Step 4: Using the same brown, define the outer 2/3 of the lower lash line lightly. Don't use a dark shade here as a strong line there can make a slightly downward drooping shape look worse. You just want a tiny bit of definition.


Step 5: For definition at the lash line, simply apply a stroke of brown pencil or gel liner. You can add a short flick at the outer corner, but try to keep it short and simple as a lid that is folded low might cause excess liner to melt and smudge.


Step 6: Curl lashes and apply black mascara. 

Thursday, December 20, 2012

Rihanna Neutral-Eye Makeup: Tips and Tutorial!


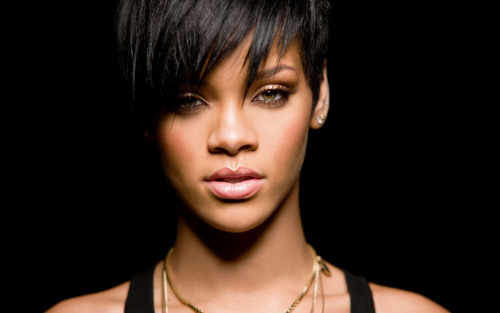
One of the recurring themes in Rihanna's makeup is that of a neutral but defined eye, and strong lips.
She always has groomed brows, defined neutral brown shadow in the crease, subtle contouring and not too much color on the cheeks, paired with a lip that she changes out which way depending on her mood and outfit.
This is a very clean, CLASSIC look that would take you from weekday to weekends, BBQ to club easily.

Here's a quick breakdown!


Skin:
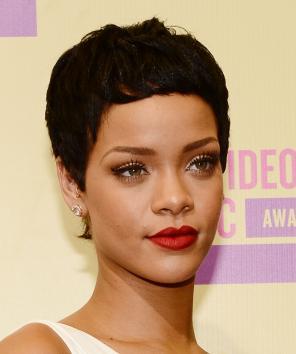
Rihanna's base is always pretty matte. She isn't a huge fan of shimmery highlighting or a "dewy" finish in most cases. Try an oil-absorbing or mineral powder foundation to minimize the shine, but don't over-apply powder, because you don't want a flat and heavy look.
Her skin is usually still quite luminous looking.

Cheeks:
Rihanna seems to skip blush a lot of times, opting for subtle contouring along the cheekbones instead. Always look for a bronzer that is not too red/copper. It should have taupe/grey tones so it can mimic actual shadows on your skin.
Look for a pressed powder 2 shades deeper than your actual shade and use that as a contour instead!

Brows: 
Rihanna's brows are always groomed and filled in with a soft taupe brown. Instead of using an eyeliner pencil which can be too pigmented and strong-looking, I do suggest looking for a waxy, less pigmented brow pencil or even a matte taupe eye shadow instead, since these will give a much softer effect.
Occasionally she throws in a nice warm coral/pink tone just on the peaks of the cheeks, above the contouring. Most of the time, it doesn't look too shimmery. Try Fleur Power from MAC (Pinch o' Peach if you are pale).

Eyes:
Rihanna likes definition. And why not? She's got those gorgeous cat-eyes and definition with liner and contouring emphasizes their shape.
The key thing is her liner. She often rims the inner lid with black, and pulls the liner into a very short and subtle flick at the outer corners, more to emphasize the tilt of her eyes than to look very obvious on its own.
image
Step 1: Begin with a matte brown for contouring the crease. There is one thing to remember. Rihanna usually doesn't pull the contour all the way to the inner corners. Start at the center and blend outwards.
She also doesn't follow the contour of the socket and pull the shadow downwards. Her artist pulls the brown straight outwards. This is a tip to "lifting" your eye shape and creating a more cat-like look.

image


image
Step 2: Liner is key to Rihanna's look. The emphasis for Rihanna is usually the outer half.
There are 3 steps.
  1. Start from the outside in, and draw a straight line from outer corner to the center of the eye. It should be thickest on the outside and disappear to nothing at the center. As a finishing touch, use your nail to scrape the outer corners of the liner outward and up slightly, to make a very short (and very easy) wing.
  2. Line the inner rim of the upper lash line (under your lashes) all the way from inner corners to outer. This emphasizes and defines the eye shape but doesn't weigh down the lid with a lot of black. 
  3. [Optiona] Rihanna likes to line the inner rim of her lower lash line as well, but she doesn't do this 100% of the time. You can skip this if you prefer (and especially if your eyes have a tendency to water). If you have narrower or smaller eyes but want that catty effect, do what I did below and draw the line only halfway. A full line can make small eyes look even narrower.
image
 --
image
Step 3: In some shots and looks, Rihanna's lids look like they gleam a little. If you have oilier lids, just leave out this step as your natural oils will create that sheen.
If you need a little extra sparkle, dab a tiny bit of shimmery beige or champagne right in the center of the lids. This creates that nice gleam. 


Step 4: Finish with mascara! You can emphasize that catty look by pulling your mascara wand diagonally up and out at the outer corners and simply concentrating on the outer lashes. If you prefer falsies, then use half-strips at the outer corners. You don't want to make things too dramatic, because you lose that fresh, sexy look Rihanna is channeling.


Lips:
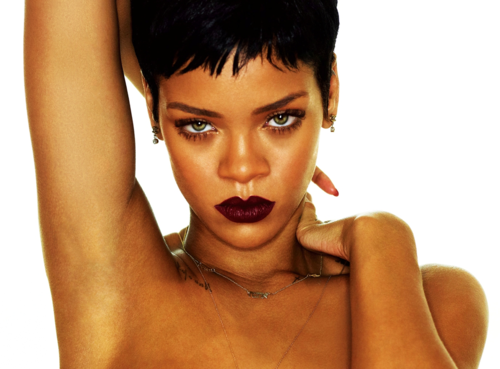
This is where you go to town. Rihanna has sported tons of colors so don't restrict yourself.
  • For a good deep red, try MAC's Russian Red or Ruby Woo with Auburn lip pencil.
  • For a deep dark shade, Film Noir or Wet n Wild Cherry Bomb are great. (You can also fill in your lip with a kajal or khol pencil and dab a little deep red or plum over for a super-dramatic effect - just make sure it does not contain any lead in the ingredients list!) 
  • That, or go au naturale with a tiny bit of clear gloss or lip balm!
Monday, November 26, 2012

Driftwood: Seafoam Green and Rich Bronze Look for Day (88 Warm Palette)


Straightforward does not need to be boring. Here's a look that you can easily wear for day because I matched a soft seafoam green with a rich brown and soft champagne. The green is almost "faded" in tone so it's definitely a bit more fun, but not too loud for work or school.

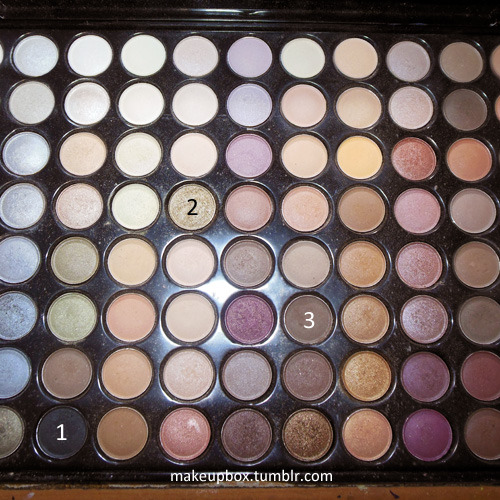
The first shade is located near the bottom left corner of the 88 Warm palette. (You can get this from both Coastalscents.com as well as BHcosmetics.com. I don't detect any difference in the quality and they're likely to come from the same manufacturers.)

The Neutrals are near the central column. The first is a deeper cocoa bronze right at the bottom, right of the middle. The champagne comes higher up to the left of the center, a little above the maroon shade near the center of the palette. Both of the neutrals are shimmery, so if you prefer mattes, you can always replace the ones I used with similar shades on the palette.


Step 1: Start by buffing the seafoam green onto the inner half of the lids.


Step 2: Now, buff the rich bronze-brown onto the outer half of the lids. (This shade looks quite similar to MAC Bronze shadow, but is slightly lighter.)


Step 3: Now, pack some pale champagne gold onto your brush and then spritz it with a little water, eye drops or Fix+. THEN pat it gently down the center of your lid, going over and building up as needed, until you get a nice gold sheen.


Step 4: For definition, I ran a bronze pencil along the inner corner of the lower lid (Sephora Flashy Liner in Flashy Copper) and a dark navy blue to the outer half of the upper lid. I used a discontinued MAC pencil called Blooz, but as with all pencils, you can use ANY similar shade from any brand you choose. As long as the pencil has good color payoff, the brand doesn't matter.
Then just finish by curling lashes and applying mascara or falsies as needed!

Wednesday, December 7, 2011

Lazy Face: The 5 Minute Makeup Routine

There are days when you just DON'T have any time to spend 20 minutes getting your full face on.

Here are the essential steps and tips (for me) to get out the door looking put-together:

Step 1: Pick a good medium-coverage foundation (Dior Nude and Bourjois Healthy Mix are my favorites for being lightweight+good-coverage) with a great skin-like finish. This will even out your skin and minimize time needed for your concealer application later. Dab it on around the areas where you need the most evening out, as the coverage will be thickest in that spot.
For me thats under my eyes, and around my nose. 
And - IMPORTANT - use your clean hands! This is the fastest way to get foundation well-blended into your skin.

Step 2: Conceal any redness, discolorations, spots.
A wax based concealer (pots or sticks) will be easier to spot apply and build up than liquids. I'm trying out Revlon Photoready Concealer but MAC Studiofinish is my staple on most days. If you have really dark pigmentation or circles, get something with peach undertones. Apply with a brush, but press with your ring finger until it blends seamlessly into your foundation.
Don't rub or it will take you forever to build up precise coverage, and DON'T try to erase every single flaw you have. It's too much work and never really hides anything that well.

Step 3: Set with a powder. If you need something with a little more color, try something like MAC Mineralize Skinfinish Natural, because if you've got the shade that matches your skin tone, this is a powder that gives extra coverage without taking the glow away from your skin.

Step 4: Blush. Go for something that's a nice fresh pink (or stronger if you have a deeper skin tone) like MAC Well-Dressed if you're fair, and NYX Pinky if you're medium-toned. (I mixed both here!) Very lightly dab on with a loose, soft kabuki to add the base layer of color first. Then check to see if you need more, before buffing lightly to build up a bit of color.
If you tend to be heavy-handed, my suggestion is to go for a lighter shade than you would normally wear.

Step 5: Set your brows with pencil or powder (or brow mascara), and move on to your eyes. You need 2 basic shades. A deeper, matte shade, and a lighter (shimmer is optional) which can be neutral or otherwise.
With your ring finger, pick up some dark shadow (MAC Concrete) and smear it firmly along the lash line from OUTSIDE-IN so it's darkest near the roots. Don't worry about precision or blending.

Step 6: Next trick; pick up the lighter shade (MAC Mineralize Eye shadow in Snow Season) and use a clean finger to smear it INSIDE-OUT from the inner corners, until it slightly overlaps the darker shade in a sheer wash. That's your eye shadow done!

Step 7: Apply mascara (Bourjois Volume Glamour Max) and comb out if you need to.

Step 8: On the lips, pick your favorite everyday lip color (MAC Faux for me), apply straight from the tube, then kiss the back of your hand to remove excess. Lip gloss (DiorAddict Ultra Gloss #557 is a sheer candy pink with blue reflects) is optional!

And finally, a more presentable face in 5 minutes!


Thursday, August 18, 2011

Getting Fuller Lashes: Smoky Lash Trick

Black smoky liner with NYX Angel Blush, NYX Tea Rose lipstick (with Angel blush dusted over)

Mascara can lengthen and thicken lashes to some extent, but if you have sparse lashes, piling on more layers of mascara is not going to fool anyone into thinking you have lush lashes. 

One of the ways to make you look like you have a fuller lash line is adding dark smokiness to the base of your lashes. This trick uses few products, and can be done quickly with no need for smudging or special skills. In fact, this is a look I often wear to work (without the black along the lower lashes) because it looks polished and takes all of 5 minutes.

You need black shadow (matte is best), a firm smudger brush (pictured below), black liquid or kohl liner, and mascara.
Sephora Smudge Brush
 Step 1: Use the smudger brush to apply black shadow to the lash line. Instead of dragging the brush left and right, pack the color in sections, in a downwards motion, like you are painting your nails. If you want to keep it subtle, just leave the black near the base of the lashes.