Showing posts with label mac pigment. Show all posts

Tuesday, August 28, 2012

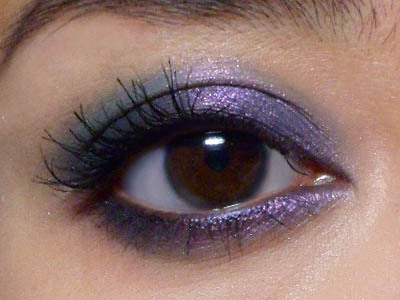
Coastal Scents Blue-Red Chrome Mica: MAC Cornflower Pigment Dupe?

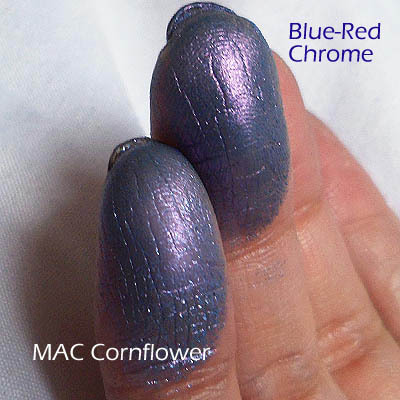
As you can see from the swatches, not really. BUT if you've ever wished that MAC's Cornflower was a little stronger, finer-grained, and looked as duochrome on the lid as it does in the bottle, then this actually performs better for a whole lot less.
The only thing you need to watch out for is to wear a good base or primer on your lids, because pure micas don't stick very well and can fade or dust off quickly. This shade is no different.

Here's a close-up of the 2 swatches over a clear base. (Both pigments don't stick all that well.) As you can see, MAC Cornflower goes on blue with just the faintest trace of violet overtone, but once it's swatched next to Blue-Red Chrome, it looks flat-out periwinkle blue. Blue-Red Chrome on the other hand, shifts very beautifully between blue and a mauve-violet. If you apply it without a base, it goes on very sheer with a violet sheen. 

For about $1 a sample baggie, this is again something I would recommend you check out OVER a MAC pigment. 


Step 1: I applied a dark blue pencil (MAC Blooz Kohl) along the lash line and diagonally up across the upper lid almost like a wing, but not extending much past the outer corners. This will serve as a dark base, which is ALWAYS a great way to bring out duochrome colors.


Step 2: Use your fingers to just lightly smudge and smoke the outer edges.


Step 3: Using a flat shadow brush so I can minimize fallout, I packed the pigment over the entire lid, from inner to outer corners, up to the socket line. Then I ran the brush along the lower lash line as well.
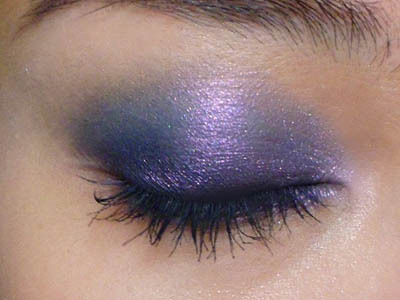


Step 4: Just curl lashes and apply mascara to finish!

Thursday, February 23, 2012

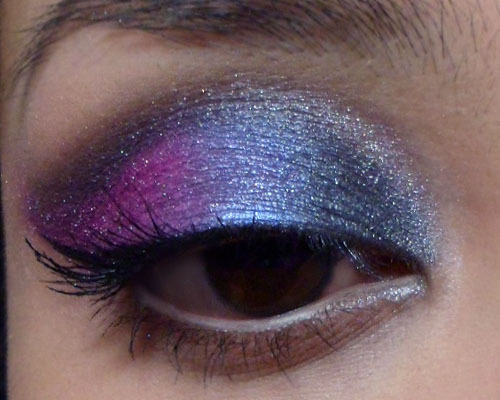
Smoky Blue-and-Pink Wing: MAC Fuchsia and Frozen White pigments


This is a look that should look multi-faceted and contoured. If you have mono-lids, just draw in the crease along your socket line, above the lid crease. This takes a bit of practice to get even but it looks great!

See the step-by-step to get the look here!

Friday, December 2, 2011

Dark Golden Olive

For most women, green shadow is something they love or hate. It's not always the easiest color to wear, but those who love it swear by its ability to be both brightening and sultry in turns.

Of the scores of greens out there, the one that is possibly the easiest for women of all skin tones to wear is a golden pistachio/olive tone that is part green, part gold, part bronze. If you want to buy just one single green shadow that you can throw on in the sheerest wash and get a beautiful, bright effect with minimal technique and skill, my suggestion would be MAC's Golden Olive pigment. If you're still a bit shy of green, then something a little more brown (e.g. MAC Sumptuous Olive would be better as a starter shade).


Of course, these 2 are just shade suggestions. I actually own neither. There are plenty of green shadows but as MAC is readily available in most countries I use it as a point of reference if you want to check out the kinds of colors I'm talking about.

Step 1: I began by using an olive green base spread very sheer over the lid (MAC Moss Scape Paint Pot). A neutral or translucent shade would work just as well, but layering green over green intensifies the color a bit.

Step 2: On the outer corners, I applied a smoky brown (literally any smoky deep brown will do) and then lightly blended the color up along the socket line for definition.

Step 3: On the rest of the lids, apply a deep, metallic olive (Coastal Scents Hot Pot in Dark Golden Olive), blending up just above the socket line.

Step 4: This is where I intensify the color. I used a very sheer, pale lemony-olive shadow (Too Faced Eye Shadow Duo in Rich Bitch blended together) in a wash all over the eye to bring out the golden sheen of the look. (MAC Gorgeous Gold or Golden Olive pigment would work just as well.) Without this step, the look would still work, but be a little less dimensional.

Step 5: To add definition back to the lash line, I applied matte black shadow to the lash line, concentrating on the outer halves.

Step 6: Run the first smoky brown shade along the lower lash line, and the  finish the look with black mascara.

---
Other products used:
  • Foundation: Bourjois Healthy Mix Foundation #52
  • Concealer: Amazing Cosmetics Concealer in Fair
  • Setting Powder: Silica
  • Brows: Maybelline Eyestudio Brow Pencil
  • Mascara: Bourjois Volume Glamour Max in Black
  • Cheeks: NYX Dusty Rose blush (applied very sheer)
  • Lips: Bourjois Effet 3D Max Gloss #63 Rose Eclat