Showing posts with label pink eyeshadow. Show all posts

Wednesday, December 31, 2014

Pastel Makeup: Givenchy Le Prisme Yeux Quatuor 73 Pastel Model

I asked you guys on Instagram which of the 6 Givenchy eye quads you wanted a tutorial for, and a majority of you guys - unsurprisingly - voted for the toughest one. 73 Pastel Model.


It's gorgeous. 
But as someone with dark eyes and dark hair, I tend to avoid all-pastel palettes because they tend to look better on the pale and fair-haired, with light eyes. 
But you guys chose, so I'm going to show you how I'd work with a palette like this!

First, some tips for working with pastel shadows:
  • Clean up your lower waterline with a light pencil. Pale shadows can make your eyes look less white. This helps to reverse it.
  • If your eye contours are not very defined, shimmery pastels can make your lids look puffy and swollen. Don't apply these pale colors any higher than the hollow of the socket line. The best thing is to add a matte dark definer shade (like dark grey in this case) to the socket line to add some definition back.
  • Apply LOTS of mascara or wear wispy false lashes that aren't too heavy and dense. Pale shadows work well when paired with long lashes, but if you apply too heavy a set of falsies, you just weigh the entire look down.

Givenchy Le Prisme Yeux Quatuor 73 Pastel Model swatches

Texture:
The shades in this palette are very pale and translucent, as you can see in the swatch image. So it's best to apply them over a base so the color holds and intensifies.


Givenchy Magic Khol 7

I used a nice beige-brown metallic pencil (Givenchy No 7) as a base and that worked beautifully. Use any matte or metallic neutral beige-toned base. 


Instead of just applying the shadows directly, it helps to start with a nice soft neutral beige-brown base. The brown will not show up under the shadows but it helps to anchor the pigments.


Green pencil used was a Catrice pencil 060 Don't Be Mean To Green


For the pale green shade, do the reverse and concentrate most of the pigments on the inner corners, fading out along the lash line. This creates a nice ombre-green effect from light to dark.


Make sure you curl your lashes well. the higher and more doll-like they are, the better!

You can keep things as is if you like the softer look, but I personally want more definition along the socket, so I added a dark charcoal grey shadow very lightly.


Instead of applying it heavily into the outer corners of the eyes, I started slightly inside along the socket. The grey doesn't touch the outer corners, which keeps the overall look light and the eye shape more rounded and doll-like. Make sure the color fades away as you move inwards.


On the rest of the face, I kept the colors very soft and marshmallowy as well. 
This is not the sort of look that goes too nicely with a bright red lip, etc. The colors are soft, but the contrasting multi-colored hues are still the main focus, so keep the rest of your makeup soft or they will overpower all the pretty pastels.

Givenchy Le Rouge 102 Beige Plume

Instead of going too matchy-matchy with pink cheeks, lids, AND lips, I used a warmer pink blush and kept the lips a warm nude, and the peach-pink undertone still ties in nicely with the eye colors.
Pastel makeup look

Givenchy Products Used:
  1. Teint Couture foundation
  2. Le Prisme Visage Mat powder in 83 Peach Plumetis
  3. Magic Kohl 7
  4. Le Prisme Yeux Quatuor 73 Pastel Model
  5. Le Rouge 102 Beige Plume
  6. Noir Couture Mascara in black


Other Products Used:
  1. Concealer where needed. I used Benefit Fake Up.
  2. I cleaned up my waterline with a matte beige pencil from Nars called Rue Bonaparte. This helps to brighten up the eyes and balance out the lower lids with the pale colors on the upper ones.
  3. The key things I used for this eye look included a medium green pencil 060 from Catrice.
  4. For more definition or to transform the look from Day to Night, you can add a darker matte grey shade to the socket line using a small pointed pencil brush. I used Coastal Scents Burnished Brunette. It looks a bit like MAC Print.
  5. Physicians Formula Sexy Booster Blush for a light warm-pink cheek glow.

Tuesday, December 3, 2013

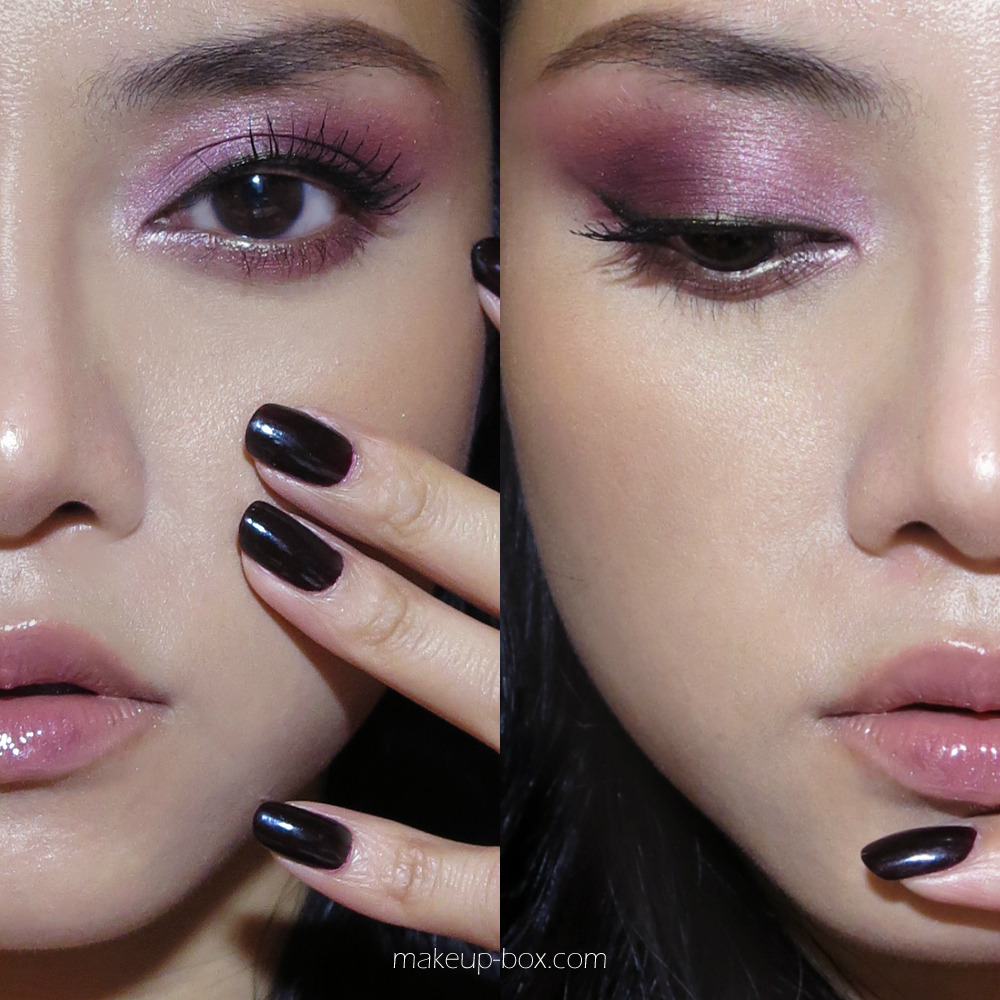
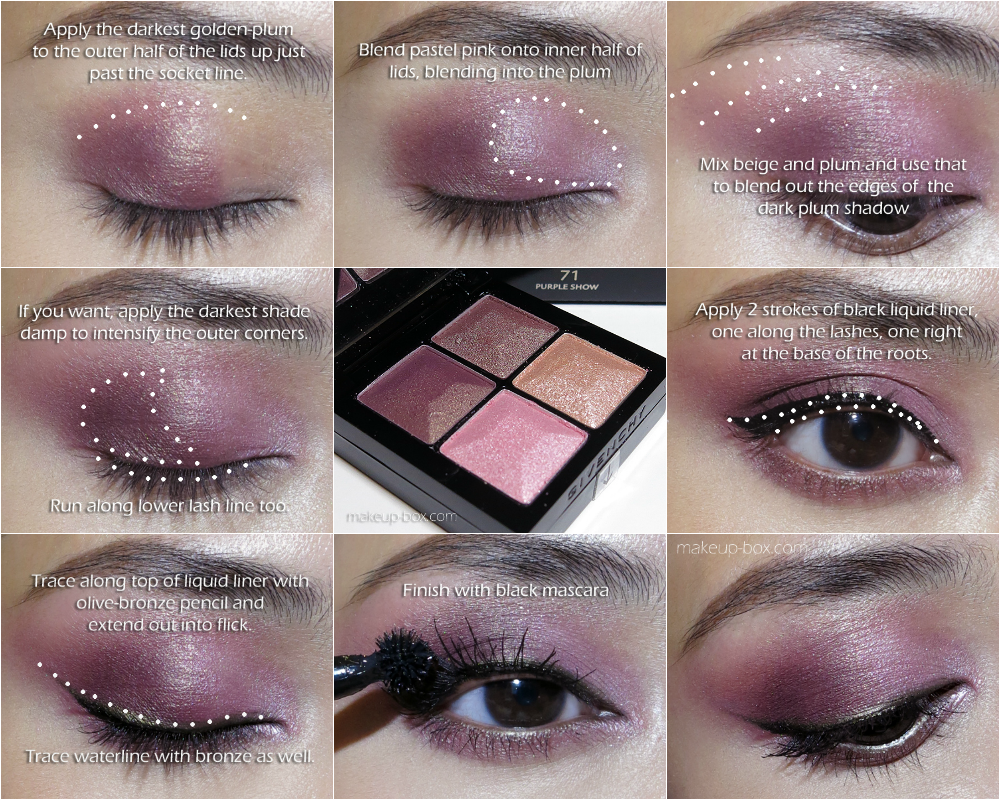
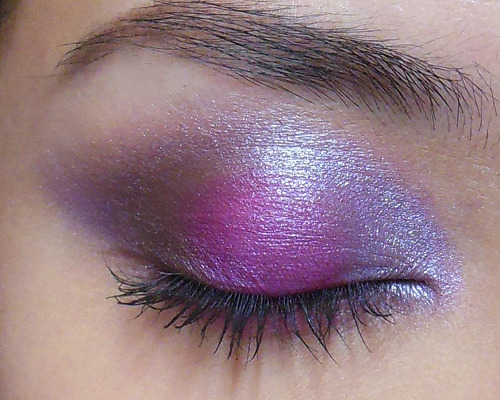
"Midnight Rose" Tutorial (Dramatic Pink/Plum Smoky Eyes using Givenchy Le Prisme Yeux 71 Purple Show)

Rosy pink tones are not typical colors for the eyes, because it can go so wrong and make your eyes look tired and swollen. Do it right, and it can be pretty and dramatic with a slight “goth”/gothic feel.

Here are a few tips:
  • Make sure you conceal any unevenness and redness in your skin. Rosy shadows will bring those out, and make them more obvious. 
  • Blend a rose colored shadow with softer, more pastel tones AND make sure you ground it with dark definition at the lash line. 
  • One other trick is to use a bit of liner in a contrasting tone (I used an olive-bronze pencil since there are so many red tones and green is on the opposite end of the color wheel). A brown or plum pencil complements the rosy shadows better but they would fade right into the background instead of standing out.
  • Pair it with soft blush and neutral/nude lips. Rose everywhere can look quite scary and over the top.

Products used:
  1. Foundation: Makeon Chokchok Shining BB Cushion (smoothed on with fingers)
  2. Concealer: MAC Studiofinish Concealer in NW20
  3. Powder: Bourjois Poudre de Riz de Java
  4. Contouring: The Body Shop Matte Bronzer 01
  5. Blush: Benefit Rockateur (I keep using this recently; it goes great with most looks…)
  6. Eyeshadows: Givenchy Le Prisme Yeux Quatuor in 71 Purple Show (it says purple, but the colors are more rosy-plum)
  7. Liquid liner: Givenchy Parad’eyes Liner in 1 Dream in Black
  8. Pencil: Givenchy Magic Khôl in 5 Bronze
  9. Mascara: Givenchy Phenomen’eyes Waterproof in 1 Water Black (this is fantastic for very separated wispy looking lashes and good lift because it catches every lash)
  10. Lipstick: The Body Shop Colour Crush lipstick in 220
  11. Lipgloss: Clinique Long Last Glosswear in 18 Mystic (a purple grape). This was applied just around the center of the lips for some dimension. 
  12. On nails: Lancôme Rouge Reglisse, which is a dark blood/red but looks black here.)

Saturday, November 9, 2013

Pink or Black? Shu Uemura Holiday 2013 Pink and Black Palette tutorials

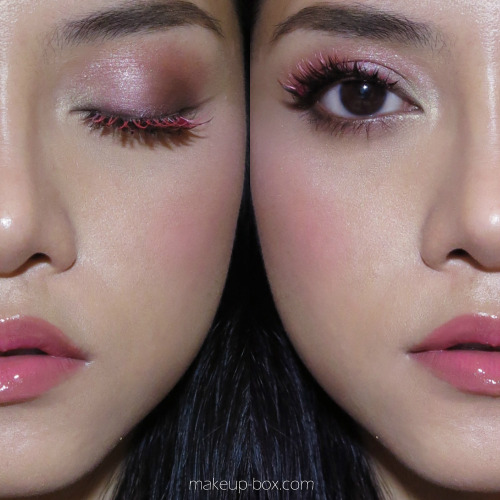
Shu Uemura Holiday 2013 Face/Off: Pink Princess vs Black Princess looks
When we first saw the anime-inspired Pink/Black-split collection from Shu Uemura's 6 Heart Princess collaboration with artist Takashi Murakami, it was a natural to start thinking of doing pink vs black princess looks.

I've done just that, and you can choose for yourself which suits you more! (Or just go for both since the collection celebrates the duality in all women anyway. Full swatches and close-ups of the limited edition collection, including 5 lip and cheek creams and 2 pairs of premium lashes, are available here!


Shu Uemura 6 Heart Princess Heart-full Pink Parallel Palette makeup
To view the Pink Princess palette and tutorial, click here.
http://www.makeup-box.com/post/65950065810/shu-uemura-pink-princess-look-6-heart-princess

Shu Uemura 6 Heart Princess Enchanted Black Parallel makeup look
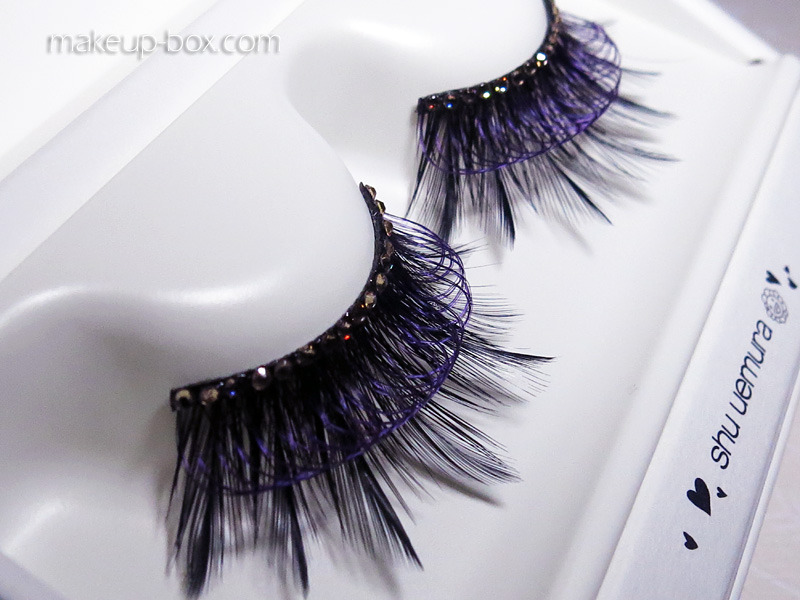
The Black Princess look isn't as dramatic as it should be, because I used Katy Perry Ka-Pow lashes instead of the jeweled, feathered, cobweb-like premium set from the collection. (They were too large to fit my eyes, and I wasn't about to cut up $125/pair lashes.)

Shu Uemura 6 Heart Princess "Black Jewel on Wing" premium lashes
This post will be updated with a link to the full Black Princess makeup tutorial shortly!

Monday, May 27, 2013

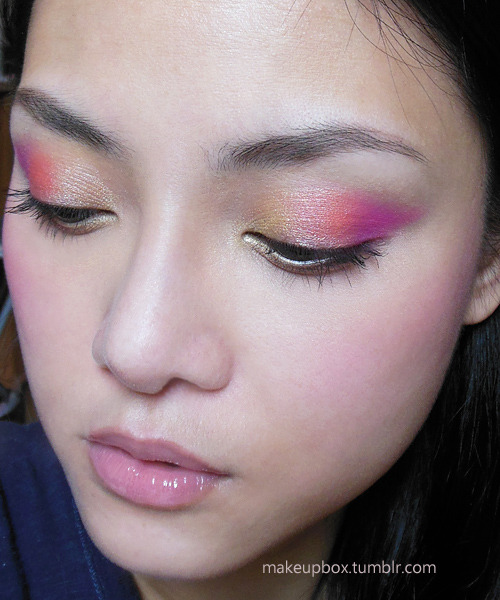
The Summer Wing: Easy Gold, Coral and Neon-Pink Winged Eyes


This is an easy gradient winged eye and actually more flattering than you might think neon pink shadow would be.
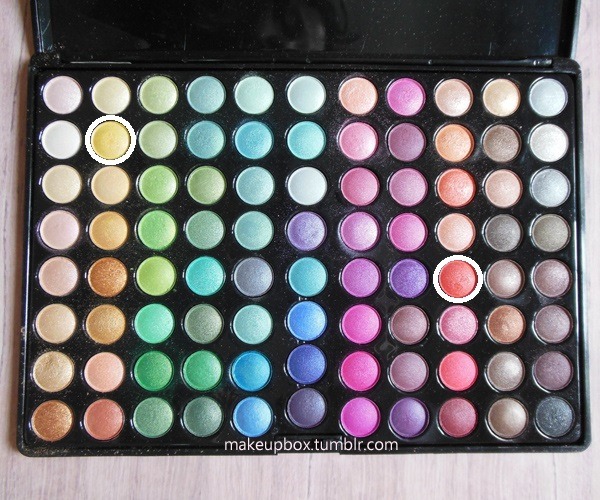
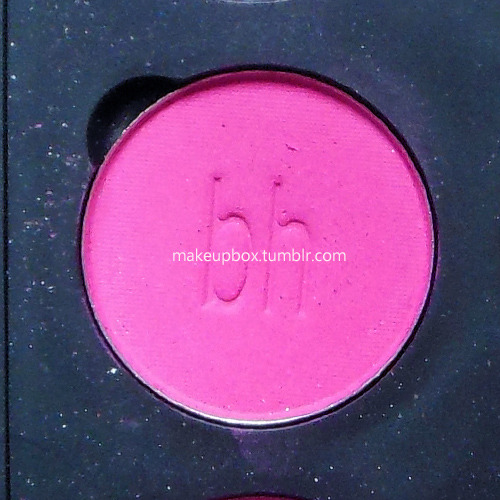
The 3 main shades are yellow, coral, and fuchsia, but the key to the look is that I used 2 shimmers in the 88 Shimmer palette for the yellow and coral, then switched to a matte neon pink (BH Cosmetics WM20) at the outer corners. 
This creates more strength to the look, although you can also use one of the fuchsias in the shimmer palette if you want to save the trouble. A matte is just more flattering when you're wearing a neon pink on the lids, in my opinion.

Friday, April 12, 2013

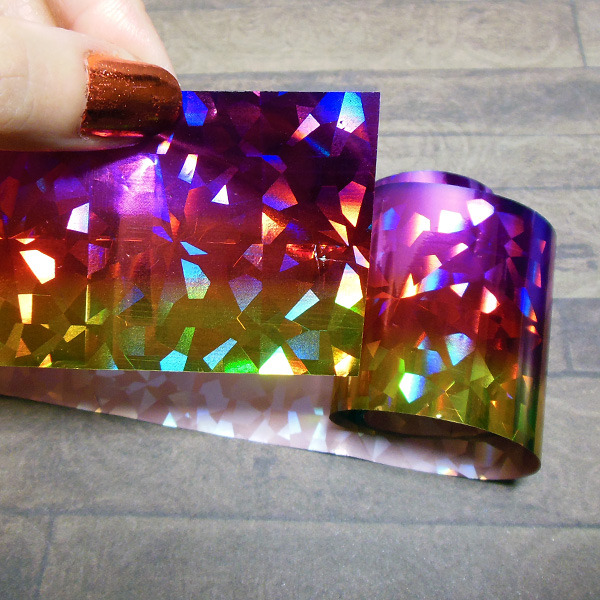
Holographia: Dramatic Foiled Ombre Lids (Yellow-red-pink) with Transfer Foil!


Transfer foils were created for arts and crafts. Then some genius decided to use it on nails. Not long after, some people thought it might be a good idea to attempt it on the lips.
(That didn't go too well, because while it looked cool when it was done perfectly - a la Katy Perry - very few people ever managed to do it perfectly. Tons of women ended up with disappointing patchy, cracked-looking lips.)
Since I've got tons of foil (I buy mine from dollarnailart.com), I naturally wondered about using it for other things. It is BRILLIANT as a dramatic transfer tattoo on the body, But what about the eyes?

The Adhesive:
While there isn't anything harmful about applying the water-based nail foil adhesive onto your hands and body in general, applying it to the eye was another thing altogether. Because companies are so hush-hush about the ingredients of their glues, I could only guess at what ingredients Shizzle Lips and Glitzy Lips used in their "lip approved" skin-safe glues and whether they were mostly similar to nail foil glues.
You only need to know that you can use lash adhesive (if you have a strong and thick formula like Duo, add a tiny drop of water to thin it out before applying with a brush or it will be too hard to spread nicely).

 
The Foils:
It's the same thing no matter where you buy it from. These are layers of reflective or holographic ink that isn't toxic or reactive in their dry state. Whether you pay $1 at Dollarnailart.com or $29.90 for Glitzy Lips, it is EXACTLY THE SAME THING and they work the same way.
The strip I chose was unfortunately part of a jumbo pack from eBay, which doesn't have a name or number. You can substitute any other color foil though I recommend a strip that has a similar ombre gradient if you want the same effect I got. At dollarnailart.com, a similar alternative would be Wrapping Paper or Wildberry Splash.


Thursday, March 7, 2013

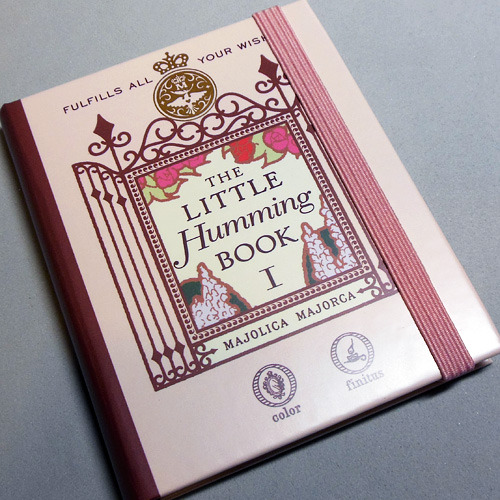
Majolica Majorca Humming Book I (Swatches, Review, 2 Easy Looks and how to dupe the product!)


I think Majolica Majorca has fabulously silky and pigmented eyeshadows. But I'm not a fan of palettes where there are a mixture of cream and powder products. Creams have different shelf lives from powders and the lip cream is most likely going to go bad before the other stuff. Also, when powder gets into cream and vice versa, everything gets ruined. 

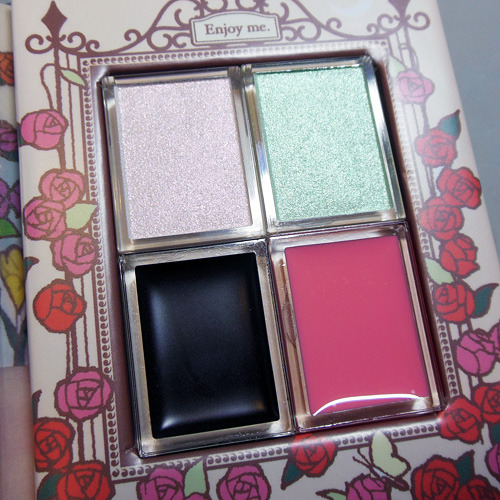
BUT, when I saw this charming little "song book" in their latest limited edition collection and tested the 3 shadows (1 cream base and 2 shadows) alone and over one another, I concluded it was so brilliant I had to pick one up.

 
Concept:
The collection is centered around a dreamy, lyrical flower garden, and the combination of shades gives you exactly that sort of look. Now you CAN possibly use each of the colors alone, but I personally wouldn't do that. 
Alone, the 2 pale shadows can look a little washed out and not flattering if you don't have a very defined and deep socket. The cream base on its own, does not set and will shift, smear, and crease. The genius is in the combination when the pale duochrome shadows hit that dark blackened plum. You get the most beautiful soft-focus pearl finish.
The petal-pink lip gloss I couldn't care less about. It looks nice in the pan but applies streaky, lacks pigmentation, isn't flattering on its own, and all in all, you're better off getting Revlon Lip Butter in Strawberry Shortcake.

Saturday, January 26, 2013

Twilight-Bloom: Intense Pink, Lavender and Cocoa Eyeshadow Tutorial (88 Shimmer Palette)


This color combination just reminded me of some exotic, poisonous bloom surrounded by dark woods.

 Good for:
  • All eye colors
  • Medium-fair to Dark skintones
  • Double-lids (it could still work for some mono-lids if you have quite a bit of lid space, but otherwise it might not be as flattering)
  • Those with little lines/dryness around the eye area (those with more mature skin can swop to completely-matte shades in similar colors)

You will need:
  • A brown base (pencil, cream shadow or gel liner would work)
  • A rich hot-pink or fuchsia shadow 
  • A medium lavender
  • A deep chocolate brown
  • Mascara


Step 1: First use your finger to apply a light layer of brown base over the entire lid. Don't blend it out too far or pack it on too thick. It's just meant to deepen and provide an adhesive base to the colors.


Step 2: Pack the intense hot pink onto the center of the lid, right in the middle of the brown base. 


Step 3: Using the same brush, just flip to the other side and pick up some of the lavender. Pack that onto the inner 1/3 of the lid, beside the pink, and then sweep it lightly up along the arc of the socket line, to the center of the eye. (If you have mono or hooded lids, leave out the lavender upward-arc.)


Step 3: To add some definition and contour, use a dark brown on the outer 1/3 of the lids, and then follow the socket line once again, arcing inwards to the center of the eye.
On the lower lash line, run a little of the fuchsia shade along the lash line, keeping it soft and hazy. (If you want a less dramatic look, leave this out or use the brown instead of pink.) 


Step 4: Finish by picking up a little of the lavender from earlier and then using that to extend the outer edges of the brown into a very soft wing. Be very light-handed with this. If you want the look to be a little more subtle, leave out this step.


Step 5: [Optional] Line the lower lash line with brown. This gives definition if you are used to lining your lower lash line. You don't need to. Leaving this step out keeps the look more hazy and dreamy. 

Saturday, March 31, 2012

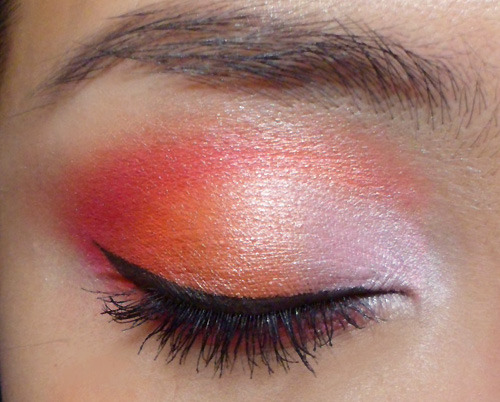
Tangerine Cocktail: Pink and Coral Spring Eyeshadow (120 Palette 2nd Edition)


Orange and coral is not a shade most people will want to wear on their eyes, but when you pair it with a pastel amd a deeper fuchsia it just looks so tropical, fresh and fun.
I haven't been giving my 120 palette much love recently, so I decided to whip it out since it has so many shade options. You don't have to have a 120 palette or the same one to do this look. You just need a:
  • pale pink
  • bright orange
  • warm coral (red-orange)
  • deep magenta pink

Step 1: Pack the pale pink in the inner third of the lids.

Step 2: Apply a bright range down the center of the lids, and then curve inwards along the socket line to hug the pale pink and define your eye contours.

Step 3: Apply a deeper coral-orange in the outer parts of the lids and then run inwards along the socket line, above the bright orange applied earlier. 

Step 4: Apply a deep magenta pink in the outer corners and sweep up along the outermost arch of the socket line. The magenta will look fuchsia over the bright orange, which is the effect you want. (If you use a fuchsia it will just look coral.)

Step 5: Run the magenta along the outer halves of the lower lash line as well, to tie the colors together.

Step 6: Use a black gel liner and run it along the upper lash line, as long as along the water line, ending it in a slight flick.

Finish with mascara!

Wednesday, March 28, 2012

Cotton Candy and Chocolate: Defined Pastel Makeup Tutorial (using I Nuovi Dusts)


Pastels are all over the place this season. But more of us love pastels than pastels love us, as it's not always the most flattering color-group to wear around the eyes for those with high-color (dark hair, darker skins, etc) and flatter eye contours.
For this eye look, I'm using pastels that are so pale they are almost icy, and the application is actually very straightforward, as it hinges mainly on the chocolate powder liner to bring everything together. 
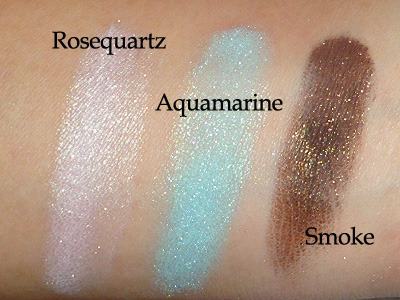
You just need to arm yourself with eye shadow shades similar to the ones swatched above. It doesn't matter if it comes in loose or pressed form.


  • Pale pink
  • Pale Turquoise
  • Deep chocolate brown

Step 1: The thick winged liner. This is MUCH easier to do with powder shadow than with gel or liquid, and you just need a firm angled brush to stroke from outside in, to gently create the wing. There are many brown shadows around, but pick a shade that is matte or semi-matte, to stand out against the pastels better.
---

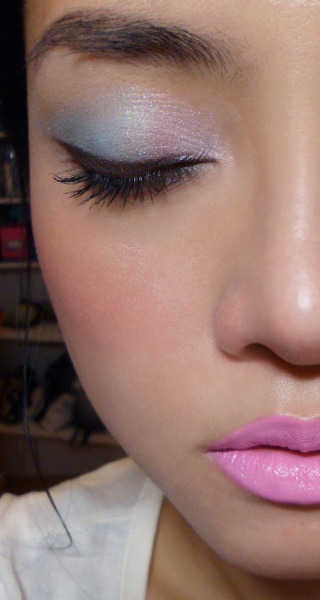
Step 2: Layer  a pale turquoise shadow over the outer half of your lids. Then repeat using the pink on the inner halves, extending down around the inner corners slightly to brighten the eye area.

Step 3: Finish by applying another layer of brown shadow thinly as a liner at the lash line. This gives the brown more depth close to the lashes, while the bit that has pastel blue and pink shadows layered over it has a bit of sheen.
Then finish with black mascara on top and bottom lashes.


On the cheeks, go for a hot pink blush instead of a pastel. This keeps everything edgy instead of being just pastel everywhere. I used Shu Uemura P Red 14 Blush but any intense pink will do.
On the lips, go with a blue-based pink like Great Pink Planet (what I wore here) or Saint Germain (left-most swatches) to go with the shadows!