Showing posts with label stained lips. Show all posts

Monday, October 26, 2015

Fall Makeup Tips and FOTD featuring MAC Viva Glam III and Moonshot Jelly Pot in P08 Cafe Con Leche


Tempted by all the dark, lush Fall tones of rich brown, rust, and brick red, but worried that they're too dramatic?

Here's my favorite way to channel the Fall mood and pair all these rich, warm brown-laced colors together without everything becoming too vampy or over the top for the day.

1. Sheer out a dark lip shade

Often in Fall, brands start releasing beautiful rich, deep lip colors. Nothing says Fall more than a beautiful brown-red, berry or plum colored lip. It's posh and chic and dressy, but not as loud as red or as vampy as a full-on noir shade.

One trick is not to go TOO brown as it can make your entire face look quite drab and washed out when paired with brown-toned eyes and dark Fall clothes. Dab a little of the color on the back of your hand with your finger and see if it sheers out to a reddish or plummy tone. If all is you see brown, it's TOO brown.
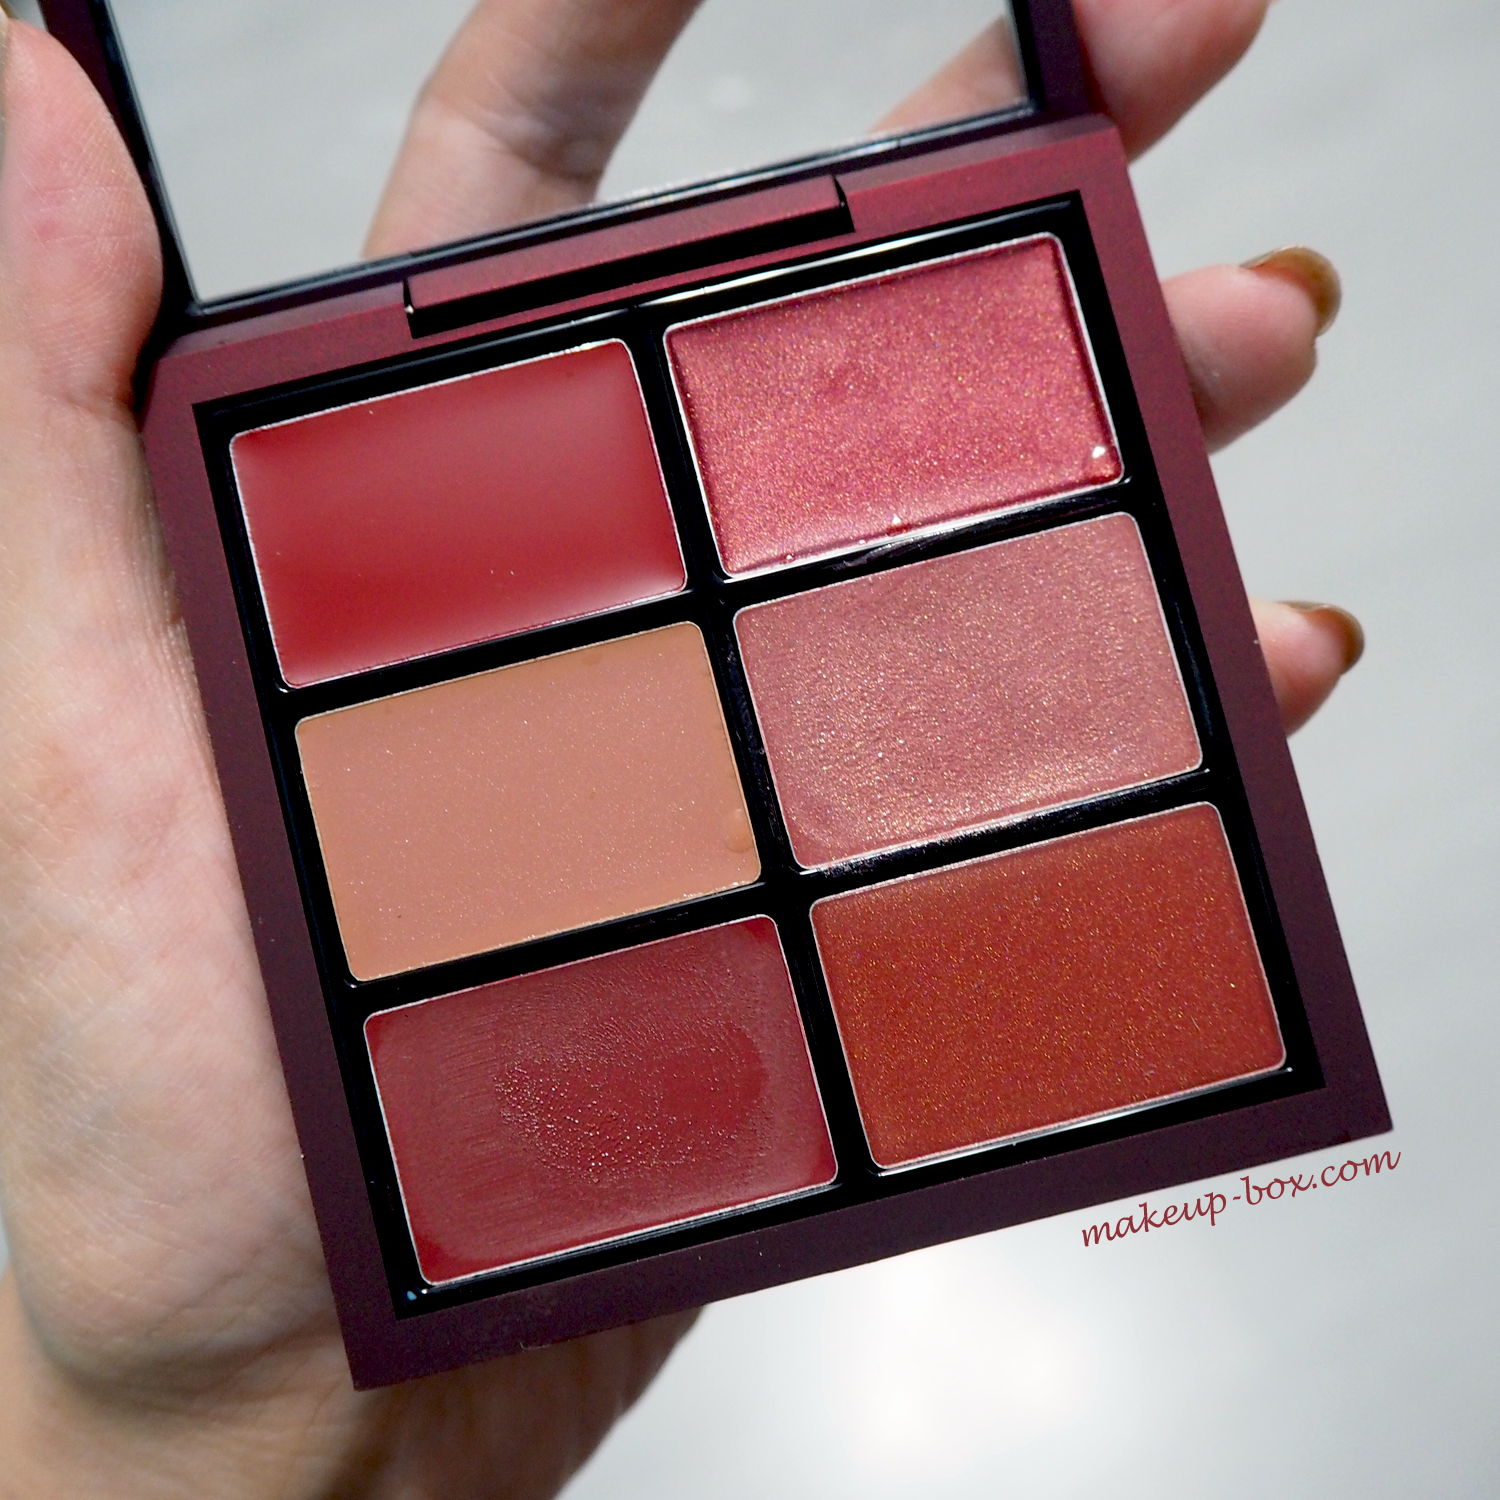


I used MAC's classic Viva Glam III (the darkest shade on the bottom left) for the look above. It has the potential to look very vampy, but sheered out, it is just a lovely raisiny red-brown that looks pretty, not severe.

Simply dab on the color with a finger and then apply clear lip balm over your lips to add a little sheen and to even out the color.

2. Go for a smoky eye in a softer, metallic shade of brown

Black liner and mascara is the easy way to do your eyes for dark lips. But it can often look very severe, especially for girls who like to draw very thick liner.

A smoky hazy eye look in a soft brown is much more romantic and dreamy. Instead of going for a typical dark smoky eye color, pick colors that are 1-2 tones lighter, like Moonshot's Jelly Pot in P08 Cafe Con Leche below. Medium-toned metallics are dimensional enough that you only need one shade to look like you applied 2-3 colors. Great for a low-maintenance eye that you can throw on quickly.
  • Make sure you blend out the edges and there aren't any hard lines.
  • If your eyes do not tilt downward too much at the outer corners, you can run a tiny bit along the outer half of your lower lashes to create that smoky dreamy effect.
  • If you need definition and want to wear liner, use pencil and try to smudge it out lightly with a ring finger so it is not one hard black line.


3. Don't use brown-toned or very shimmery blush

It might seem to make sense to match your blush to your lip and eye colors, but not everyone suits that severe monochrome look with brown eyes, brown lips, brown cheeks.

Skip the brown-toned blushes unless you have caramel to dark skin. Often it's more flattering to inject a tiny bit of soft color to your face with a neutral peachy-pink blush when you are wearing brown tones on lips and eyes.

Just don't pick a shade that's so bright - or apply so much - that it is obviously clashing against the rest of your makeup. The blush is there so you don't look too corpse-like. Not to make a statement in itself. 

This is also the one time I would not go with a very metallic or shimmery blush. A satin or matte shade would look much better. Otherwise it just detracts from the overall look and you will have too much going on on your face.


Tuesday, May 19, 2015

A quick FOTD tutorial: stained coral pink lips and soft lids


Shared a simple FOTD on Instagram and Dayre and was requested to do a tutorial on the look, so here it is!

It's really all about bright "stained" lips, and the eyes are kept quite soft so that the lips can be the focus. And I call them stained lips because they're quite translucent and soft, like you applied a strong color and then blotted it away a bit. It's not ombre lips where the lip color is a different tone in the center or between the upper and lower lips. 

You can do this with pretty much any strong lip color  that you don't want to apply full-on. The only color that wouldn't work for this sort of look would be those dark, almost-black purples. Those would sheer out quite grey and deathly because there isn't enough red or pink undertones in them.


Because we're working with metallics, it's always a good idea to prime the lids well. A good base catches onto shimmery pigments and brings out the intensity and shine.


For the shadow color, try any beige-golden champagne tone like MAC Naked Lunch, Tan pigment, The Balm Mary Lou Manizer highlighter if you are pale, etc. I'm using that bronze-beige pigment which is from the now-defunct brand I Nuovi. But this sort of color is easy to find.


Good brown transition colors like MAC Omega, etc are great. I used a Body Shop shadow called 215 Coconuts About You, which is affordable and a fantastic taupe transition color for the socket. If you have small lids or eyes and apply a shimmery beige all over, it can make your eyes look flat and smaller than they really are, so it's important to add definition back.


Here I simply applied a stroke of Mary Lou Manizer frmo The Balm down the center of my lid with my finger. This way of having a darker shade, and a lighter shade helps to re-establish that 3D contoured look of the eye. 


I used Benefit They're Real mascara and Innisfree Gel Liner pencil in No 9 for the final bit of definition around the lash line. Again, this just helps to add some strength back to the eyes. Pale soft colors can really wash out your features. 


The final effect you want is that of gleaming lids. As if your eye lids were slightly wet/dewy. You don't want the focus to be on the color of your shadow or the strength of your eyeliner.


Next the lips! I'm using OCC's Lip Tar Stained Gloss in New Wave, a bright neon warm pink. And the trick to a long-lasting stained lip is to have layer of nude pencil (I used Make Up Store Nude Beauty) beneath as a base.


This step is optional but I actually often apply a taupe/grey pencil (a brow pencil is perfect) right along the outer edges of the lip to expand them slightly. This works better than using a nude or a colored lip liner, in my opinion, because what you want to do is create that "shadow" that appears on the edges when someone has naturally curved, pouty lips.


The actual color I dab on evenly with a finger, and remove any access. You are aiming to stain the lip liner beneath and create a rose-buddy, soft effect. Not apply a thick coat of color. (That's a nice look too but that's not what this tutorial is about.)


Then to finish I wanted a blush that had similar rosy, warm, and tawny tones in it, so I went for Givenchy's Le Prisme blush 22 Vintage Pink.


Sunday, May 5, 2013

Jelly Ombre Lip and Big Doll Lashes (feat. Shu Uemura Gloss Unlimited)

Huge lashes, lavender cheeks, and a berry-stained "jelly" lip!

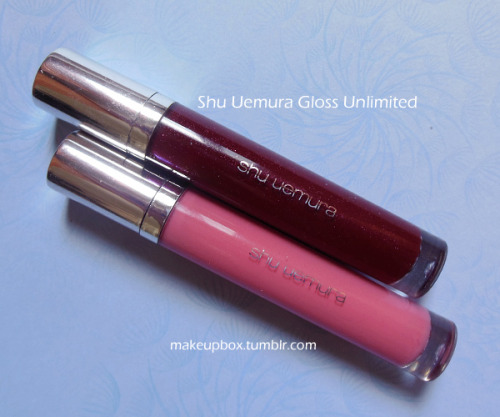
Shu Uemura Gloss Unlimited in WN 20 S (top), PK 70 C (bottom)
Apparently, two-toned lips are in this season. (Apparently, I've been doing them for 2 years while they were completely out of fashion; boohoo...) I don't usually use glosses to do ombre lips, because there usually isn't enough of a visual contrast. But when I saw a very dark shimmery wine shade in the Shu Uemura Gloss Unlimited range, I immediately thought "stained jelly lips!"


The Lips
In the grand tradition of the great Uemura-san himself, I swopped things around and did my lips before my eyes. Uemura believed a lip color could be applied first and thereafter be the deciding factor for the eye and cheek makeup you choose.)

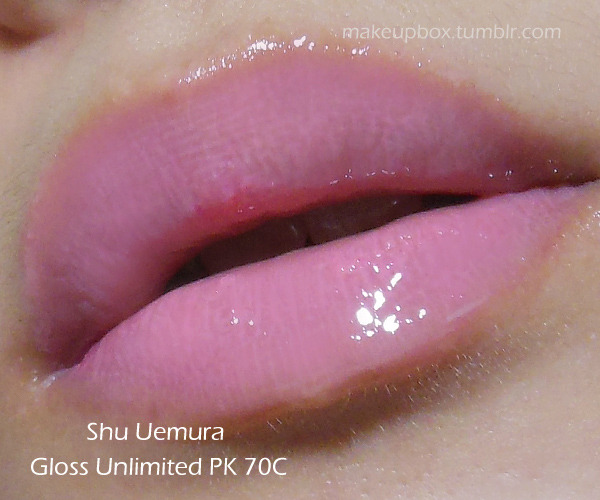
Step 1: I applied a soft beige pink, PK 70 C (translates to "Pink 70 Cream" for you and me) over the lips. (Try MAC's Please Me Lipglass if you can't find this in your country.)


Shu Uemura Gloss Unlimited in PK 70 C
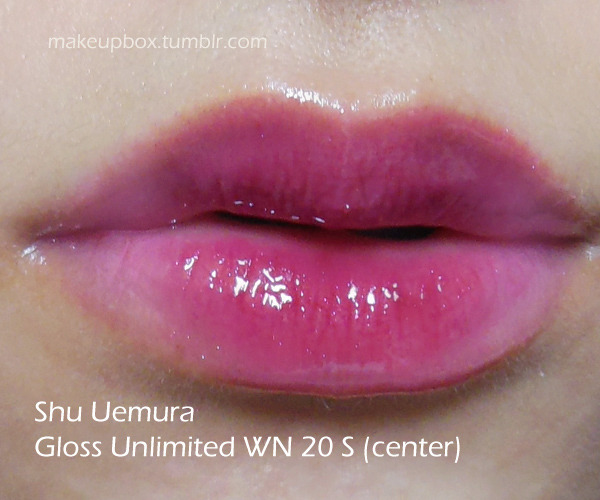
Step 2: Next, I applied a deep berry gloss (you need to use something quite pigmented or it won't have this level of contrast) WN 20 S (translates to "Wine 20 Shimmer"). (Try MAC's Desire or Rebel Lipglass if you can't find this.) 
Shu Uemura Gloss Unlimited in WN 20 S
*The US range seems to be slightly different from Asia (is anyone seeing a recurring pattern here???) so I listed alternatives with a similar color if not the same texture.

---

The Eyes
The modus operandi is "doll-like". Rounded, widened, with huge lashes. You can apply lower lashes if you want, but this isn't meant to be a super-dramatic look, so I skipped that.
image
 Step 1: To create a rounded eye shape, I used the 88 Warm Palette and mixed up a few of the medium browns just to create a warm matte tone that's about 2-3 shades darker than my skin color. This I applied to the entire lid in a rounded shape, blending upwards almost to the brow near the center.
Then on the inner corners, I applied a little pale beige.

image

Step 2: Line your lower eye rim with a pale yellow liner like NYX Yellow. Next, use a dark grey or charcoal pencil to create definition and emphasize a rounded shape. You want to line it such that it's thick at the center of the eye, and then tapered to a thin point at both ends.
On the lower lash line, run the charcoal pencil along the outer half of the eyes, making it thicker at the outside.

image

Step 3: Here's one trick to easier eyelash application. Apply the glue directly along your lash line. This can be done if you're using one of the brush-applicator lash glues, or with a liner brush if you're using regular tube glue.

image
Step 4: Apply long, dramatic clustered lashes (I used Red Cherry #16s) and push them up at the center of the eye for doll eye.


The Cheeks
I wanted a "glowy" sort of effect to go with the eyes and lips, so I used a lavender blush (MAC Full of Joy just on the upper areas of the apples and up long the cheekbones.


Why don't you pick a lip and then decide your makeup today? ;)