Showing posts with label 12 hour eyeshadow. Show all posts

Thursday, July 28, 2011

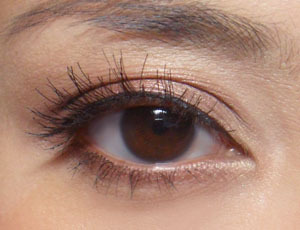
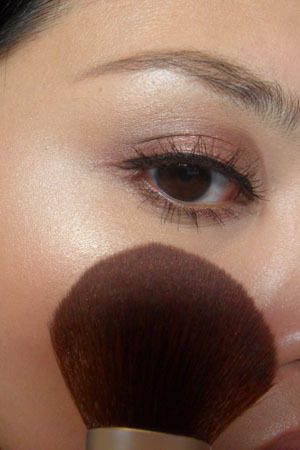
Lusterleaf Kitten Eye with Double-Lashes


When you wear a pale wash of color over the lids, it is very important to keep your lash line very dark and defined or your eyes could just "disappear".

If you want to keep the drama but aren't that great with lots of color and shading techniques, dramatic lashes are the way to go. You have the option of applying big, thick Showgirl-esque falsies like those below (I'm personally not a fan of that look, but I guess it shades your eyes from the glare during the day), or else stacking two sets of wispier lashes for a full but soft look.


A lot of celebrities wear double-lashes by gluing two strips together so they are extra thick. 
But I'd like to recommend a third option if you have time to spare; Pairing a strip with individual clusters.
---

Step 1: I applied a golden-green base to the lids. I have an ancient tube of MAC Paint lying around, but I don't think you can get that anymore. Try Moss Scape Paint Pot for a very similar effect.

Step 2: To add some dimension, I applied soft matte brown to the outer half of the socket line.

Step 3: Finish the lid by dusting a glimmering mint-green shadow over the remainder of the lid. I used MAC Lusterleaf, a pale green Lustre shadow. The base helps to minimize fall-out as Lustres are pretty much fine mineral flecks pressed together, and don't adhere as well as the usual powder shadows.

Step 4: As a base for the lash strip, I applied a black liquid liner to the lid and ended in a subtle flick. Then curl your upper lashes well to prep for the next step.

Step 5: Apply a strip of wispy lashes (by that I mean the lash strands are not closely packed together but loose and more natural looking) right above the lash line.

Step 6: Now the interesting part. Pick up individual clusters with a tweezer and dip the top-sides of the knots into lash glue. Let them dry for at least 30 seconds so they get tacky. 
You are going to glue them on from UNDER your lashes, onto your tide lines, at the base of your lash roots. After placing, let set for a few seconds, then gently push upwards to make sure they curve up at the same angle as your real lashes.
**Skip the full strip on the top and just do individual clusters under your lashes for a super-natural look. People won't see the clusters that way, and you won't need to wear liquid liner to hide the knots.

Final Look: Your lash line should be very dark and your lashes full without the eyes looking weighed down by an overly-heavy strip of lashes on the top.

Wednesday, July 13, 2011

Multi-tasking: Revlon Colorstay 12 Hour Shadow #01 Copper Spice


Revlon Colorstay Shadows are a bit of a hit-and-miss with me because I find they are all one texture. There is no contrast between mattes and shimmer and glitters. All of them are the same satin finish, and you don’t always get great color payoff.
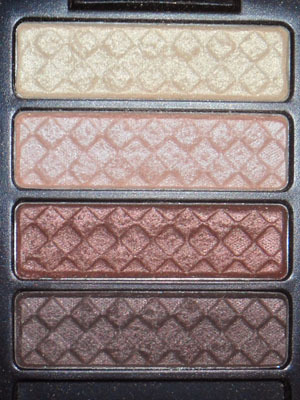
But one of my favorites is Copper Spice, which consists of a champagne, a peach, a coppery-russet, and a dark cocoa. Nude Elements is popular, but I find it a little duller and less flattering than Copper Spice.
But here’s what I do with 3-4 color palettes to get maximum mileage out of the shades.
image
—-
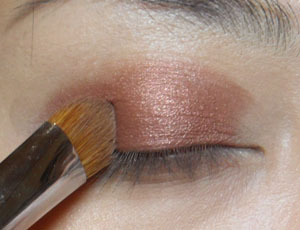
Step 1: Apply the 3rd shade, the coppery-russet, onto the outer 2/3 of the lids. Having a good base and using a flat brush to pack the color on will give you more intensity.
image
—-
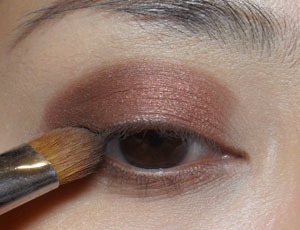
Step 2: Apply the dark cocoa along the lower lash line and outer corners of the upper lids for definition. If you have mono-lids, go ahead and sweep along the hollow of the eye socket a little.
image
—-
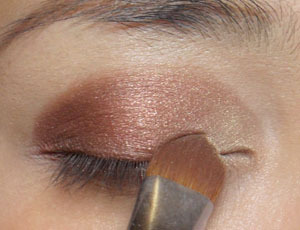
Step 3: Apply the palest champagne-gold to the inner corners of the lids, and downwards on the inner corners of the lower lash line as well. Then use a soft brush to blend out any harsh lines overall.
image
—-
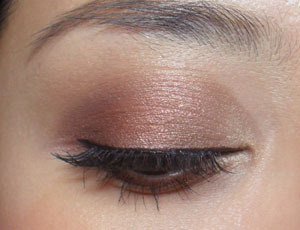
Step 4: Apply black liquid liner to the upper lash line, and then black mascara to top and bottom lashes. Put on fake lashes if you need a little extra oomph. This is a look that transits well between day and night.
image
image
—-
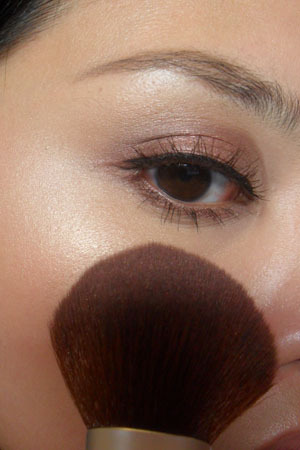
Step 5: Here comes the multi-tasking step you can take with most neutral-to-warm eyeshadow palettes. With a big fluffy brush, apply the two palest highlight shades to your cheekbones as highlighter. (Yes, it doesn’t ALWAYS have to go onto your brow bone. And I DO recommend sticking with one spot, not both, if you don’t want to overdo it.)
This gives a lovely sheen and coordinates with your eye look. 
image