Showing posts with label dramatic makeup. Show all posts

Friday, December 13, 2013

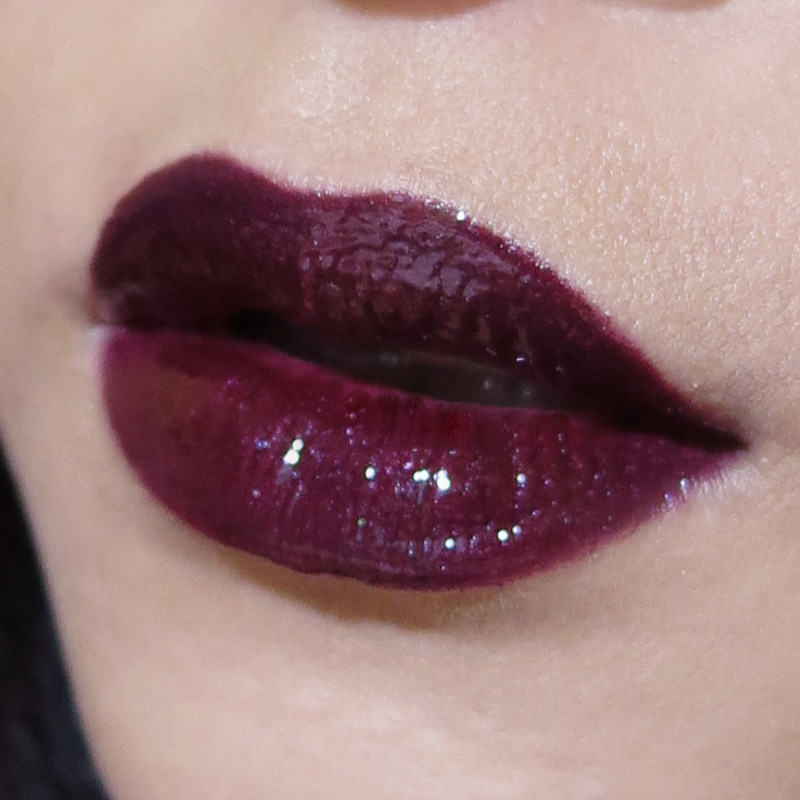
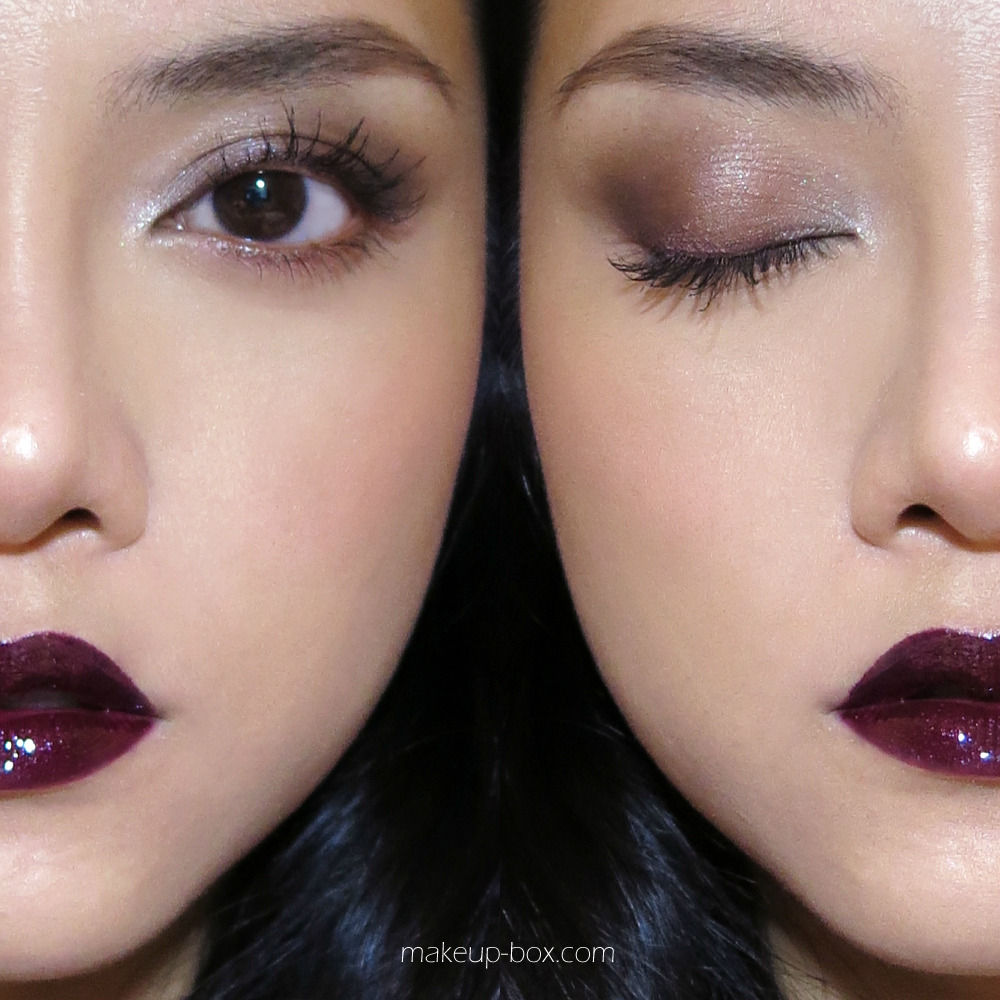
Holiday Look #5: Deep Dark Pleather Plum


A very “noir” look focusing on glossy dark lips that works on any skintone! There are a few tips to wearing monochromatic looks like this.

  • Conceal, conceal, conceal! Dark, monochromatic looks can make uneven skin tone and any redness more obvious.
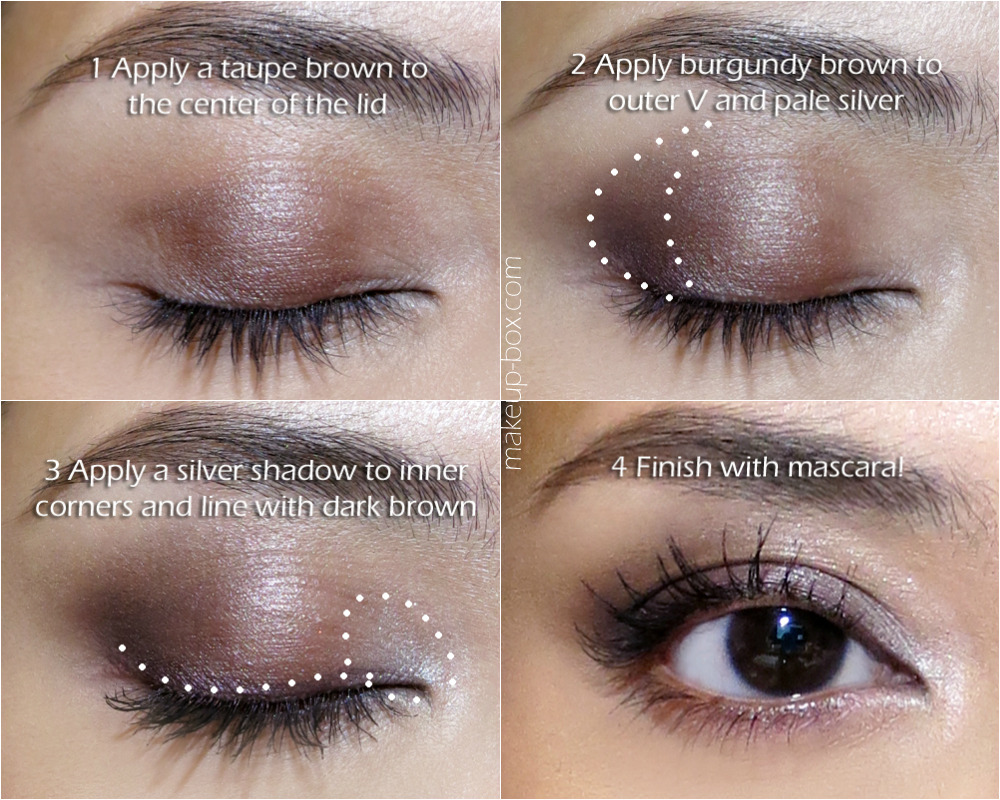
  • Keep the eyes a little softer if you don’t want to look too vampish. I used a soft taupe as the main lid shade and plum only in the outer corners.
  • Wear a brighter blush. Dark monochromatic looks can really drain the face or make you look sallow, so the way to balance it out and stop everything from going completely goth is to use a soft pink blush to add a little sweetness and color to the face
  • Be prepared to touch up! Like a glossy red lip, you will likely need to be careful when wearing a glossy dark lip. Smears, smudges, track marks from your hair getting caught in your lips, you name it.

Product used:

  • Foundation - LANEIGE Snow BB Soothing Cushion SPF 50 No. 21
  • Concealer - MAC Studiofinish concealer NW20
  • Powder - ClearLast Powder in Medicated Ochre
  • Brows - Shu Uemura Hard Formula 9 Pencil in Seal Brown
  • Taupe shadow - MAC Satin Taupe
  • Plum shadow - MAC Rich Core
  • Silver shadow - Lancôme Hypnôse cream shadow in Diamant Argenté
  • Brown/plum liner - Rimmel Exaggerate liner in Perfect Plum
  • Mascara - Lancôme Hypnôse mascara
  • Blush - Benefit Rockateur
  • Plum Lipliner - Make Up Store Jazz
  • Plum gloss - Givenchy Gloss Interdit in 15 Velvet Purple


Deep, dark juicy purple lips with Make Up Store Jazz lipliner and Givenchy Gloss Interdit in Velvet Purple.

Tuesday, June 18, 2013

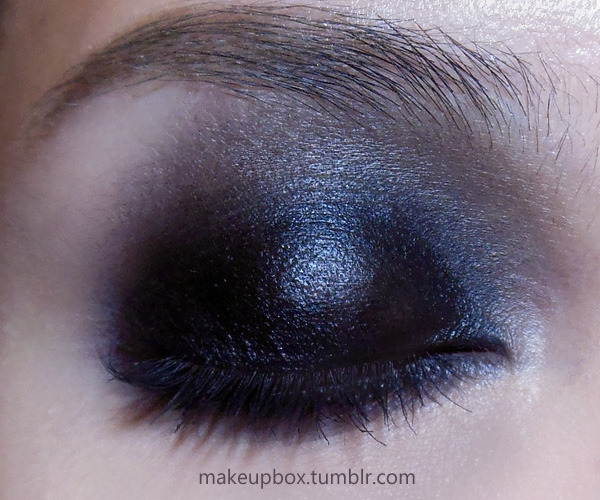
Makeup 101: 3 Common Smoky Eye Shapes to Try!


Everyone can wear a smoky eye. It just takes a little experimentation to find out which shape suits you better.
These are just general guidelines, and you should remember that they will each appear different on different eye shapes. There are also more complicated ways to do smoky eyes. I'm just running you through the basics.
For demo purposes, I'm using black face paint (Snazaroo) and 2 brushes. One synthetic concealer brush to pack on the black, and one dry blending fluff brush (below) for smoking out the black.
For your own looks, you don't need to use black or a facepaint!  You can use black kajal, khol, gel liner, pencil or even a powder shadow. Anything that doesn't set too quickly, since you need time to smoke it out.

Thursday, May 23, 2013

The Most FABULOUS Glitter Liner In The World (Glitter Foil Liner Tutorial)


When you need a whole party on your eyelids, nothing but the most intense glitter liner will do. And what can be more intense of transfer foil?

This is much simpler than the foiled-lid look I did previously, and you can also simplify it further by using a single foil color rather than two like I did. The main item you need to pull this off is a good eyelash glue, like Eye Charm or DUO. (I prefer Eye Charm just because it's cheaper and comes with a convenient eyeliner brush.)

When choosing the foil, I would pick glitter patterns because larger patterns aren't going to show up nicely on a thin strip along your lash line. 
  • I picked a bright green holographic glitter foil from Dollarnailart.com, called Lime Glitter.
  • For the inner half of the lids, I used a bright yellow holographic called Aztec Gold. 

Sunday, February 24, 2013

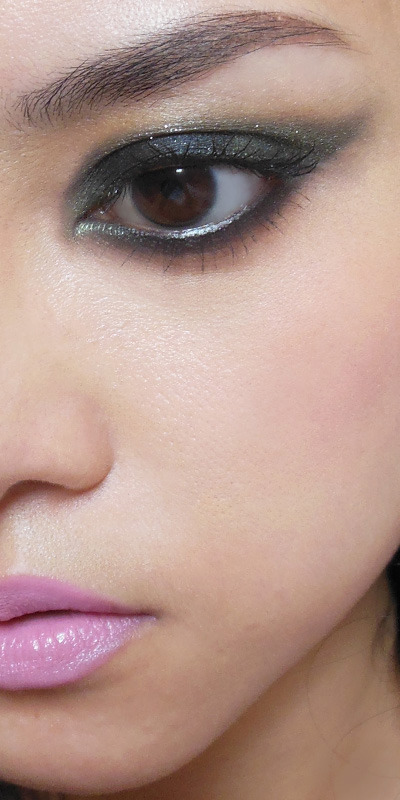
Basic Green/Black Winged Eyes


There's nothing quite as dramatic as a solid winged eye, and the good news is that it isn't actually extremely hard to do as long as you get the basics right.

This look is good for:
  • All eye shapes and any skin/hair/eye color.
I used L'oreal Infallible Shadows in Eternal Black and Permanent Kaki. (I believe this is named differently in the States. You can use any deep khaki green you have.)
You will also need black liner, and mascara. 

Monday, February 11, 2013

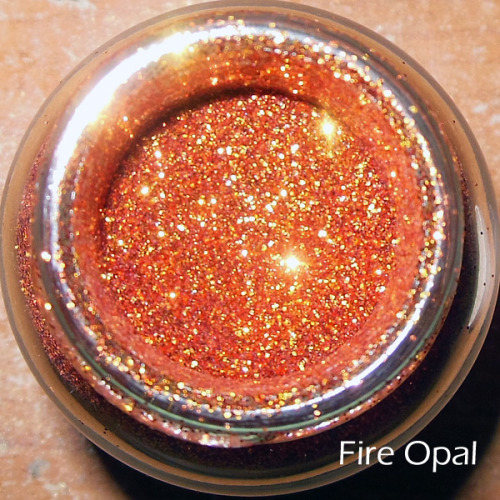
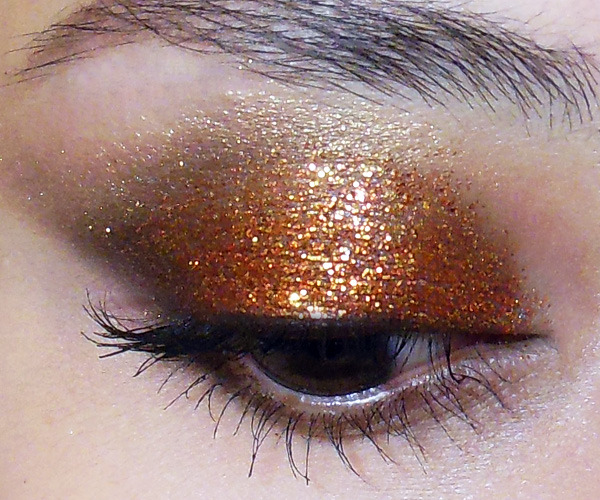
Fire Opal: Sparkly Burnished-Gold Lids (usin Martha Stewart Crafts Glitter!)


I mentioned in an earlier post that I found some of the most gorgeous ultra-fine glitters at the craft store. 
They're from Martha Stewart Crafts, and come in the most beautiful shades. These aren't micro-glitters but they're certainly the same size as most cosmetic grade glitters from brands like MAC and Lime Crime. The best thing is each 1.5oz glass jar costs less than US$10. The shade I'm using today is Fire Opal, a beautiful blend of pale gold and coppery-bronze.
Disclaimer: I'm not encouraging you to pick craft glitters over cosmetic-grade glitters. I personally only choose glitters that are very fine, round-cut and 100% polyester, and I always test to make sure they don't bleed in solvents and on the skin, regardless of whether they are from a makeup brand or a craft store.Always proceed with caution and be your own judge!
--

image


Step 1: First apply a brown base. You can use Maybelline Color Tattoo in Bad to the Bronze, or something like MAC Groundwork. You want to blend slightly past the socket line, and also wing it out at the outer corners, pulling towards the end of the brows.


image

Step 2: While your base has not dried, quickly use a flat brush to pack glitter onto most of the lid, except for the outermost corners, where you will apply a little dark chocolate brown shadow (L'oreal Infallibale Shadow in Endless Chocolat - the name might be different in the US; any deep brown will do) for definition.


image
Step 3: With the same chocolate brown shadow, run lightly along the outer 2/3 of the lower lash line for a little definition.
Along the edges of the brown, use a soft peach-golden shade like MAC Gleam or Expensive Pink to gently blend and fade the color.


image
Step 4: Finish with black mascara!

Wednesday, January 16, 2013

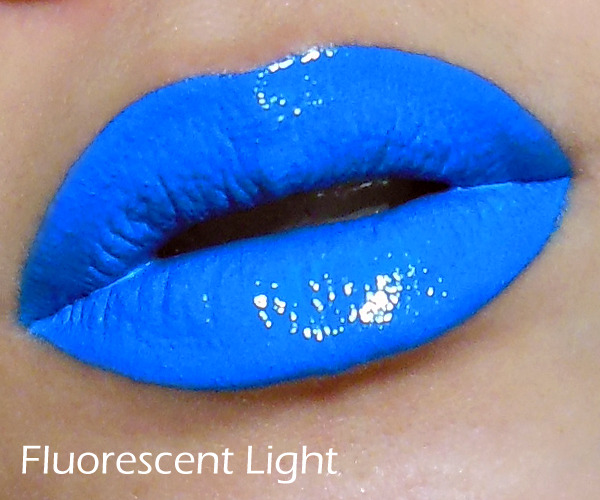
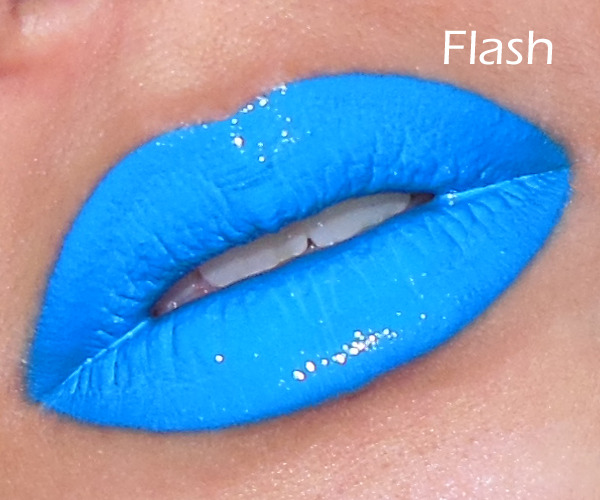
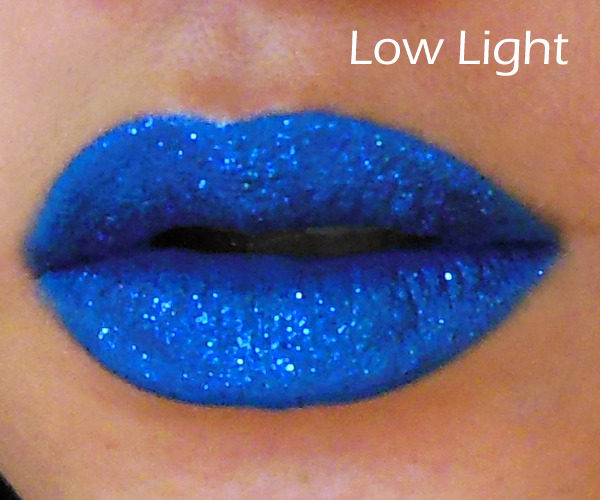
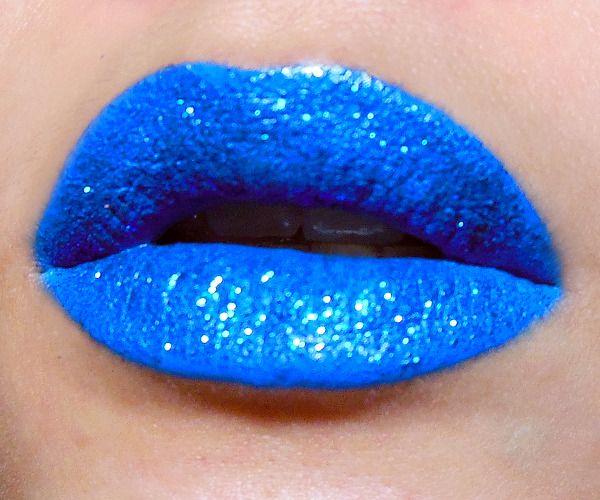
Tips and Tricks: What To Do with a Blue Lip Mix!


The idea of blue lips always sounds so ridiculous. Until you actually wear it and realize it looks pretty cool.
I'm demonstrating with Obsessive Compulsive Cosmetic's Rx Lip Tar, which is a rich creme cobalt blue. It's quite deep and strong in real life, but for some reason in white fluorescent light, it looks bright blue.


In 2 of the images, I applied Lime Crime's deep indigo-blue glitter, Aquarius, over the Lip Tar. The glitter is darker than the gloss, so it created a deep metallic-looking effect. To see the intensity/depth of the final color, check out the low-light image above. (I apologize for the unfocused image; for some reason my camera doesn't want to focus without light. I probably should have tried an indoor setting.)
If you're taking photographs with it, remember 2 things will happen:
  1. In indoor light, the sharp contrast of the blue against your skin color is going to create a dark border right around the lip color. 
  2. In flash, the blue is going to GLOW.


Tools and Tips:
  • Use a small concealer brush. There is no way you are getting this on using your fingers or directly from the tube. You will need plenty of precision because any streak, smear, or uneven lines is going to show up instantly.
  • It's best to apply a lip primer or clear liner first. This is because lip tars will rapidly bleed into fine lines around your lips (as you can see from the slight fuzziness on some of the images above).
  • For an extra precise lip, pick up a little concealer on a small brush after you apply your blue lip, and then go around the border of your lips just to clean up and get an ultra-neat line.
  • OCC Lip Tars AND MAC Lip Mixes will go on glossy, but eventually set to a matte finish. If you want to apply any glitter to it, do it quickly while it is still glossy, because once it sets it goes matte and it will no longer be as tacky.

Some Ideas for Mixing
Wearing a cobalt blue lip isn't practical for everyone. So what else would you find useful in a Lip Tar or blue lipstick?
Color adjusting/mixing!

A strong blue can do 2 things:

1. Add cool tones to a color that you find a little too warm (yellowish, orange) for your liking. Adding this to a basic red lipstick allows you to make it almost berry-ish or blood-colored. Very cool if you're going for a glam look or have deeper skin and find most reds showing up orange on you.

When added to a pink or mauve, it intensifies the bright magenta/violet tones so you can add a twist to your regular bright pink lipstick.

2. It adds depth to an already-deep color. Try adding a dot into a dark plum or liver colored lipstick. Instant Noir. This works the same way that a translucent blue-toned hair dye can turn brown hair black. 


Final reminder:
Don't over-apply when you're using it as a lipmix! The color is extremely pigmented and can overtake the original lipstick you're trying to adjust. 
How much do you need?
This little. That's ALL I used for the 3 lip color adjustment swatches above. One tube is probably going to last you for years if you're only using it on yourself.

Saturday, January 12, 2013

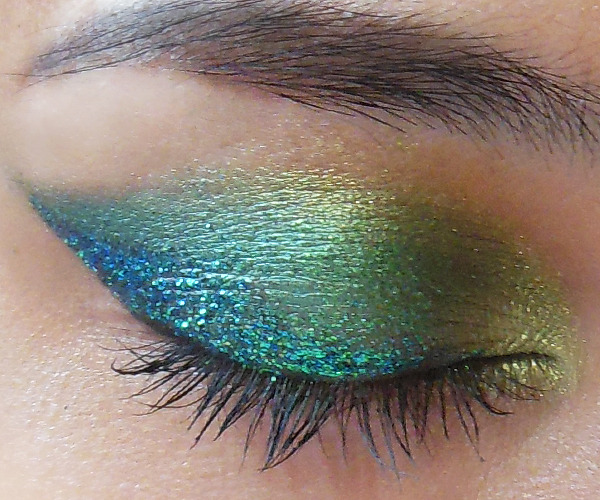
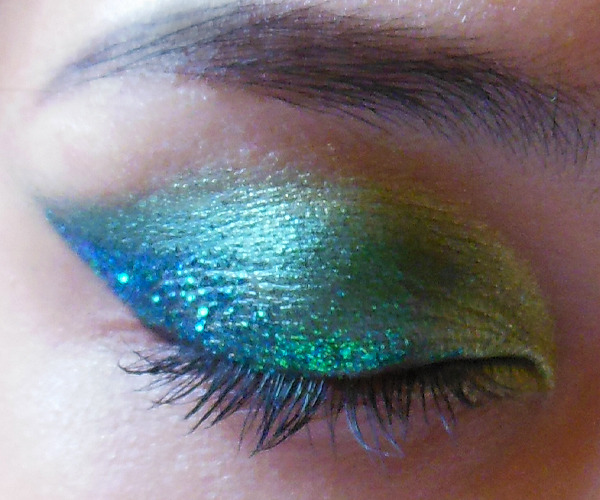
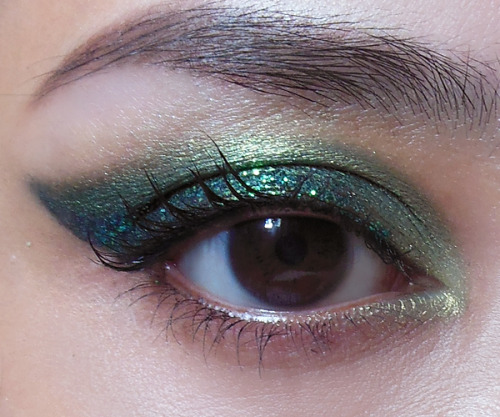
Absinthia: Green Fairy Eye Tutorial


There was a phase in my life when I wore NOTHING but green eyeshadow. I just thought it was such a sexy and flattering color. All you need for a sultry, smoky eye that stands out is a deep, vibrant green like MAC Humid or a discontinued pigment called Green. (I used that for this tutorial because I still have my large 7.5g jar from years ago, but use Humid or Antique Green pigment if you don't have it.)
I also added a touch of golden lime (MAC Golden Olive pigment) and a deep emerald green glitter called Capricorn. Now, in direct light, this glitter looks like a straight dark emerald green, but when the light shifts or when you're in the shade, it has a teal-blue shift. That's probably my favorite glitter out of the Zodiac range from Lime Crime, but a regular green would work anyday.


image
Step 1: I used black gel liner to create a slight cat-eye flick at the outer corner. This was done by drawing a line from the outer part of the lower lash line outwards, and then a second line from the outer corner fading in towards the center of the upper lid.
Don't worry about it looking too neat and precise. This acts as a sort of guiding line for the look.


image
Step 2: Using a flat brush, I blended the vibrant emerald green shadow all over the lid, JUST past the hollow of the socket line. For more drama, you can foil the shadow with a little Fix+, eye drop, or sealing liquid so it's more metallic. 
Be careful if you are using pressed shadows. You should add the moisture to the brush AFTER you pick up the shadow. Introducing fluids into the pan can end up ruining your shadow, depending on its formula, even if you're just using water.
At the outer corner, your shadow should extend straight out a little past the black liner applied earlier.


image
Step 3: Using a pencil brush, apply the pale lime green shade to the inner corner of the eye, blending a little inwards on the upper lid. Then pull more lime green along the socket line, along the edge of the deeper green applied earlier. 
Pull it to the center of the eye and then stop.


image
Step 4: Glitter time. Dampen the fine brush with sealant or clear mascara and then pick up some glitter. Gently apply it along the lash line, and then out along the black liner. Extend out along the edge of the green shadow applied earlier. Go over with a second coat of glitter right along the lash line and flick, just to intensify the sparkle.
If you're not able to find a duochrome glitter and want a more dimensional look, you can opt to go for a dark blue or teal glitter as well. It won't be duochrome, but the overall look will permanently look like the daylight image above, rather than shifting between emerald and teal depending on the light.


Step 5: Carefully curl lashes and apply mascara to finish. As the glitter is most intense along the lash line, I find wearing false lashes will obscure the whole look, so if you must, wear only natural-looking half strips.

Sunday, November 18, 2012

Painted Lady (Retro China Glam Makeup)


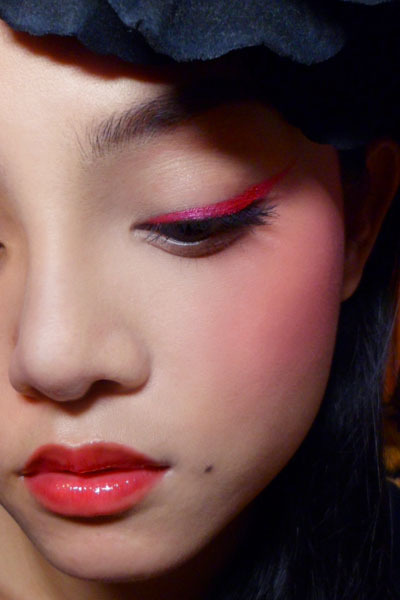
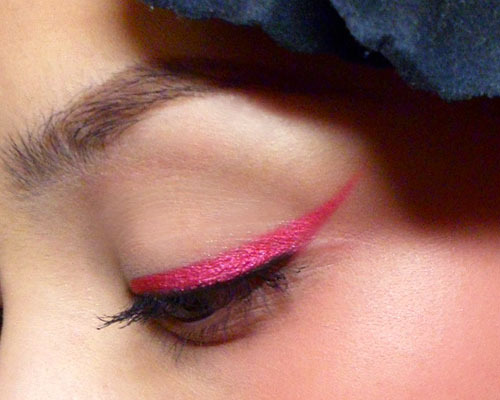
Was inspired by a recent campaign by Majolica Majorca to do a retro Chinese glam look featuring pale skin, winged liner, very intense pink cheeks and red-tinted lips. To update the look and keep it modern, an intense reddened pink liner was created using pigments and the lips were kept juicy and sheer with a clear red gloss.
  • Black pencil
  • Red pigment with a touch of pink (try MAC Bright Fuchsia pigment)
  • Mascara
  • A matte, bright, red-pink blush (I used Shu Uemura P Red 14)
  • Sheer red gloss (I used Lipstick Queen Shine Gloss in Red Sinner

Step 1: Begin by applying black liner along the upper lash line, and then gently smudging it out with your finger so it's just a smoky line. This just adds nice dark definition to the base of your lashes when you apply colored liner.


Step 2: I mixed some red pigments with a drop of liner sealant (use eye drops if you can't find any) and then apply it like a liner along the upper lash line from OUTSIDE-INWARDS. This makes sure you deposit the most color and thickness to the outer corners, and the line is fine on the inner corners.


Step 3: Finish the liner by extending the ends out into dramatic wings, following the angle of your lower lid. Then apply black mascara on the upper lashes to finish.


Step 4: For the cheeks, you want to use a soft brush so you don't get streaks. Then pick up some blush and run it very high up on your cheekbones. Then spread/buff upwards right under your eyes, and downwards to the hollows of your cheeks. It should be most intense right along the cheekbones.
Avoid bringing the blush too far inwards toward your nose or it could look really odd.


Step 5: For the lips, keep it simple since the rest of the face is pretty dramatic. Just apply a clear red gloss. Look for one that looks bright red because it will take on a slight pink cast over your lips.


Extra: As a final fun step, I dotted black liner near my lip, and then set it with matte brown shadow so it looks like a real beauty mark.


Monday, October 8, 2012

Statement Metallic Ombre Lips (Chinese Festival Colors)


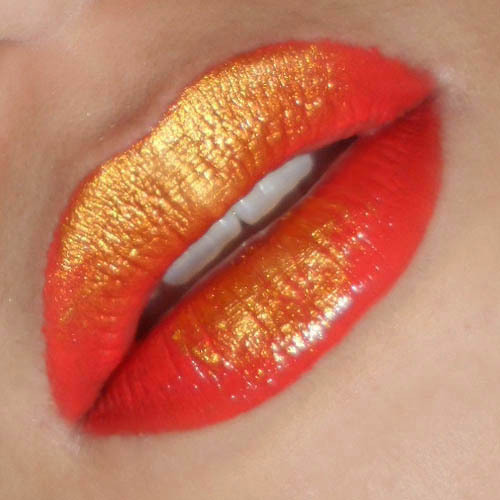
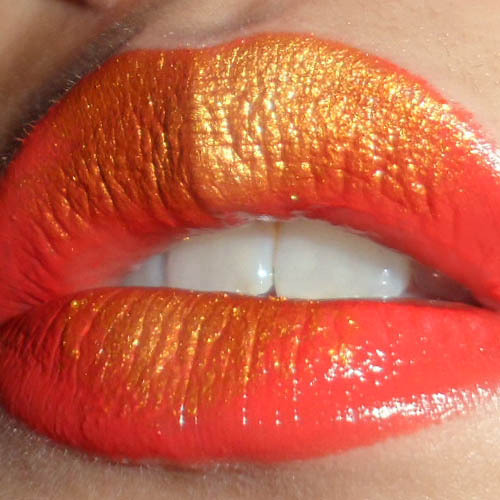
This is a fun tutorial with a twist on the "traditional" ombre lip using a metallic pigment. You can choose any colors you want as long as they sort of stand out from each other. (Test on the back of your hand to see if you like the effect.)
Just because this is the Mid-Autumn Festival period for many Asians, I went with a nice coral red (Revlon Ravish Me Red) and a bright amber-gold pigment (Coastal Scents mica in Metallic Rustic Gold).
The only other things you'll need are a flat eye brush that isn't too small, and Q-tips in case you need to clean up any mess.


Step 1: Simply slick on your lipstick as neatly as possible. Matte lipsticks will allow the pigment to "float" and be more obvious. The glossier the lipstick, the more the pigments will sink into the moisture (and look dull).
You can still use a creamy lipstick. You'd just need to layer on more pigment.


Step 2: Using your flat brush, press one side of it into the pigment and then tap the brush to remove any excess. If you don't, all the pigment is going to end up on your chin. Not very sexy.


Step 3: The 1st step to laying down the color is to gently pat a thin layer of pigment onto the top lip. Go from center outward one side at a time, so that most of the pigments will be concentrated in the center. The first layer you lay down may not be very vibrant and opaque, but don't worry about that.


Step 4: This is where you pack a 2nd layer of color down the center of both top and bottom lips. On the top lip, this should give you that nice ombre effect where the gold is most intense in the center and then slowly fades out into the red.
On the bottom lip, I wanted more dramatic contrast (like gold foil pressed onto the lips), so I only pressed the brush down around the center. No ombre, no fading outwards like we did with the top lip.


If you need to, use a Q-tip to carefully clean up the edges if your lip, but if you didn't pick up too much pigment earlier, you shouldn't need to.
Now all you need is minimal makeup on the rest of your face, and you'll have the most vavavoom lips at the party! (Just be very careful about eating and drinking.)


Friday, September 28, 2012

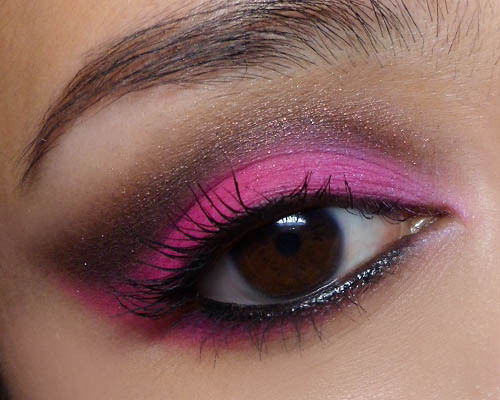
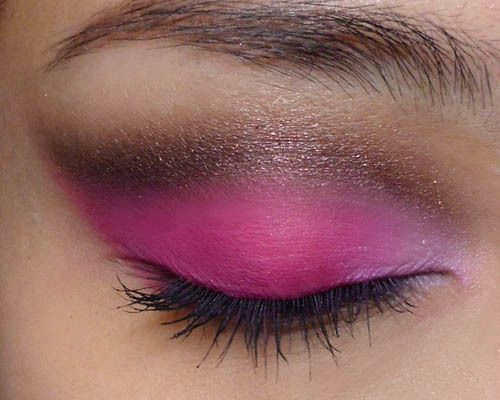
Punky-Pretty (Fluorescent Hot Pink with Smoky Cut-Crease)


This is a very dramatic look pairing hot pink with a smoky dark russet brown. Definitely more for the clubs or a party than a day out with the girls!
I used new shades from my BH Cosmetics shadows:
WM20 - An true matte hot pink
MS12 - Dark sparkly blackened red-brown
WS07 - A mid-tone satin mauve pink


Step 1: First run a black khol along your upper and lower water lines.


Step 2: Using a pointed brush for control, first draw a line diagonally up and out at the outer corner of the eyes. Then pick up more shadow and run it along the socket line, stopping before you reach the inner corners. 
Smoke the entire line out to get a really thick brown swatch.


Step 3: Pack a neon hot pink along the entire lid, leaving only the inner corners empty. Then run the pink along the outer halves of the lower lash line as well, extending the line up and out, right under the dark brown wing created earlier (below).


Step 4: To illuminate the eyes a little, apply a paler mauve pink to the inner corners of the lid. 

Step 5: Finish by checking to see if you need to touch up your black liner. (To help it last longer and look more intense, dab a matte black shadow over the pencil to set it.) 
Then finish by curling lashes and applying black mascara.