Showing posts with label black smoky eyes. Show all posts

Sunday, April 15, 2012

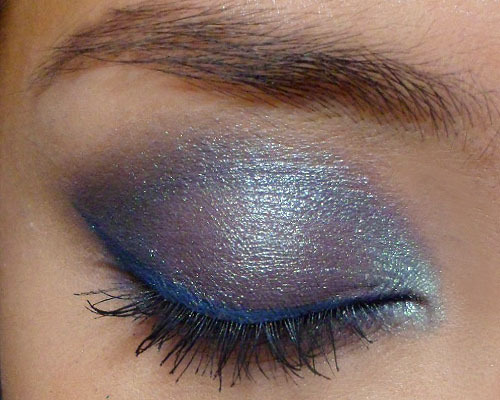
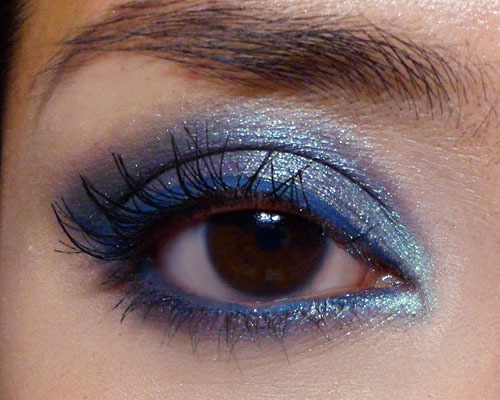
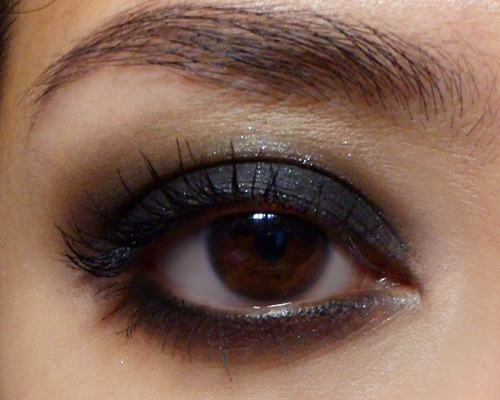
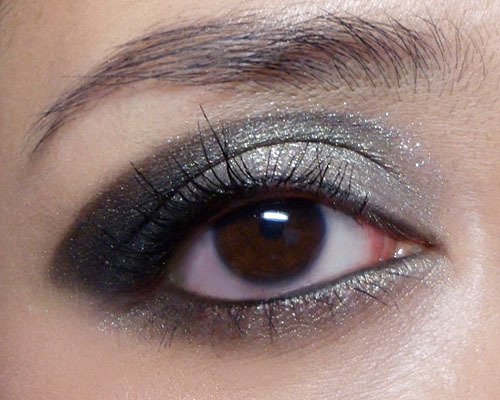
Dark Seafoam Marine Tutorial (featuring Stargazer Blue Cake Liner)


This is a fun evening eye made up of several blues. Navy blue crease (The Body Shop Eye Shadow Single in #31), metallic seafoam-grey lids (Cyber Colors Cosmos Eyeshadow #01 Neptune), and a gorgeous matte prussian-blue liner (Stargazer Electric Blue Cake Liner - though it's not really electric blue) which costs all of £3.50. 

The hardest item to obtain or duplicate would be Cyber Colors Cosmos Eyeshadow #01 Neptune (available at Sasa boutiques around Asia), which is a gloriously unique baked shadow made up of swirls of gunmetal, silver, and teal. I tried and tried but couldn't find any substitute. The closest would be to mix an iridescent teal shadow with a metallic grey.


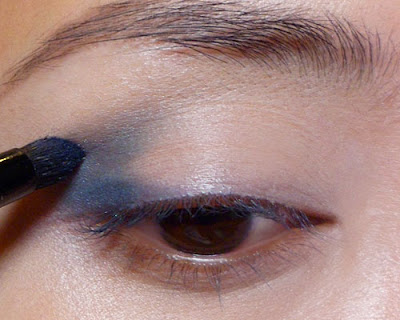
Step 1: After applying a base, brush on a deep navy blue shadow in the outer V of the eye and smoke along the socket line (above the crease).


Step 2: As I was using an iridescent baked shadow, I used my finger to smooth on the lid color for maximum intensity. (Note that using your finger only works for baked/mineral shadows or very soft ones like Stila, and TheBalm, as they don't contain enough talc to get ruined and sealed over when they come into contact with oils in your finger.)


Step 3: Using a pencil brush, run the shadow along the lower lash line as well.


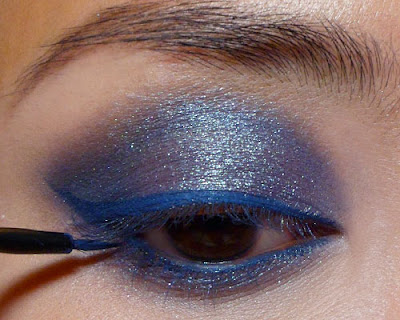
Step 4: The fun bit. Add a few drops of water or liner mixing medium onto a prussian blue cake liner and apply along the lower lash line and upper lash line, ending in an outer flick. (I highly recommend the Stargazer Electric Blue Cake Liner as it's a gorgeous and unique shade unlike any of the generic navies around.)


Step 5: Finish with mascara for the final look.

Saturday, March 24, 2012

How to Apply Black Shadow

Black smoky eyes with just one single shade in the Wet n Wild Coloricon Greed Palette

Anonymous:
How do apply black eye shadow? I know this sounds stupid but everytime i apply it, it either creases within 5 min, or applying it gets super messy, and it gets all over my cheeks. any tips? Mabe i'm using the wrong brand?


Essential tools for applying black shadow

It helps to use a good eye shadow brand, but even high end shadows from Urban Decay and MAC would crease and give you a lot of fall-out if you do it wrong. The thing to remember about black shadows is that they are primarily made up of matte pigments. Even the ones with sparkly bits are actually matte shadows with sparkly bits thrown in, and the texture is still that of a matte shadow.

Matte shadows tend to be chalkier, more powdery, and go on less evenly than shimmery/pearlescent shadows, which means they have poorer adherance ("stickiness") to your skin and brush, and you get more fallout and creasing in general. 

Always use:

1. A shadow primer to grab and hold on to your black shadow -
  • If your eye shadow is very pigmented, you can use a skin colored primer like Urban Decay Shadow Insurance (the matte one) or Lime Crime's Eyeshadow Helper
  • If your shadow is chalkier and less intense, then make sure you use a black base. If your lids are oily, use a silicone based cream/gel shadow like MAC Blackground Paint Pot. If your lids are normal or dry, use a black pencil and smudge it out to a thin smoky layer with your finger. (Kajals and kohls are better because they are softer and easier to blend.)
  • If you are applying shadow to your lower lash line, make sure you apply base or pencil there as well.
2. Flat brush to pack on the color with minimal fallout - 
  • Pat on in sections. Don't drag, buff, or sweep back and forth. This is because you are pressing the shadow pigments down into your base so that they stick and don't come off easily. If you use a soft, fluffy brush, you will not get intense color because the powder pigments will be dusting off all over your face (which you don't want).
3. As a last step, go in with a soft fluffy brush to blend the edges of your shadow so you don't have any messy, hard lines. Then you can finish with more liner and mascara.


Thursday, January 26, 2012

Grey 2 Ways: Day and Night Looks


Day Look: A wearable and flattering way to wear grey without loading down your eyes is to add a touch of gold in the inner corner, and to add black to the lash line.


Night Look: Grey cannot go wrong paired with black. To keep things interesting, I went for a very defined shape instead of the typical smoked-out look.
Read on for the step-by-step!

Friday, December 2, 2011

Holiday Glam: Smoky Blackened-Gold with Crimson lips


Most of the time, we pair dark smoky eyes with muted lips to keep things in balance, but it does not mean that you can't pair it with a strong lip for the holiday season. 
To keep the eyes sultry but not overly heavy and severe, I adapted the traditional black eye with 2 things:
  • A pale gold on the lid (I mixed a blend of translucent silver and gold mica to get that specific "cold-gold" shade, but any gold pigment would work as long as it's very metallic (e.g. MAC Gold Metal Pigment) or applied with a dampened brush for a foiled finish.
  • Pigmented matte black shadow (you can get this from inexpensive brands with strong pigments such as Wet n Wild, Sleek, etc. as they work just as well as MAC or other high-end brands)

Step 1:  Using a firm, pointed pencil brush or a flat angled brush, apply a stroke of black along the lower lash line, starting ALMOST from the inner corner (leave the inner-most corner clean so you don't close off your eye totally) and pull out past the outer corners slightly.  You'll likely need to re-dip your brush to get an even stroke of color as firm brushes give precision but do not pick up a lot of product.
 

Step 2: With the same brush, draw another line along the socket, but don't touch the inner corners of your eyes. (If your eyes are very close set, you might want to start the line nearer the middle of your eye,)
The outer corner of the upper line should meet the lower line in a rough wing shape. Do not worry about getting neat lines. 

Draw a third stroke along the outer half of the upper lashes as well.
The finished look will be something like the below. Look straight ahead into the mirror or take a picture to check that the top line looks more or less symmetrical on both eyes.

Step 3: Smoke it all out! Dip a soft blending brush lightly into the black shadow so there is just a bit of color, and then run it briskly along the top socket line to smoke everything out. This is where you add more black to even out the amount of color on both eyes until they are roughly equal.

Step 4: The fun part. Use a flat brush to pack gold pigment onto the lids. Any shade of gold, bronze or deeper silvers would work for this, but I do recommend loose metallic pigments for the most dramatic effect against the black. Fill in all the bare areas from the inner corners of the lids outwards.
A less shiny shade will give less contrast so if you're worried about looking too dramatic, by all means choose a softer finish.

Step 5: Add definition back.
  • I applied black liquid liner along the top lashes and then use the pointed or flat brush to run black shadow along the line. This smokes it out and keeps it from looking too precise and harsh.
  • pale yellow pencil to the waterline (my trusty Make Up Store Vanilla Matt pencil), and then 
  • went back in the soft blending brush dipped in black. Start to intensify the black and blend into the edges of the gold. Remember the overall look is predominantly smoky black, with a flash of gold.

Step 6: Finish by curling lashes and applying mascara (Bourjois Volume Glamour Max in Black). You can wear lashes with this look, but I chose not to as it might obscure the trace of gold but if you have very big lid space, it would totally work.

---

Step 7: On the cheeks, I applied a bit of MAC Mineralize Skinfinish Natural in Dark as subtle warm contour just under the cheekbones, and skipped blusher as it would just compete with the lips and eyes.

Step 8: On the lips, I applied a full-on deep-red matte lip using MAC Russian Red lipstick (this is actually not a blue-based red despite what some say; it's more of a dark true-red). I don't have a dark, cooler-toned black cherry shade or that would look even more dramatic with this eye.

---
Other Products Used:
  • Foundation: Bourjois Healthy Mix Foundation #52 for a velvety matte glow
  • Concealer: Amazing Cosmetics Amazing Concealer in Fair for a slightly brighter under-eye since the makeup is so smoky and dark
  •  Setting Powder: MAC Mineralize Skinfinish Natural in Medium
Recommended nail shade: Black creme, to keep things edgy but refined!