Showing posts with label gold eyeshadow. Show all posts

Saturday, August 8, 2015

Urban Decay Naked Smoky Swatches and Demo


It almost seems there will be no end to the Naked series!
The latest item to join the family is Naked Smoky, which for the first time sees the 12 colors grouped by theme, so you can easily create looks using the 3 "quads" in the palette, or by picking balanced trios just by choosing 1 warm, 1 cool, and 1 matte from the palette.

Warm Neutrals:

Cool Neutrals:

Matte Neutrals:


There are plenty of soft colors but definitely more deep shades in here, considering it's a "Smoky" palette. The mattes are slightly more chalky, which is quite common for mattes. They're pretty smooth and blendable though, so you don't need to worry that they'll go on patchy and uneven.

But as usual for Urban Decay, it's really the metallics that stand out. They are smooth, pigmented, and just gorgeous as heck. I'm more of a warm neutral girl, but the grey/plum shades in this palette are just too nice. The warm shimmer shades are beautiful as well of course. (I'm a huge fan of Dirtysweet.) The good news is I didn't experience quite as much fallout with this palette as some of the earlier Naked palettes. In fact, I didn't even need to clean the skin under my eyes after doing the eye look below.

This palette has only 1 glitter shade, Armor, which is good because they have a tendency to fall off the lid and all over the cheeks after a few hours. Still, this wasn't as bad as I remember some shades being in Naked 1.


One of the fun things to do with this palette - since the cool and warm tones are quite balanced - is to do part warm, part cool looks, like the one I did above.

I do feel several of the shades, and the balance of light and dark in this palette are somewhat similar to the Naked original palette, so technically speaking, you don't need both unless you're a collector and fan of all Naked palettes. This has more deep/smoky shades than Naked 2, so you can consider it if you want deeper options. And of course, it is very different from the rosy-hued Naked 3, so it's actually quite a good complement to that palette if you want a good range of different neutrals.

The Naked Smoky palette launches 20 Aug in all Sephora Singapore stores at SG$83.

Monday, December 9, 2013

Holiday Look #3: Longwearing Soft and Glowy (feat. Benefit Groovy Kind-a Love Kit)

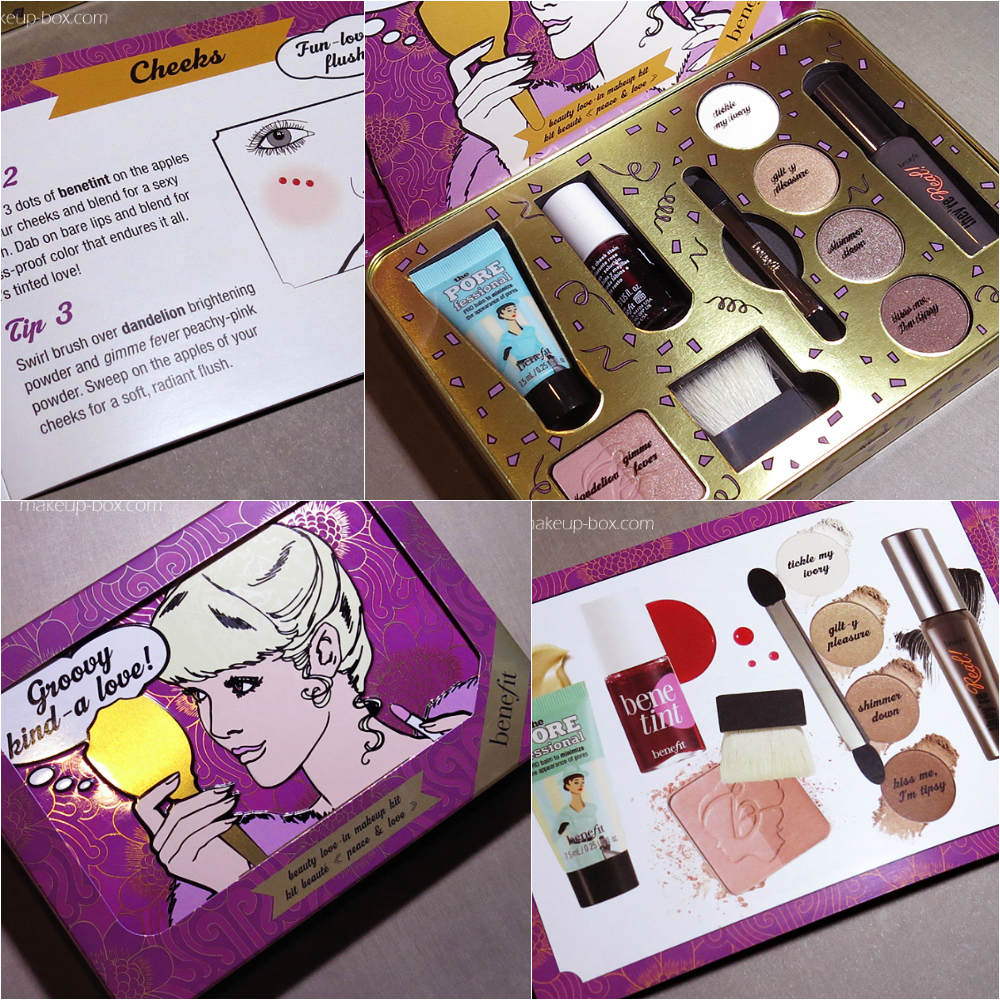
Benefit Groovy Kind-a Love kit contents

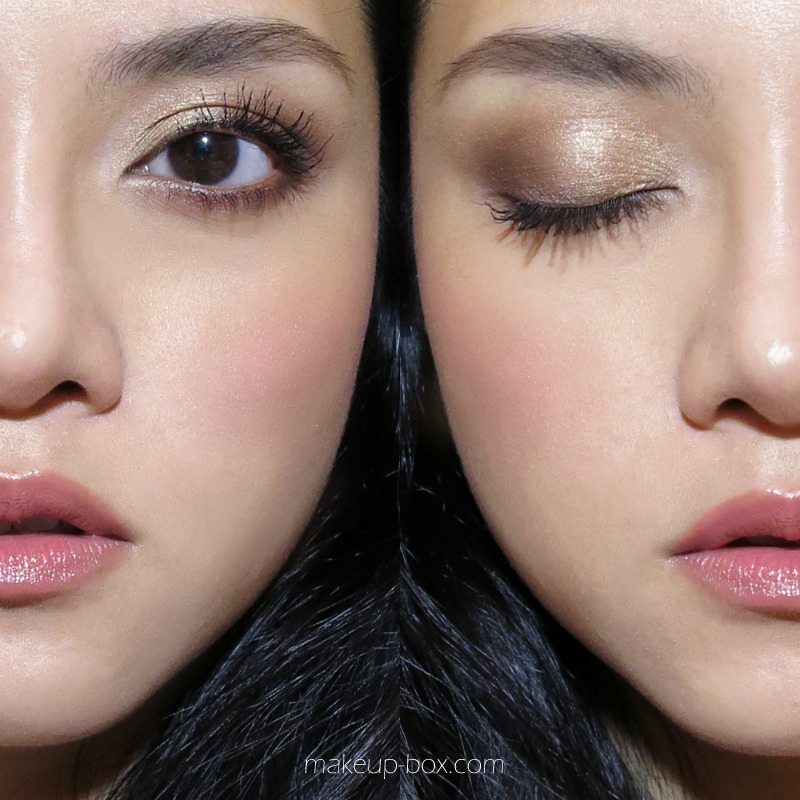
Not everyone’s into a smoky eye or red lips and winged liner. If you prefer the subtle enhancement of a low maintenance “girl-next-door” look that will last the night, this one’s for you!

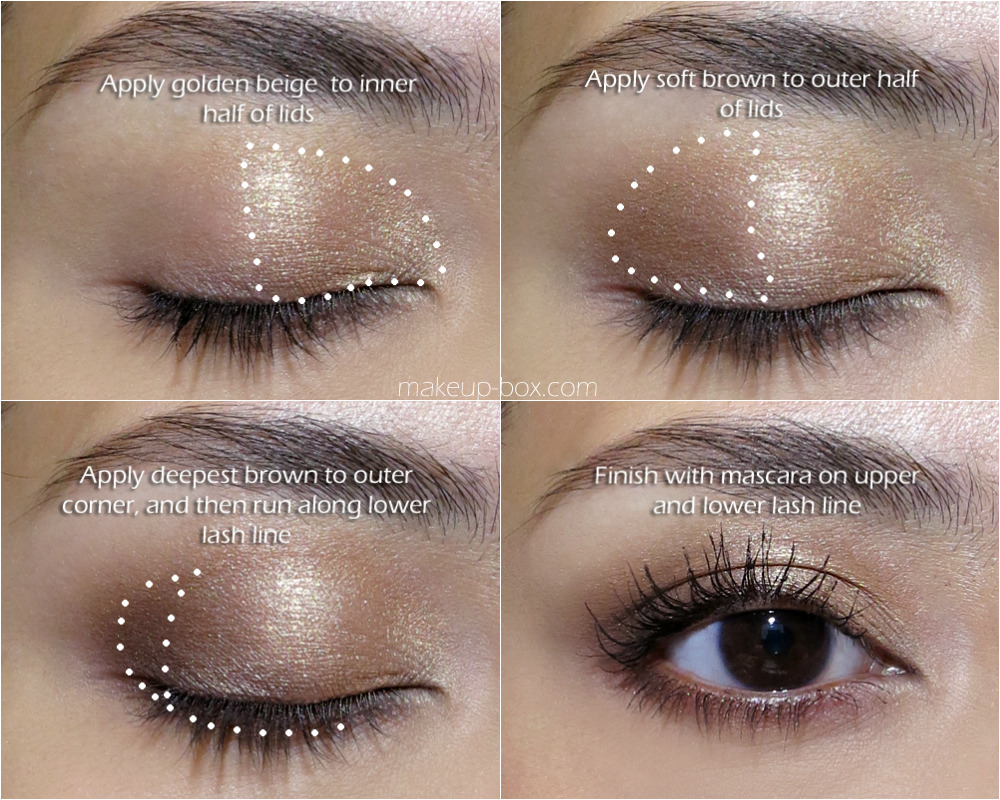
I used a nifty little limited edition kit from Benefit, “Groovy Kind-a Love”, which includes minis of Porefessional balm, Benetint, 4 neutral brown shadows, a mini They’re Real mascara, and mini dandelion/gimme fever duo. Everything you need for an ultra-natural and flattering look.


Products: everything in the kit except for the concealer, lip liner and lipbalm.

  1. Concealer - Make Up For Ever Lift Concealer #2
  2. Lip liner - Givenchy Lip Pencil #3
  3. Lipbalm - use any pot balm you have that gives a slight sheen!
  4. Tips:
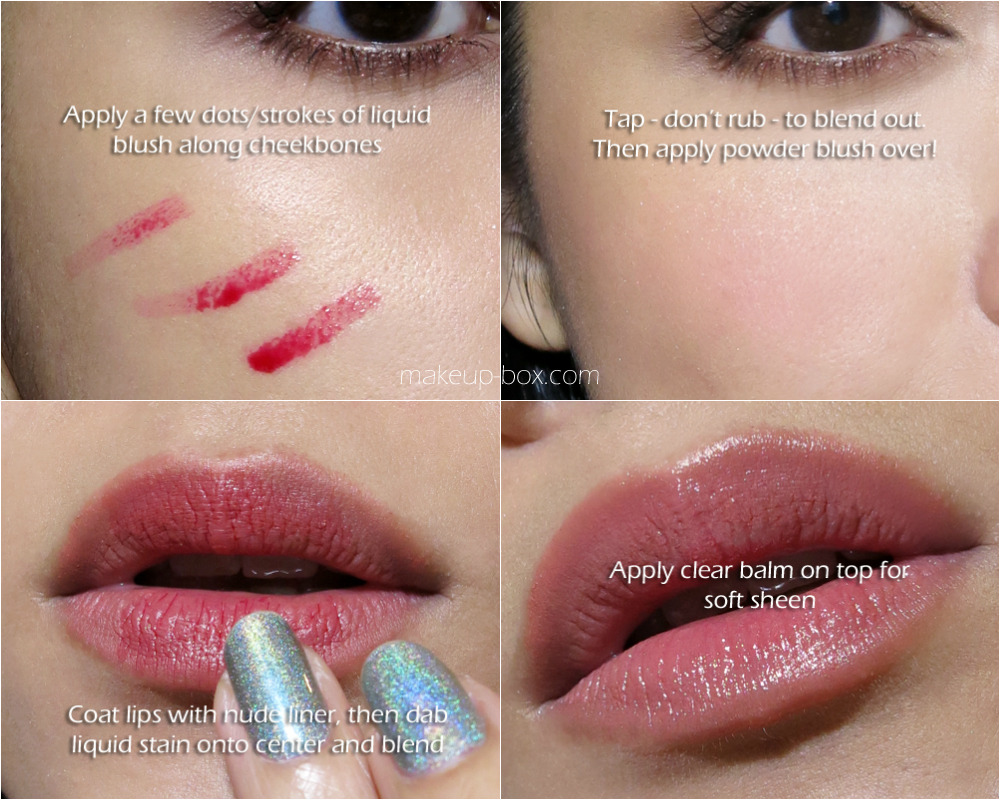
  5. Layering blush is a way to make it last the whole day, but be careful not to go overboard or you could end up with overly red cheeks. The thinnest layer of both will go a long way.
  6. Try Stay Flawless 15 Hour Primer on the lids as an eyeshadow primer!
  7. To avoid a stain wearing away unevenly on the lips, use a thin layer of nude liner as a base first.

Friday, November 1, 2013

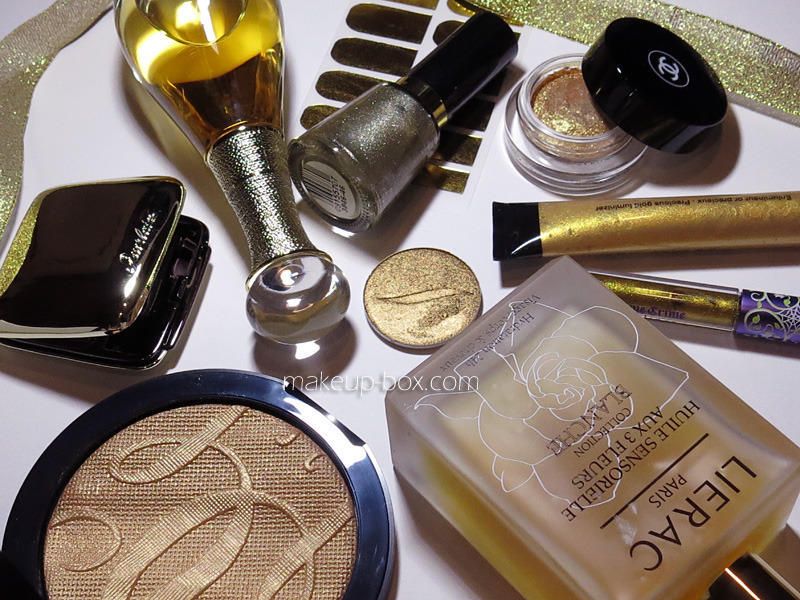
My Hoard of Golden Beauty Treasures!

Selection of gold things that are perfect for the holiday season

Excuse the loads of "product porn"! But don't they make SUCH a luscious visual?

Here are some of the golden things I love. Sadly, a couple of them are limited edition and no longer available (although we can cross our fingers they'll be re-released).

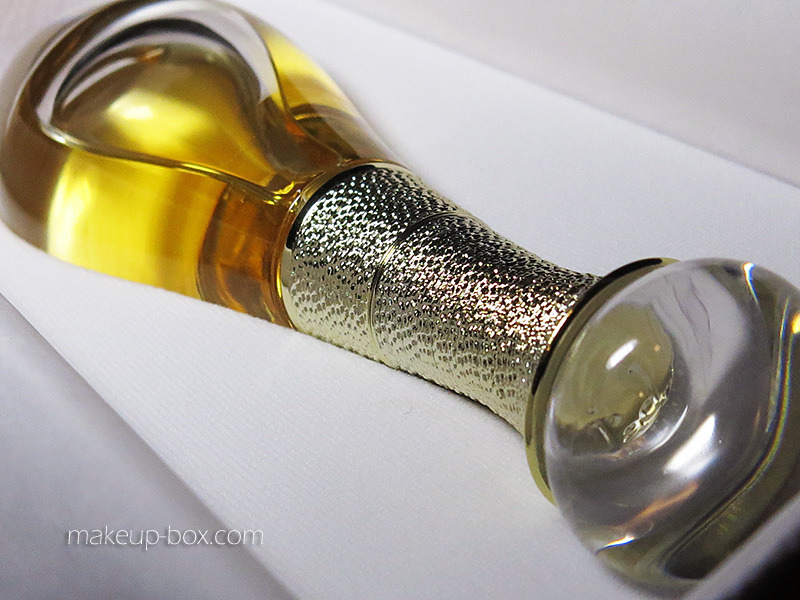
Dior J'adore Essence de Parfum
At the risk of sounding cheesy, this is liquid gold in a bottle. We keep complaining about Dior reformulating its classic scents with cheaper synthetics, but this particular version went the other way. Made from expensive natural Rose and Jasmine absolutes harvested from fields reserved just for Dior, and blended with real Tuberose and a touch of Tahitian Vanilla to lend a bit of oomph (don't worry, it doesn't smell like dessert), this is a more linear/simple but drop-dead gorgeous flanker of the original J'adore.

The slimmer, smaller, hand-crafted signature bottle with the long neck is just a pleasure to look at as well.


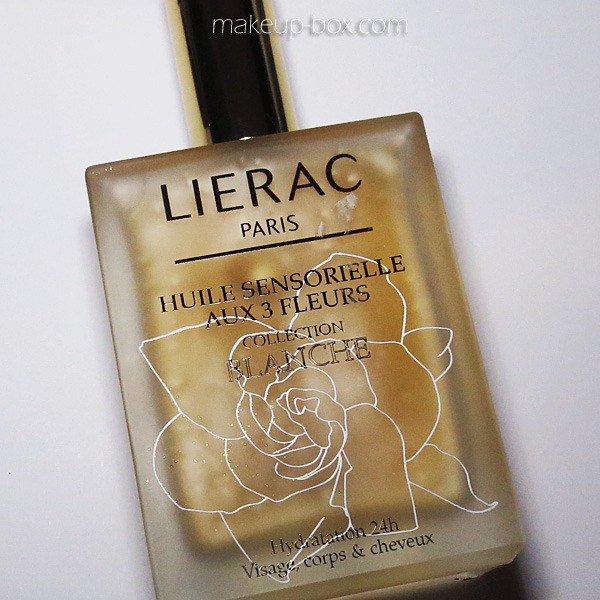
Lierac Huile Sensorielle aux 3 Fleurs
Lierac Huile Sensorielle
If you're traveling to or living in some place dry, you probably appreciate the wonders of rubbing a silky oil into your skin and hair.

Lierac's Huile Sensorielle is less well-known as Nuxe's equivalent, but I love it for the delicate blend of fragrant white flowers (camellia, jasmine and gardenia) with argan, sweet almond, grape seed, and hazelnut oils. It's light but nourishing, and just lovely and subtle to smell on your skin and hair.

Just be careful to store it away from light and heat, as it is all-natural and can go rancid.

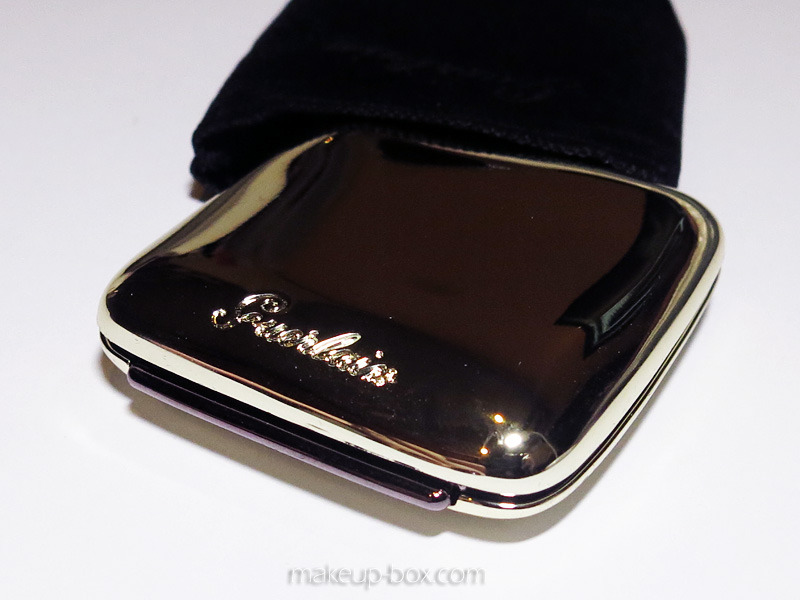
Guerlain Ombre Eclat
Well, this is the only item that is here just because of the packaging. That's not to say Guerlain eyeshadows aren't some of the most impressive on the market. But if you're looking to treat someone - or yourself - this holiday season, a richly-pigmented shadow in a beautiful gold compact, sheathed in its own suede sleeve, is one of those little luxuries that feels special to own precisely because you wouldn't buy it under normal circumstances.

Guerlain Sun In The City (Limited)
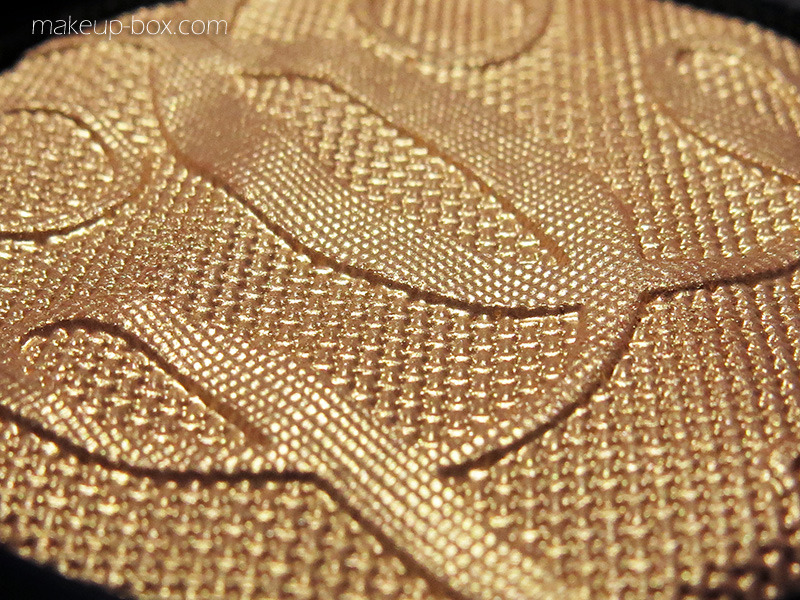
Guerlain Sun In The City highlighter/bronzer
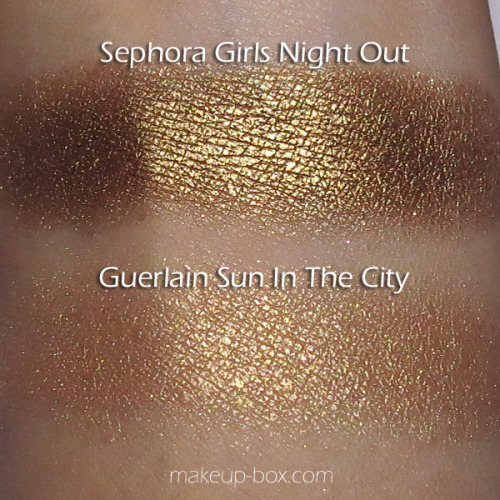
This ridiculously beautiful powder is only there because it's so ridiculously beautiful; both to see and to use. It's one of the best golden highlighters for medium to dark skins, and it's just a shame it's not part of the permanent collection. The compact is also HUGE so you can sweep it down your neck, across shoulders, down the arms and legs for a golden-bronze sheen.

Sephora mono shadow in Girls Night Out, and Guerlain Terracotta Sun In The City


Chanel Illusion d'Ombre Vision (Limited)
Chanel Illusion d'Ombre in Vision
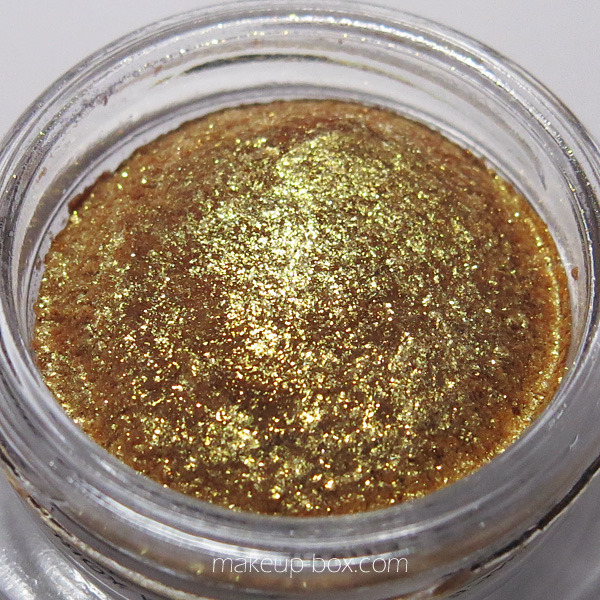
One of my favorite cream shadows in the world - bar none - Vision is just made up of gold flecks, so you look like you're wearing a wash of gold dust on the lids. There's no other color in the base. Just Tinkerbell dust that won't fall off onto your cheeks.

The bad news is it's limited edition and no longer available, but here's a cheap alternative!

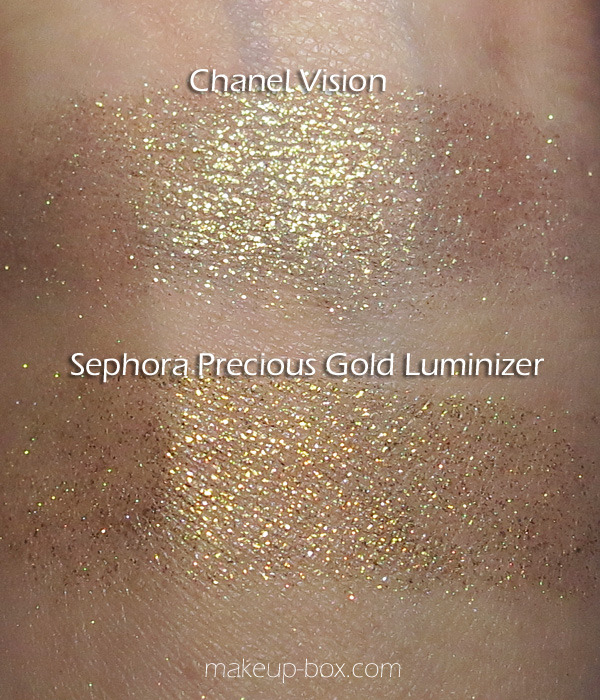
Sephora's Precious Gold Luminizer costs a humble US$10 but it's SO fun. It's similar to Vision, but the proportion of darker gold flecks is higher than in the Chanel. Honestly though, on the lid, most people won't be able to tell the difference. 

Swatches of Chanel Vision and Sephora's Precious Gold Luminizere

I like to dab this onto the inner corners of my eyes, or the center of my lid on top of a neutral/matte eyeshadow look. It can be worn as a wash across the lids, but doesn't go on as evenly as the Chanel, since it's a gel, so it doesn't build up very easily. Still, for the price, who's complaining?!


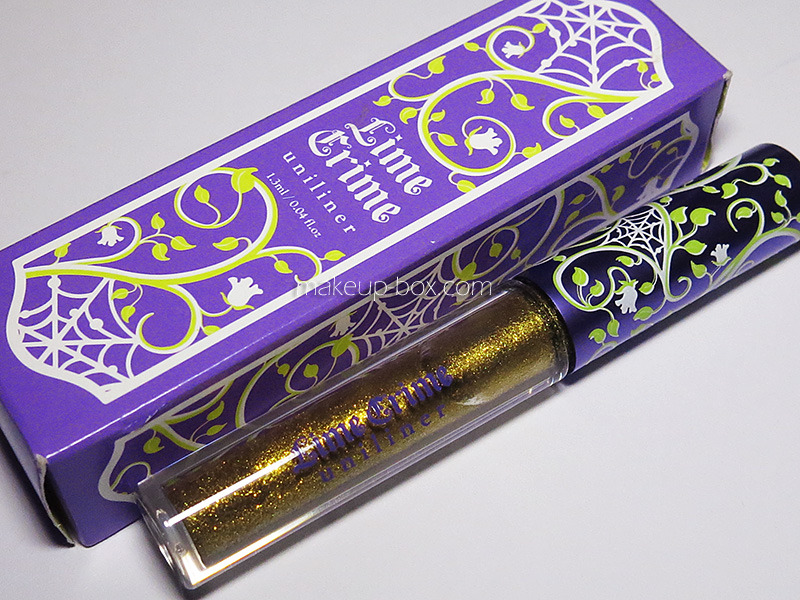
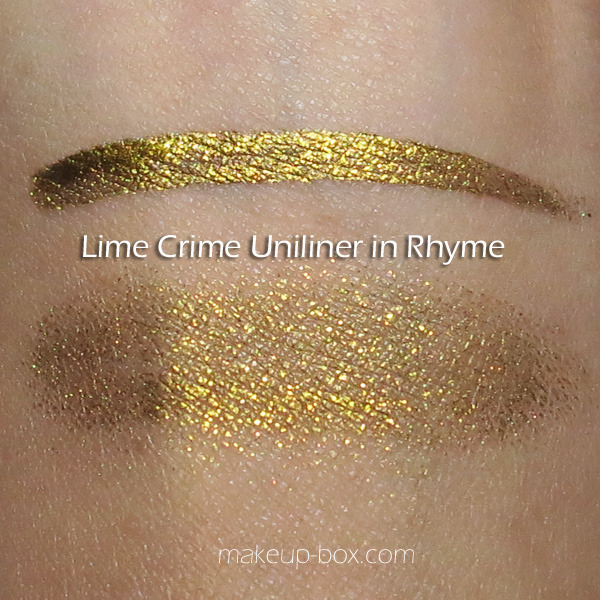
Lime Crime Uniliner in Rhyme
Rhyme isn't a typical metallic liquid liner. It's made up of ultra fine gold flecks, so if you sheer it out, it almost looks like a sparkly gold shadow. It's fantastic as a holiday liner, and I've also used it many times dabbed on the center of the lids over other shadows.

Lime Crime Uniliner in Rhyme applied as liner, and spread as shadow

Other products:
  • Revlon Nail Enamel in Gold Coin - this is a sparkly cool gold that's not glitter and not quite chrome either.
  • Gold nail wraps from lightinthebox.com (these are available from so many places; I just inluded them because nothing looks quite like gold nail wraps)


Thursday, October 24, 2013

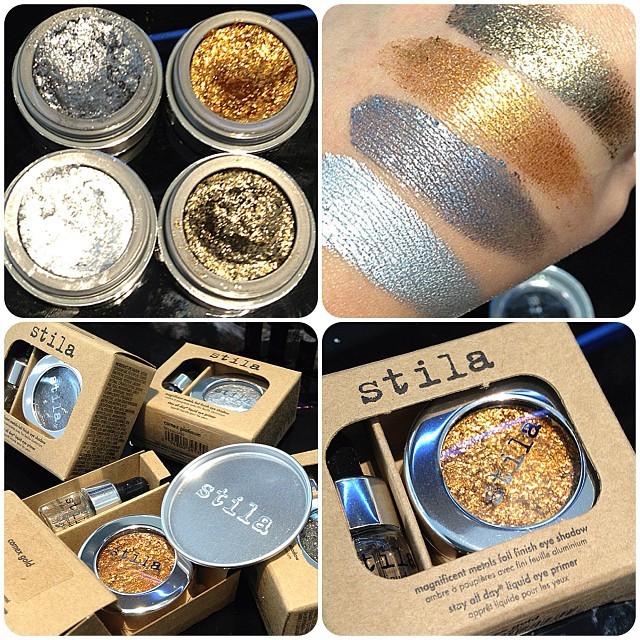
Stila Magnificent Metals Foil Finish Eye Shadow Review and Swatches

Stila Magnificent Metals Foil Finish Eye Shadows: Comex Platinum, Titanium, Comex Gold, Vintage Black Gold
What they are:

These are neither cream shadows nor loose pigments. They are very interesting and unique. These are intense metallic pigments suspended in a light fluid silicone/wax/crosspolymer base. It’s more like curdled milk than a cream shadow, because the dry pigments are not soluble in the silicone base.

The pigments and silicones both dissolve in the priming liquid thpugh, so they blend and smooth out once you mix all 3 things together.

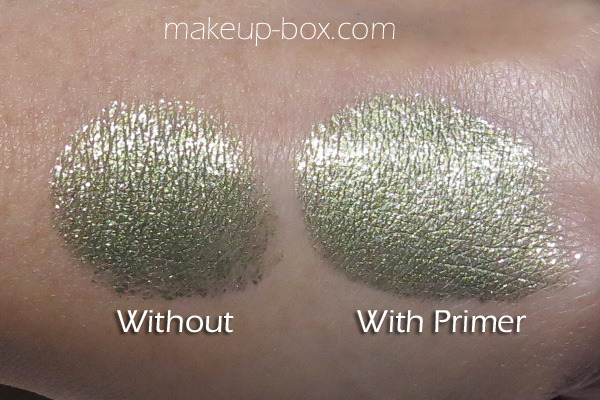
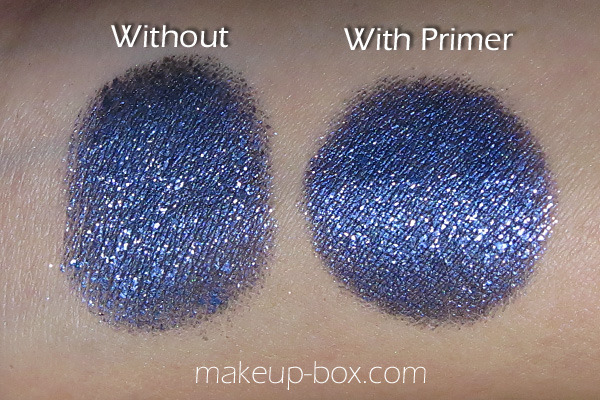
Without getting too technical, I’ll just say they can be used on their own without the “primer”, but they can flake, look uneven, and won’t set and stay in place. With a tiny bit of the liquid primer, they smooth out like Chanel or Dior cream shadows, build up and apply more evenly, and last much better as well.

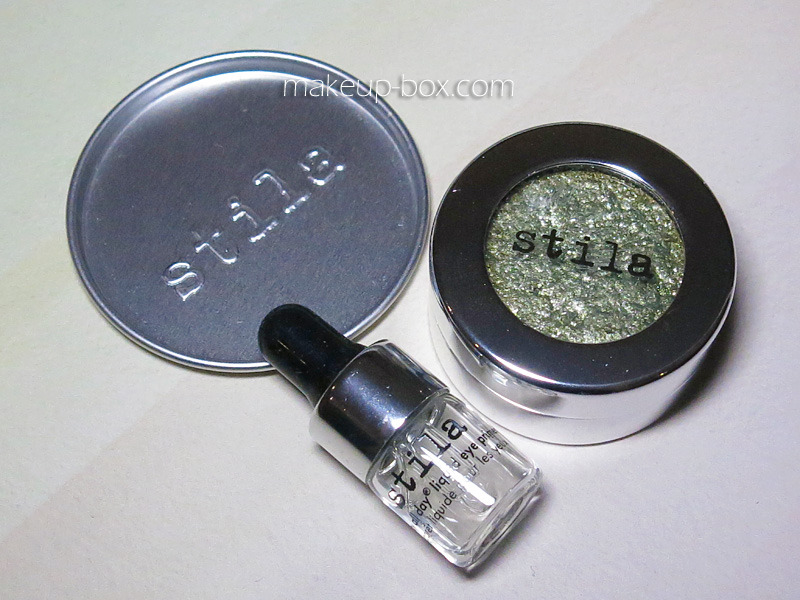
The Kit:
Stila Magnificent Metals Eye Shadow in Metallic Laurel, shown with items in a full kit
You get a little box including:
  1. A pot of metallic pigments
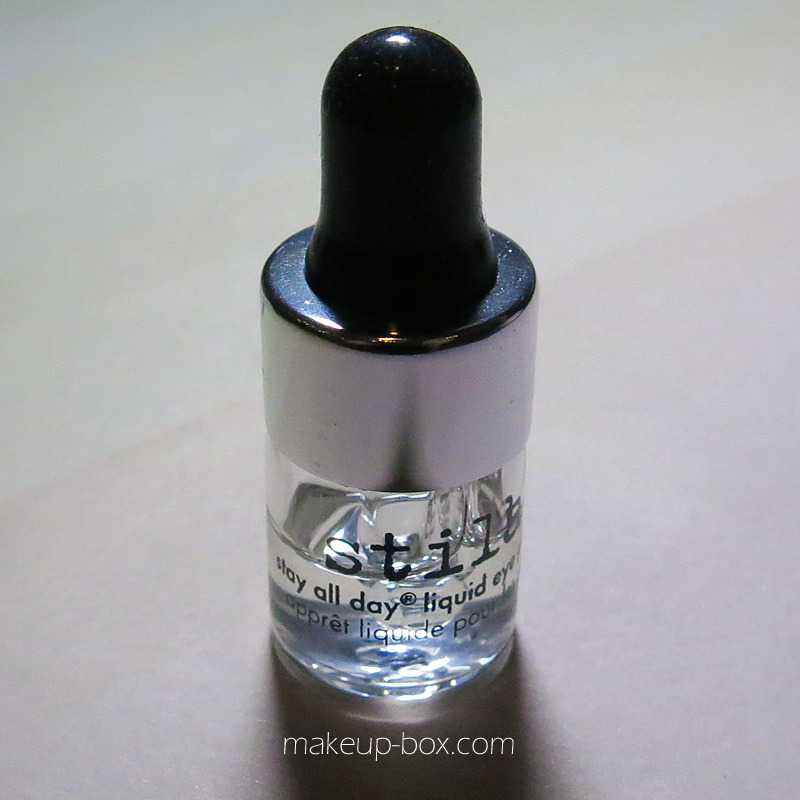
  2. A tiny dropper bottle of the confusingly-named “primer” liquid (it’s more a liquid sealant because you don’t use it to prime your lid)
  3. A small flat metal pan for blending the 2 together

Stila Stay All Day liquid eye primer for Magnificent Metal pigments

Application:

Definitely not recommended to wear the pigments on their own without the base because they can smear, flake and crease quickly. While the instructions are for you to add a drop of priming liquid to some shadow and blend on the metal pan, I find it hard to control the proportions and and leads to a lot of product wastage.

Stila Metallic Laurel swatched with and without the liquid primer
Stila Metallic Cobalt swatched with and without the liquid primer
Tip: My preferred method is to dab a tiny bit of sealing liquid onto the center of your lid, then use a finger to apply pigment over, and blending right on the lid.

To see detailed pros and cons of these, click here

Sunday, April 21, 2013

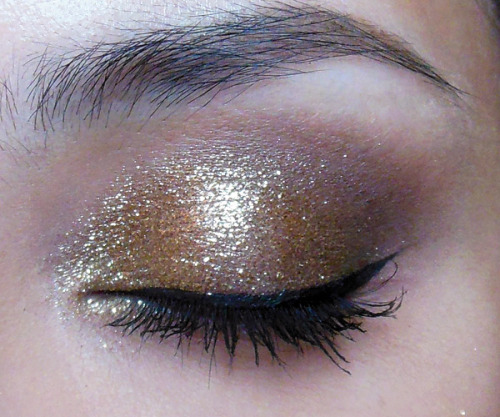
[Requested] Reinterpretation of a Sparkly Gold Smoky Lid


This is not an exact recreation because my eyes are shaped a little differently and I wanted to blend the edges out more, but I'll run through the type of products you need tocreate this look.
http://25.media.tumblr.com/tumblr_m0ikzftSP71qev1moo1_500.jpg
I can't be 100% sure with the yellow lighting and difference in skintones, but the item I find can create this type of sparkly effect is a loose golden-brown sparkle like MAC's Reflects pigment in Antique Gold, used wet.
image

Reflects pigments are not glitter, and not regular shadows either. They are shiny mica particles larger than regular loose shadows so they sort of combine pigmentation with sparkle. Like glitters, they don't "stick" to the skin well and will fall out all over your cheeks, so you might want to do your eye makeup first, then clean up and do your foundation and concealer after.
To get them to go on like dramatic foiled metal, you want to use either a good creamy base or apply them wet (do use eye drops or a liquid sealant instead of pure water as they will rub off easily once dry if there is no ingredient that provides some tackiness).

Monday, May 28, 2012

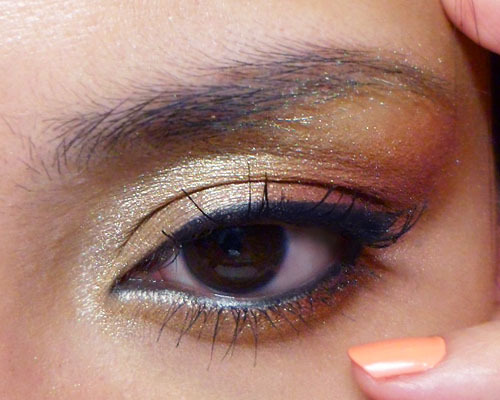
Golden Bronze Cat Eye Tutorial (88 Warm Palette)


My 88 Warm Palette has been in cold storage lately, as tends to happen when you are always trying new things. This is a look you don't need the 88 palette to create, as there are lots of similar shades in other palettes as well. 
The shades you'll need to pick are
  • A soft beige- or malt-gold that isn't too far off from your skin tone
  • A warmer, stronger amber-gold with some orange in it
  • A soft burgundy with a pearl sheen (surprise; this gives the whole look more depth than just sticking with a deep bronze or brown)


Step 1: Apply the soft gold all the way from inner corners up to the brow bone, leaving just the outer-most corners of the eye clean.


Step 2: Pack the warm ambery gold onto the outer 1/3 of the lid below the socket, and then extend up to the brow bone. Notice I extended the color inwards more along the deepest part of the socket line. This will give your eye more definition instead of allowing all the bright colors to wipe out your contours.


Step 3: Pick up a warm, rich burgundy and pack that right in the outermost corners of the lid, then also lightly sweep the remaining pigment on the brush up towards the end of your brow as well. This will make the look a lot richer and stop the eye look from going too brassy and yellow.


Step 4: Apply a black pencil along the tightline and waterline, and then use black liquid or gel liner to apply a thick flick at the outer corners. Finish with black mascara.


The finished effect is polished, dramatic, but at the same time not over-the-top because it should work with your natural skin tone. You can choose to pair this with a strong lip, but I prefer just going the natural route with this.
On Rest of Face:
  • TheBalm Hot Mama blush (my favorite warm coral blush)
  • NYX Iced Honey lipstick (metallic beige/nude)
  • Revlon Super Lustrou Lipgloss in Coral Reef (sheer coral creme)
*Quick tip: Applying a creme gloss over a metallic or pearly lipstick is a way to juice up your pout without adding a lot of obvious shimmer and sparkle.

Friday, December 2, 2011

Holiday Glam: Smoky Blackened-Gold with Crimson lips


Most of the time, we pair dark smoky eyes with muted lips to keep things in balance, but it does not mean that you can't pair it with a strong lip for the holiday season. 
To keep the eyes sultry but not overly heavy and severe, I adapted the traditional black eye with 2 things:
  • A pale gold on the lid (I mixed a blend of translucent silver and gold mica to get that specific "cold-gold" shade, but any gold pigment would work as long as it's very metallic (e.g. MAC Gold Metal Pigment) or applied with a dampened brush for a foiled finish.
  • Pigmented matte black shadow (you can get this from inexpensive brands with strong pigments such as Wet n Wild, Sleek, etc. as they work just as well as MAC or other high-end brands)

Step 1:  Using a firm, pointed pencil brush or a flat angled brush, apply a stroke of black along the lower lash line, starting ALMOST from the inner corner (leave the inner-most corner clean so you don't close off your eye totally) and pull out past the outer corners slightly.  You'll likely need to re-dip your brush to get an even stroke of color as firm brushes give precision but do not pick up a lot of product.
 

Step 2: With the same brush, draw another line along the socket, but don't touch the inner corners of your eyes. (If your eyes are very close set, you might want to start the line nearer the middle of your eye,)
The outer corner of the upper line should meet the lower line in a rough wing shape. Do not worry about getting neat lines. 

Draw a third stroke along the outer half of the upper lashes as well.
The finished look will be something like the below. Look straight ahead into the mirror or take a picture to check that the top line looks more or less symmetrical on both eyes.

Step 3: Smoke it all out! Dip a soft blending brush lightly into the black shadow so there is just a bit of color, and then run it briskly along the top socket line to smoke everything out. This is where you add more black to even out the amount of color on both eyes until they are roughly equal.

Step 4: The fun part. Use a flat brush to pack gold pigment onto the lids. Any shade of gold, bronze or deeper silvers would work for this, but I do recommend loose metallic pigments for the most dramatic effect against the black. Fill in all the bare areas from the inner corners of the lids outwards.
A less shiny shade will give less contrast so if you're worried about looking too dramatic, by all means choose a softer finish.

Step 5: Add definition back.
  • I applied black liquid liner along the top lashes and then use the pointed or flat brush to run black shadow along the line. This smokes it out and keeps it from looking too precise and harsh.
  • pale yellow pencil to the waterline (my trusty Make Up Store Vanilla Matt pencil), and then 
  • went back in the soft blending brush dipped in black. Start to intensify the black and blend into the edges of the gold. Remember the overall look is predominantly smoky black, with a flash of gold.

Step 6: Finish by curling lashes and applying mascara (Bourjois Volume Glamour Max in Black). You can wear lashes with this look, but I chose not to as it might obscure the trace of gold but if you have very big lid space, it would totally work.

---

Step 7: On the cheeks, I applied a bit of MAC Mineralize Skinfinish Natural in Dark as subtle warm contour just under the cheekbones, and skipped blusher as it would just compete with the lips and eyes.

Step 8: On the lips, I applied a full-on deep-red matte lip using MAC Russian Red lipstick (this is actually not a blue-based red despite what some say; it's more of a dark true-red). I don't have a dark, cooler-toned black cherry shade or that would look even more dramatic with this eye.

---
Other Products Used:
  • Foundation: Bourjois Healthy Mix Foundation #52 for a velvety matte glow
  • Concealer: Amazing Cosmetics Amazing Concealer in Fair for a slightly brighter under-eye since the makeup is so smoky and dark
  •  Setting Powder: MAC Mineralize Skinfinish Natural in Medium
Recommended nail shade: Black creme, to keep things edgy but refined!

Wednesday, October 19, 2011

Featured Shade: Matte Purple Shadow

Colors to pair a matte purple shadow with!

A good matte dusty-purple is hard to find. Purple is one of those colors that I find to be more flattering in a matte or satin finish. Sparkly or metallic purple can look a bit too garish for work and school, but a dusty lavender grey is a much better option.

My favorites are Everyday Minerals Matte Eye Shadow in Tide Pool (limited edition, unfortunately), and Urban Decay Matte Eyeshadow in Cult (slightly deeper purple). This is a quick run down of some foolproof shades to pair matte purple with.

Everyday Minerals Tide Pool Eye Shadow (Matte)


Purple on Purple: Pale silvery-purple with a deeper smoky purple look great together.  Swatches: MAC Crystal (left), and Tide Pool (right)

Champagne and Purple: The contrast of a pale glimmering gold with a smoky purple is gorgeous. Swatches: MAC Retrospeck (left) and Tide Pool (right).

Chocolate and Berries: Nothing goes with purple as well as a rich cocoa when you want a more sophisticated look. Swatch: MAC Cement (left), and Tide Pool (right).

Bronze on Purple: For instant drama, an ambery, metallic bronze shadow or glitter  paired with a matte purple  can really play up your eyes.  Swatches: NYX Pearl Mania in Oro Pearl (left) and Tide Pool (right).