Showing posts with label brown smoky eyes. Show all posts

Monday, May 20, 2013

[Requested] 88 Matte Palette Smoky Brown Evening/Prom Eye (a la Bruno Mars "Just The Way You Are" Music Video)


Perfect opportunity for me to combine 2 requests; one for a dark brown prom-makeup done using the 88 Matte Palette (the Warm palette has the same shades needed), and one for the smoky eye look worn by the gorgeous model in Bruno Mars' Just The Way You Are video.

Dissecting the Look


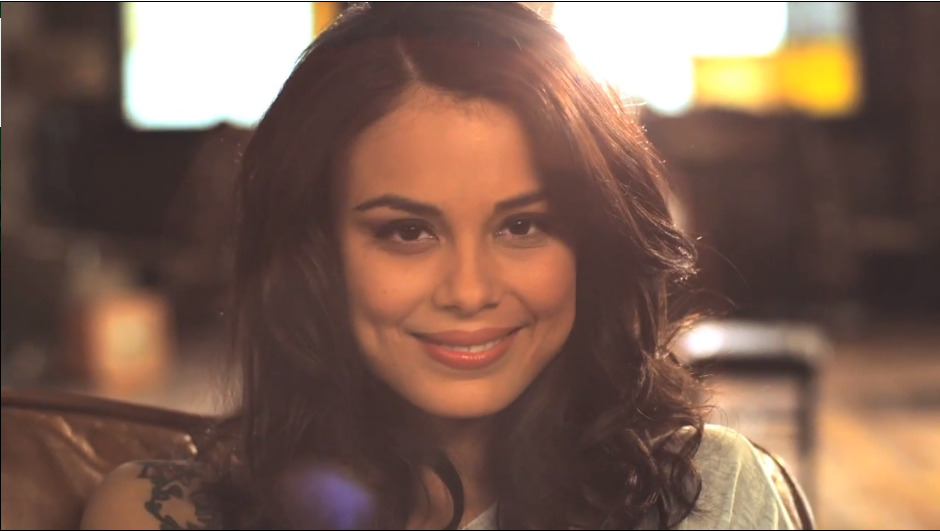
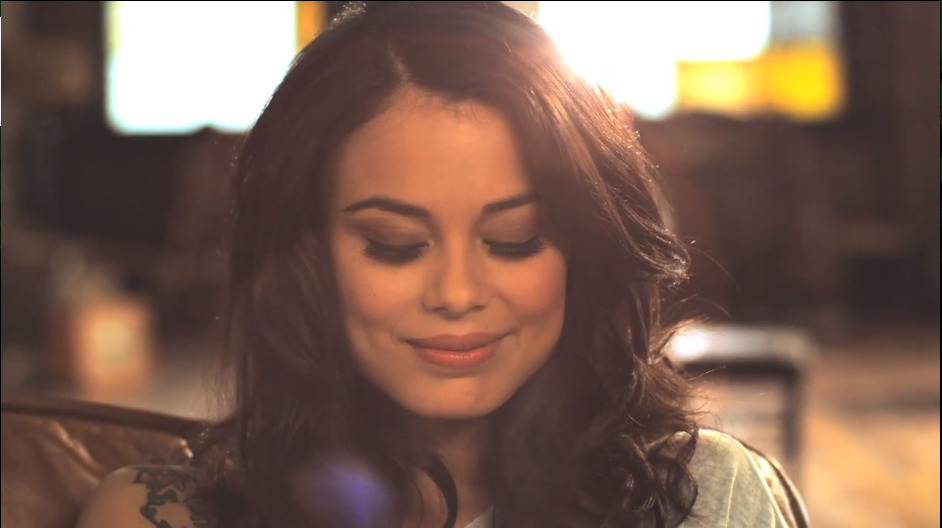
The lighting in the video is extremely orange/yellow and the moving images aren't crisp and clear (you can click on the images for a closer look at my screen grabs). From what I can tell, she is wearing:
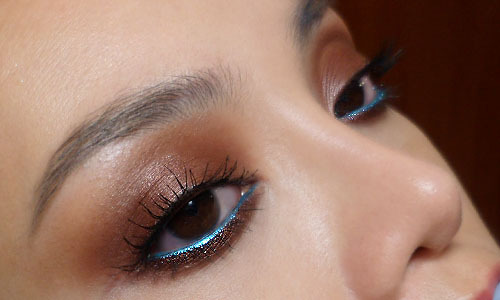
  • a matte chocolate brown smoky eye
  • a very flared and winged-out eyeshadow shape that emphasizes the outer halves of her socket line, quite similar to the classic smoky wing Pam Anderson might wear
  • very defined and thick black liner but it's not a very hard and precise line (i.e. does not look like liquid liner)
  • full false lashes that are a "rounded" shape, longer in the center instead of at the outsides
It's a very straightforward and flattering look as long as you can get the shadow shape correct, and it doesn't matter if you had mono-lids, hooded eyes or double lids; blue, green brown, hazel or grey eyes. But in real life, it probably works better for an evening out clubbing or at the prom than to school.

Monday, February 20, 2012

Smoky Brown with Electric-Blue Liner (Bourjois Intense Extrait 08 and Regard Effet Metallise 54 Bleu Clinquant)

This is a super-simple way to dress up browns without piling on a whole lot of color. If you enjoy wearing color along your lash line, this is also a way to get it to to stay longer and more intense along the waterline. 

Bourjois Regard Effet Metallise Pencil in 54 Bleu Clinquant on waterline, with Intense Extrait Shadow #08 on the lids.

I used a lot of Bourjois in this look (uninentionally, but aside from the electric blue pencil, it's easy to find lots of alternatives and many makeup wearer should already have similar shades in their collection).


Saturday, September 17, 2011

Evening Rose: Featuring NYX Doll Pink Lip Gloss (Swatches and Mini-Review)

Evening look featuring NYX Doll Pink Gloss, softly-colored eyes, and cool pink cheeks.

Since rediscovering my love for the richness, opacity and longer wear of lipsticks, I've sort of left most of my glosses lying around for months.

NYX Doll Pink (below) Round Lip Gloss is one of those items that I dropped into my shopping cart while buying all those NYX Matte Lipsticks, and it's been left forgotten and unloved for a long while, until I finally remembered it and dug it out.

As you can see below, this gloss is extremely pigmented as glosses go, but it's not sticky or heavy. In fact, it's really lovely, for a gloss that costs under a couple of bucks online.
Swatches of hot pink glosses (L-to-R): MAC Cremesheen Glass in Loud & Lovely, Revlon Super Lustrous Lipgloss in Pink Pop, and NYX Gloss in Doll Pink
For the simple eye look, you just need 2 shadows, liquid liner, and mascara. It's meant to hold its own against the pink gloss and blush, but not overpower because it's just a soft neutral smoky eye. But when it catches the light, that touch of shimmery blue should keep everything fresh and interesting.

Step 1: Apply a dark chocolate brown shimmer all over the lids and wing out at the outer corners. You can choose a matte brown if you want, but be careful not to go too dark as the whole look can become overly heavy.

Step 2: Gently pack a stroke of sparkly blue along the lower lash line (you can use transparent glitter with mixing medium for maximum drama) and at the inner corners to highlight.

Step 3: Apply black liquid liner along the upper lashline. I also applied it just to the base of the lashes at the waterline so no skin shows under the lashes. Finish with black mascara or false lashes if you want.


For the lips, I applied NYX Doll Pink gloss first, then very lightly stroked a taupe-brown pencil just around the edges of the gloss for definition. Note that you should not be drawing OUTSIDE the gloss but just over the border so your pencil blends with the gloss.
You don't want a visible brown line.


For the cheeks, I applied a pale pink blush onto a kabuki and then dabbed it lightly into an intense blue-pink shadow before applying the mixture to the cheeks. Try MAC Stars n Rockets or any other intense magenta-pink (or even pinky-purple).


Thursday, September 1, 2011

Azure Pop Tutorial

Metallic azure blue centered on matte brown smoky eyes.

We've all seen the Jason Wu F/W 2011 runway makeup, with the dark navy smoky eyes and bright metallic gold in the center of the lids.


I wasn't so much interested in re-creating the look as re-interpreting it with a different color scheme and softer, more wearable finish for real life. 

Step 1: Pack a matte cocoa brown to the outer and inner thirds of the lids, over a good eyeshadow base. You want the color to be intense, as this is your guide-line for the contrasting blue in the center of the lids. Don't bother smoking it out at this point.

Step 2: Pack a metallic azure blue to the center of the lids. For more drama, foil the shadow with mixing medium like MAC Fix+ before applying to achieve a more metallic finish. If you want to soften the look, just apply it dry. 


Azure blue from the 88 Shimmer Palette; good alternatives if you don't have a similar shade include MAC Mutiny pigment or Barry M Kingfisher Dazzledust. Just don't get anything that is too green-toned if you want maximum contrast with the brown.


Step 3: With a softer, warmer brown, blend along the socket line and upwards toward the brown bone. Again you can go all the way to the brows for drama but I did not.


Step 4: Finish with dark brown liner along the water lines, and black mascara on top and bottom lashes. I opted not to apply false lashes, just so I wouldn't obscure the lid colors.