Friday, October 12, 2012

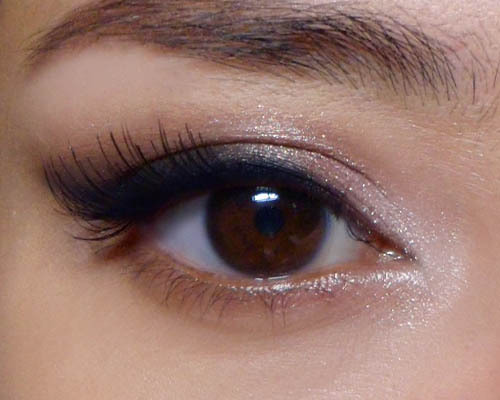
Soft Glamor: Easy Evening/Party/Prom Neutral Eye


Note: Leaving everyone with a look while I pop off to NYC for a holiday!
Posts will be a bit sparse for the next 2 weeks. Hope you all stay well and have a great Halloween!

For everyone who is relatively new to eye makeup and not sure how to add some flattering glamor for formal occasions, this is a look you can try.
It's comprised of neutrals, so it goes with pretty much any outfit, although you can change the lid shade from a smoky brown to any other color and retain the shape and application.
I used a:
  • Matte black
  • Smoky taupe brown (semi-matte)
  • Coppery-beige shimmer
  • Silver-white shimmer
Also, a black eye pencil, black mascara, and a single strip of wispy lashes cut into half.


Step 1: First use a firm smudge brush or angled brush to apply black to the lash line, like you would apply a thick swatch of liner. As always, draw in the outer flick first, parallel to the angle of your lower lash line, and then extend the line inwards to the inner corners.


Step 2: The main lid shade for the smoky look. I used a deep taupe brown (BH Cosmetics MS17; use MAC Satin Taupe if you have it) above the black earlier, and gently filled in the entire lid EXCEPT the inner corners. Follow the line of the black and wing the brown out at the outer corners.
On the inner corners, run it along the socket line only.


Step 3: On the inner 1/3 of the lids, apply a peach-tan shimmer. MAC Tan pigment or BH Cosmetics CS09). This doesn't show up that well on camera but in real life both these shades are very intensely metallic.


Step 4: [Recommended for the very pale to medium-fair skins; Optional for everyone else] Dab a bit of silvery-white shimmer right in the inner corners just to brighten things up a little. This is only needed if the tan shimmer is the same tone or darker than your natural skin tone. You'd need a little more brightness at the inner corners for a more flattering effect. 
If you have caramel to dark chocolate skin, the peach-tan shade should already pop against your skin.

Step 5: The lashes. I cut a pair of wispies (fluttery, irregular, natural-looking) into 2 halves and then used one half on the outer lash line. This beefs up your lashes only on the outside, and emphasizes that sultry, catty effect. You want to curl your natural lashes before you apply falsies.

Let the glue dry at least 30 seconds or until you see a bit of the glue going grey or transparent. Then place the inner corner in the center of the lid, and then tuck the outer corner down.
(Half strips are a much easier way to apply false lashes for those who aren't familiar with it, and cutting a single pair of lashes into 2 is cheaper than buying a single pair of half strips for the same price!)
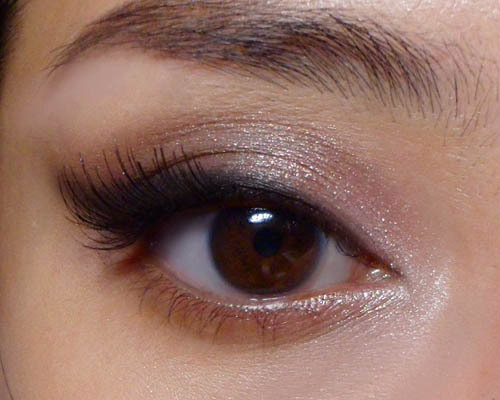
 
Last step: Finish by applying black pencil along the inner rim of the lower lids to just intensify the lash line further, and then you can apply some mascara just to weave your natural lashes into the false ones.


Tips on cutting lashes:
  1. Look for lashes that are symmetrical, with longest hairs in the center, and outer hairs equally short. 
  2. The best lashes for cutting have short outer hairs and much longer hairs in the center. This helps if your natural lashes are short, because the short end of the false lashes should more or less blend in with your own instead of sticking out obviously in the center of your eye.


Monday, October 8, 2012

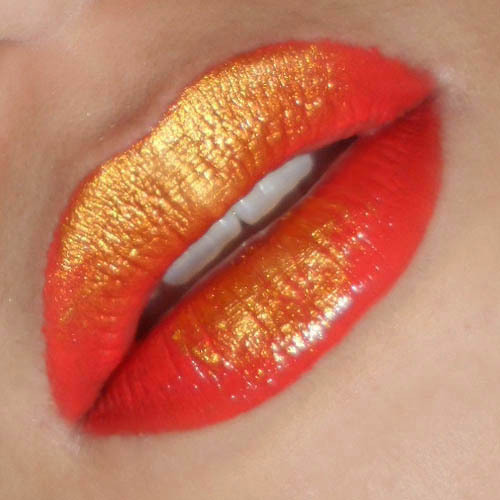
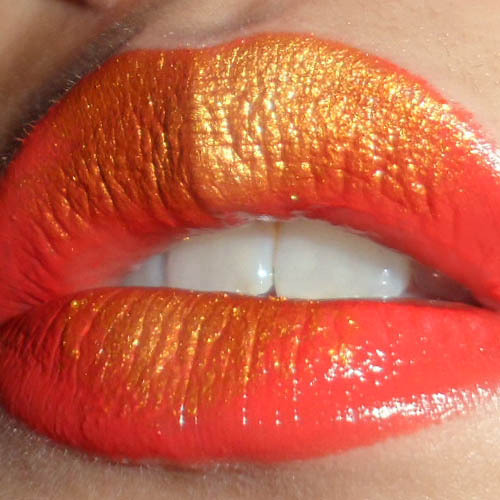
Statement Metallic Ombre Lips (Chinese Festival Colors)


This is a fun tutorial with a twist on the "traditional" ombre lip using a metallic pigment. You can choose any colors you want as long as they sort of stand out from each other. (Test on the back of your hand to see if you like the effect.)
Just because this is the Mid-Autumn Festival period for many Asians, I went with a nice coral red (Revlon Ravish Me Red) and a bright amber-gold pigment (Coastal Scents mica in Metallic Rustic Gold).
The only other things you'll need are a flat eye brush that isn't too small, and Q-tips in case you need to clean up any mess.


Step 1: Simply slick on your lipstick as neatly as possible. Matte lipsticks will allow the pigment to "float" and be more obvious. The glossier the lipstick, the more the pigments will sink into the moisture (and look dull).
You can still use a creamy lipstick. You'd just need to layer on more pigment.


Step 2: Using your flat brush, press one side of it into the pigment and then tap the brush to remove any excess. If you don't, all the pigment is going to end up on your chin. Not very sexy.


Step 3: The 1st step to laying down the color is to gently pat a thin layer of pigment onto the top lip. Go from center outward one side at a time, so that most of the pigments will be concentrated in the center. The first layer you lay down may not be very vibrant and opaque, but don't worry about that.


Step 4: This is where you pack a 2nd layer of color down the center of both top and bottom lips. On the top lip, this should give you that nice ombre effect where the gold is most intense in the center and then slowly fades out into the red.
On the bottom lip, I wanted more dramatic contrast (like gold foil pressed onto the lips), so I only pressed the brush down around the center. No ombre, no fading outwards like we did with the top lip.


If you need to, use a Q-tip to carefully clean up the edges if your lip, but if you didn't pick up too much pigment earlier, you shouldn't need to.
Now all you need is minimal makeup on the rest of your face, and you'll have the most vavavoom lips at the party! (Just be very careful about eating and drinking.)


Monday, October 1, 2012

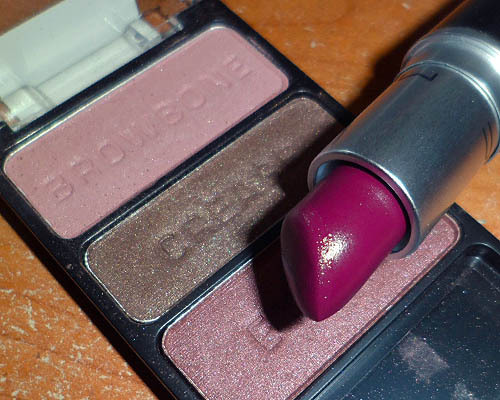
Velvet Bloom (Wet n Wild Knock On Wood Trio, with MAC Rebel Lipstick)


A rather straightforward look (which I believe will be flattering on most people) featuring soft eyes a rose-colored lips for those who want to play up their pout more than their eyes. 
It's getting to the end of Summer, so I wanted to start getting into the duskier, more romantic colors like rose, cocoa brown, dusty pinks. This made me whip out Rebel lipstick from MAC and my Knock On Wood trio from Wet n Wild. 


Step 1: I used the middle shade in the Knock on Wood trio (soft chocolate brown) and blended that lightly onto the inner and outer 1/3 of the lid. The color should go up to the hollow of your socket, so even if you have hooded or mono-lids, you can wear this look.
If you don't have the Knock on Wood palette, this is a pretty easy shade to find. I just recommend shades that aren't too metallic for this look. Go for something matte or semi-matte, to get that soft-focus finish.


Step 2: In the center of the lid, I used the softest shade in the palette, the dusty beige-pink browbone shade at the top, and just blended it on, buffing into the brown earlier so there are no obvious lines.


Step 3: To finish the eye, I simply used a pale beige/ivory shimmer pencil (Majolica Majorca #71, or ANY ivory eye shadow if you don't have a pencil) to brighten just the inner corners. 
Then I finished with black mascara on top and bottom lashes.


The finished eye should look satiny and subtly contoured, but not like a ton of eye makeup.


On the cheeks, I dusted on a soft pink (Bourjois Little Round Pot Eyeshadow #15; use any soft pink you have that isn't too strong or bright!) and then slicked on MAC Rebel over my lips, which looks really dark and vampy in the tube but goes on a lovely rose color.