Showing posts with label wet n wild coloricon. Show all posts

Sunday, December 16, 2012

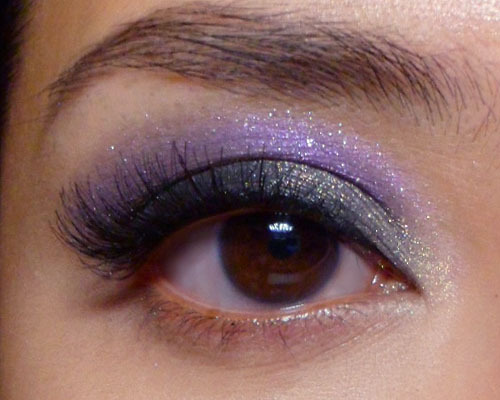
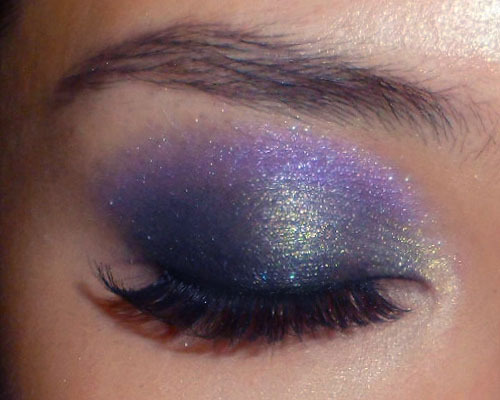
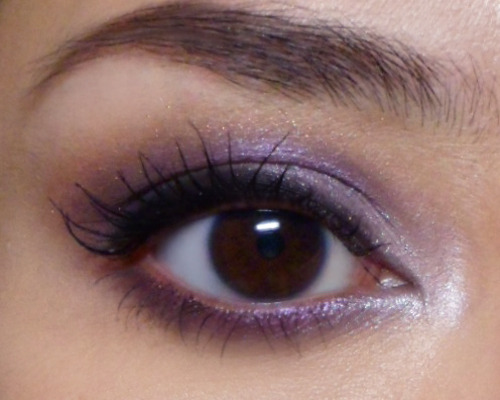
Basic Purple Smoky Eye


This is a look that you can do with any drugstore purple shadow palette as long as it has a dark shade (can be charcoal, black, dark brown, plum, whatever!), a medium purple, and a paler pink or lavender.
I used Wet n Wild ColoriCon in Petal Pusher.
It's a very basic shape and really takes just a few minutes to do. Pair with a light colored gloss or lip balm, and you'll be good to go!
Note that you can use ANY palette you want, but the main color that will "pop" and stand out more is the main lid shade. I chose a cool-toned purple because it tends to look good with most skintones and eye colors.


Step 1: First use a medium-strength purple shade as the main color. This is usually the brightest/strongest color of the 3 that you will use for a typical look.
Run along the lower lash line as well.


Step 2: Smoke out the edges of the eye with a deep shade. I used a rust-brown color from the outer corners inwards, along the hollow of the socket line. Buff until you don't see any obvious lines. I also smoked it out a little right at the outer corners, to elongate the shape a bit.
On the inner corners, just dab on a pale shade. This brightens the entire eye area and keeps the look from being too heavy or dull. If you have close-set eyes, wearing a pale shade on the inside and a dark shade on the outside also helps create the optical illusion of slightly wider-set eyes.


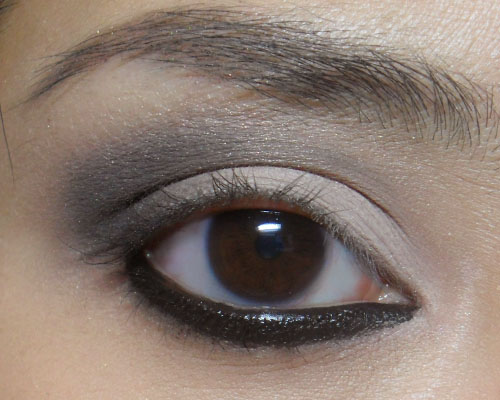
Step 3: I ran a black pencil along the upper lash line. Make it thick if you want the look to be more "evening"-appropriate or sultry. Wear it thin if you want a softer, less-smoky look.


Step 4: Use your finger to SMUDGE out the black pencil you applied earlier. You're not creating a harsh line. Just a very soft smoky gradient from the purple down to the lashes.
Finish with black mascara.

Monday, October 1, 2012

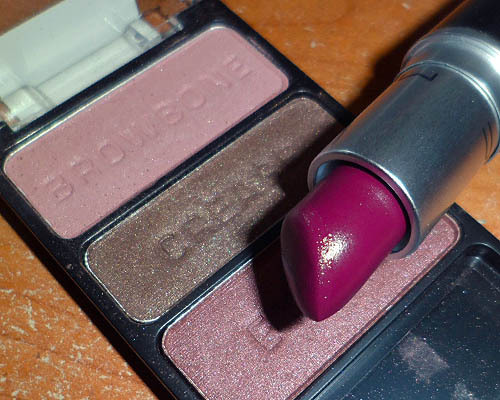
Velvet Bloom (Wet n Wild Knock On Wood Trio, with MAC Rebel Lipstick)


A rather straightforward look (which I believe will be flattering on most people) featuring soft eyes a rose-colored lips for those who want to play up their pout more than their eyes. 
It's getting to the end of Summer, so I wanted to start getting into the duskier, more romantic colors like rose, cocoa brown, dusty pinks. This made me whip out Rebel lipstick from MAC and my Knock On Wood trio from Wet n Wild. 


Step 1: I used the middle shade in the Knock on Wood trio (soft chocolate brown) and blended that lightly onto the inner and outer 1/3 of the lid. The color should go up to the hollow of your socket, so even if you have hooded or mono-lids, you can wear this look.
If you don't have the Knock on Wood palette, this is a pretty easy shade to find. I just recommend shades that aren't too metallic for this look. Go for something matte or semi-matte, to get that soft-focus finish.


Step 2: In the center of the lid, I used the softest shade in the palette, the dusty beige-pink browbone shade at the top, and just blended it on, buffing into the brown earlier so there are no obvious lines.


Step 3: To finish the eye, I simply used a pale beige/ivory shimmer pencil (Majolica Majorca #71, or ANY ivory eye shadow if you don't have a pencil) to brighten just the inner corners. 
Then I finished with black mascara on top and bottom lashes.


The finished eye should look satiny and subtly contoured, but not like a ton of eye makeup.


On the cheeks, I dusted on a soft pink (Bourjois Little Round Pot Eyeshadow #15; use any soft pink you have that isn't too strong or bright!) and then slicked on MAC Rebel over my lips, which looks really dark and vampy in the tube but goes on a lovely rose color.

Thursday, April 12, 2012

Spring Night: Smoky Duochrome Eye (all drugstore products!)


A smoky eye and false lashes do not necessarily mean a heavy look if you layer on some shine and subtle color.
Here, I used:
  • elf Black Licorice cream shadow duo (black shade)
  • Wet n Wild ColorIcon in Greed (sparkly black and gray-gold shade)
  • Essence Colour & Shine eyeshadow in 03 Wear It (baked sparkly purple)
  • Bourjois Liner Pinceau 16 Hour liquid liner in black
  • Ardell 120 Demi lashes

Step 1: Apply the black base in an even layer, sheering out above the socket line.

Step 2: Dab the tips of a brush into black shadow and then pack it gently along the lash line. Don't run this over the entire crease area as you need to leave space for the silver-gold.

Step 3: With the silvery-gold shade in the Wet n Wild palette (or any soft grey you have), run just above the black shadow in a thin strip. You may need to go over a couple of times to build up intensity. Try to keep the color within the socket line.

Step 4: Run a sparkly purple along the socket line, framing the rest of the eye makeup. You can smoke this color out a bit more since it's the outermost shade.

Step 5: Apply black liquid liner at the base of your upper lashes, and then apply wispy false lashes. To keep the look lighter and more lifted upwards, I'm not applying anything on the bottom lash line. Not even mascara.


Friday, September 23, 2011

Neutral Eye with Thick Cat Liner (Maybelline Lasting Drama Gel Liner and Wet n Wild Greed Palette)

Beige and grey cut crease with thick cat eye liner.
Neutral can be dramatic even without tons of glitter and metallic textures. It all depends on the application.
This look was done using all drugstore or budget products. 
  • Maybelline Lasting Drama black gel liner
  • Wet n Wild Coloricon Greed Palette (POP Pretty Puzzle in Smoked Out Silver has 3 comparable shades)
  • Bourjois Volume Glamour Max Mascara in Black
  • Maybelline Pure Mineral Blush in N01 Original Rose
  • NYX Round Lipstick in 556 Iced Honey
  • Sephora Shimmer Gloss in 17 Golden Beige


Step 1: Apply a matte beige along the inner 2/3 of the lids and around the inner corners to highlight  the eyes. Then a smoky grey heavily along the outer half of the crease. I applied the shimmery black in the Greed Palette, and then smoked it out with the shimmery grey.

Step 2: Apply a thick swatch of solid black gel liner along the lower lash line, making sure to cover the water line. Gel liner gives you the best control and opacity, so I wouldn't recommend using a regular pencil or liquid liner.

Step 3: Repeat along the upper lash line, and then run the brush along the tide line as well to  make sure there isn't any white gap under the lashes.

Step 4: Finish with a voluminising mascara after curling lashes. False lashes would work just as well, but I wanted to try my Bourjois Volume Glamour Max Mascara.

Finish with a warm peach-pink blush that isn't too shimmery (you want the texture to be as muted as the eye makeup.
For the lips, I decided a touch of frost might be in order, so I applied NYX Iced Honey liipstick, and topped with a shimmery beige gloss (Sephora Golden Beige).

The finished look once again.


Monday, August 15, 2011

How to even out NYX Narcissus Lipstick, plus a tutorial!

Top-to-Bottom: NYX Narcissus Round Lipstick, Revlon Stormy Pink Matte Lipstick, layered for an even, opaque finish.
Narcissus is one of NYX's best-sellers, but I'm one of those who feel the texture leaves much to be desired. Unlike many of the creme formulas, Narcissus is a semi-shimmery, bright doll-pink which has been compared to MACs Viva Glam Gaga.

The problem is that the very-creamy, slightly-shimmery texture does not adhere to your lips well, so it will sink into lines, and streak and smear around every time you press your lips together. With a shade this bright, any unevenness is extremely obvious.

The trick? Layer this over a matte lipstick. 
The matte texture will absorb some of the grease in the texture and make Narcissus less slippery. This means it will stay more even on your lips. You can use a nude lipstick or even some concealer, but to retain the original intensity and not mute the color, a bright pink that is very similar in shade would be your best option.

NYX Narcissus layered over Revlon Matte Lipstick in Stormy Pink gives a more even and opaque finish, without visibly altering the color.

Wine-smoked Eye Look with NYX Narcissus lipstick: (Click for tutorial!)

Wet n Wild Coloricon in Knock on Wood, NYX Blush in Silky Rose, and NYX Narcissus lipstick


Saturday, August 6, 2011

Wet n Wild Coloricon "Greed" Palette (Glam Look)


This is a second look featuring the Wet n Wild Coloricon Palette "Greed". Previously, I did a softer, more colorful look using the shimmery and coral-toned shades. This time, it's more a play on shapes and contrast than washes of color.


Step 1: Apply eyeshadow base over the lids, then black kohl pencil along the upper and lower lash lines. Smudge along the upper lids, and then re-line right at the root of lashes so it is darker there.

Step 2: Using a flat, firm brush, pack the matte black shade along the liner on upper and lower lids, and then extend outward in a wing. It should be thicker at the outer halves, and not too curved.

Step 3: Apply the shimmery coral in the lid area, not extending up past the socket line. Then use a small brush to blend matte coral along the outer half of the socket lines for some subtle contouring.

Step 4: Using a clean pencil brush, run the silvery-gold shade along the inner half of the socket line. This gives shape and very interesting contrast.

Step 5: Apply black liquid liner close tot he lash line, and then false lashes and black mascara to finish the look.


Monday, July 25, 2011

Dawn Storm: Wet n Wild “Greed” Palette


I’m a little late on the Coloricon train, but I finally got a few from Nonpareil.com, and I’ve been loving them so far.
The first one I decided to try was the 6-color #246 Greed palette, below. I think the shades are gorgeous. The pigmentation of the matte shades is higher on touch, but if you apply them with a brush, over primed lids, the metallics perform just as well, and are really gorgeous.


(Wet n Wild Coloricon 246 Greed)


One tip: Try to avoid applying or touching these with your fingers or you could end up hardening and “sealing” the metallic shades.

Click here for the step-by-step!