Tuesday, June 25, 2013

China Glaze Holographic Nail Polishes: Mini Review and Swatches

China Glaze Holographics
It seems holographics just won't go away yet. They're not anything new, so I don't know why it took me so long to write about them. 
Maybe cos I like holographic polishes but I don't go out of my way to get hold of specialty brands, so it's a good thing an accessible line like China Glaze jumped on the bandwagon awhile ago or I'd probably just pass on the whole trend.

Not all brands are the same, so you might want to consider the below before you buy these.

About:

  • Holographic polishes are made with the addition of special pigments called "spectraflair". They refract light differently because they are spherical in shape, unlike flat flakes of regular holographic glitters.
  • Regular holographic glitter or pigments give a scattered sparkle (like stars), and do not throw out this amazing radial effect on curved surfaces. 
  • Spectraflair pigment is traditionally used for car paints. They are available for commercial buyers only. You CAN purchase small quantities of pure pigment from some sellers on eBay, but I think the price for a tiny amount is exorbitant and you might be better off just buying a holo polish that you like than getting the pigment and struggling to mix your own.
My China Glaze Holographics Collection (from Left): Strap on Your Moonboots, Don't Be a Luna-Tic, OMG A UFO, Astro-Hot, Get Outta My Space)
China Glaze Holographics
  • China Glaze holo polishes are very subtle compared to some other brands like Color Club, and look like normal chrome polishes in the bottle. They have to dry on the nail before you can see the holographic effect properly.
  • The holo effect shows up better on most of the lighter shades. With the red and berry shades, I find the holo a little too subtle. If you want more obvious bling go for Don't Be a Luna-Tic (silver-blue), and Get Outta My Space (pale mauve).
  • Newer formulations launched in the recent couple of years work and last like regular polish. Some of the older versions from a few years ago require a special base primer or they don't go on smoothly. 

China Glaze Strap On Your Moonboots: Deep navy holographic blue. Medium-soft holographic effect. Not the most dramatic of the bunch simply because the color is quite deep, but I do love the stormy effect nonetheless.

China Glaze You're a Luna-tic: Very bright silver -blue holo.
China Glaze OMG A UFO: Fun olive green. This is one of the subtler holographics, and the rainbow effect is not as apparent as some of the other colors. Skip this unless you really like the green base tone and subtle effect.

China Glaze Astro-Hot: Pretty holographic pink. This is a good bet if you MUST blind-buy without being able to see a swatch first-hand.  I'd say it's medium intensity holographic.

China Glaze Get Outta My Space: Pale silvery mauve (pink-purple). Probably the strongest holographic effect of the bunch, aside from Don't Be a Luna-Tic. Really like this one. 

Pricing:
Varies from country to country but they tend to cost just slightly more than regular China Glaze polishes.
Pros:
  • Affordable
  • accessible
  • pretty
  • subtle enough for office or more formal occasions
Cons:
  • Many of the shades dry quite fast, so you have to apply quickly in 2-3 strokes or they will drag and streak.
  • They are so subtle that you might not notice they are holographic until you look close.

Friday, June 21, 2013

LIP TARS: What they are, how they work, what I think of some of the colors.

Obsessive Compulsive Cosmetics Lip Tars
I was recently asked my thoughts on Lip Tars and whether I thought it was worth it to invest in them. Well, I own 5 tubes so that's saying something. The thing to remember though, is that it's not for everyone. I'd recommend it if:
  1. You need to enjoy "mixology" and blending colors to make your own,
  2. You LOVE very strong accent makeup on your lips and you don't mind spending more time on your makeup, OR
  3. You're a makeup artist and you need to do both of the above.

 Most people would have no use for lip tars because:

  • They can't be applied quickly like a balm or gloss; it would look crazy
  • With most colors you need to use a brush
  • A lot of the colors are incredibly strong and not practical for school or regular office-work (ultraviolet, yellow, blue, black, white,... )
  • The pigments separate from the oils after awhile, and you need to have the patience to tip it the other way and shake it around until everything is mixed up again
That said, here are the colors I own and what I think, plus tips at the end of the post if you want to use them!

OCC Lip Tar in RX
True black. But you MUST wear a lip liner or some sort of wax base round your lips with this. It will very quickly bleed into fine lines.
I actually recommend MAC's Black Lipmix from the Pro range if you can get it.
It's not as glossy when it goes on, but the formula doesn't separate as badly and it goes on more opaque, with no bleeding. I would probably not repurchase this after I use it up unless I can't get my MAC for some reason.
MAC Lipmix vs OCC Lip Tar: The MAC isn't bleeding. It's just smudgy application. The OCC is though.
Mix with: ANY color to darken it or dull it.

OCC Lip Tar in RX
True, true primary blue. If you're looking for an opaque, intense blue whether to mix or wear on its own, this is the BEST shade you can get. I love it. Here's a post with a few things I did using RX.
One word for bloggers and those taking photos; this blue has a tendency to flashback in flash or bright lights, so it looks almost pastel blue in certain conditions. 
Mix with: Any color to cool it down. Use only a TINY dot when mixing!

OCC Lip Tar in Belladonna
This bright purple doesn't look this blue in real life. But even more than RX, the blue in this picks up in most frontal shots I take. In real life, it's not so ultraviolet.
Still it's a fantastic bright purple, and if you're the sort to love things that are "somewhat left of the center" (like me), you'll love wearing this color neat, without mixing anything in.
Mix with: Pinks to make them more lavender toned, with red for a burgundy/wine. 


OCC Lip Tar in Pretty Boy
Bright fuchsia pink.
This is the older sister (or brother) of Anime, OCC's best selling neon pink. It's still bright, but slightly more grown up and slightly more flattering on most skins. This is a shade I would recommend wearing just on its own with a fuchsia lip liner.

OCC Lip Tar in Ophelia
Soft beige pink.
The only pale shade I have in my collection at this time. It's a gorgeous cool-toned pink, but you can see no matter how much patting and blending I did, the lines are still visible where the pigments sank in. From a slight distance, and in real life, it's not really noticeable. Just be careful when you're taking anything in high-res.
Mix with: A bright color to soften it slightly. Although I'd also recommend just wearing this on its own because it's a very pretty and wearable shade for those with pale to medium-fair skin.

A few tips for those who can't resist the lure of these little tubes:

  • Try to always use a lip brush, except with some paler colors that look patchy or streaky. Then I recommend using your ring finger to lightly spread an pat it out.
  • Apply a very very thin layer first, spread it out sheer, let it set a bit, then build up more when needed. Don't plonk on a whole lot (this is not regular lip gloss!) because it will seep everywhere, and be more likely to bleed and sink into lines.
  • Lip tars are a blend of pigments and oils. This is the reason they separate, and why they seem to go on glossy, then lose some of the shine after awhile. The oils vaporize and get absorbed, leaving mainly pigments, unlike wax-based glosses and lipsticks which will just sit pretty on your skin.

If you want to make your own D.I.Y. Lip Tars (works better with metallic pigments), I also have a post on that here.


Tuesday, June 18, 2013

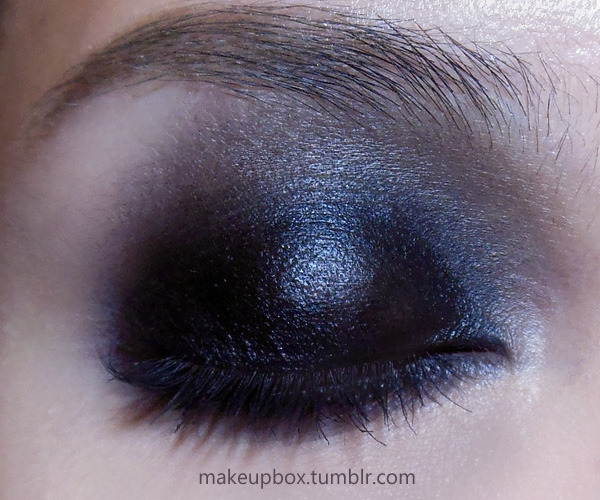
Makeup 101: 3 Common Smoky Eye Shapes to Try!


Everyone can wear a smoky eye. It just takes a little experimentation to find out which shape suits you better.
These are just general guidelines, and you should remember that they will each appear different on different eye shapes. There are also more complicated ways to do smoky eyes. I'm just running you through the basics.
For demo purposes, I'm using black face paint (Snazaroo) and 2 brushes. One synthetic concealer brush to pack on the black, and one dry blending fluff brush (below) for smoking out the black.
For your own looks, you don't need to use black or a facepaint!  You can use black kajal, khol, gel liner, pencil or even a powder shadow. Anything that doesn't set too quickly, since you need time to smoke it out.

Sunday, June 9, 2013

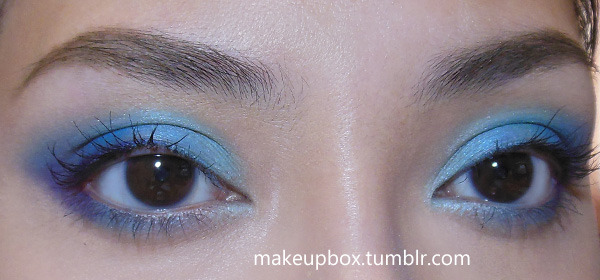
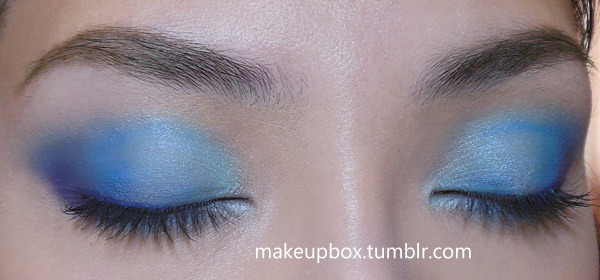
Pacific Blue: Simple, Colorful Winged Eyes (88 Original Palette)


Simple look featuring 3 shadows: 
  • A light aqua, a medium bright blue, and a dark purple.
  • Dark blue/purple liner optional.
  • Black mascara.


Steps below!


Apply mascara to finish!

Saturday, June 1, 2013

MAC Temperature Rising Haul (My Recommendations)


I actually wasn't interested in the Temperature Rising collection when I saw the publicity images and the product images online. 

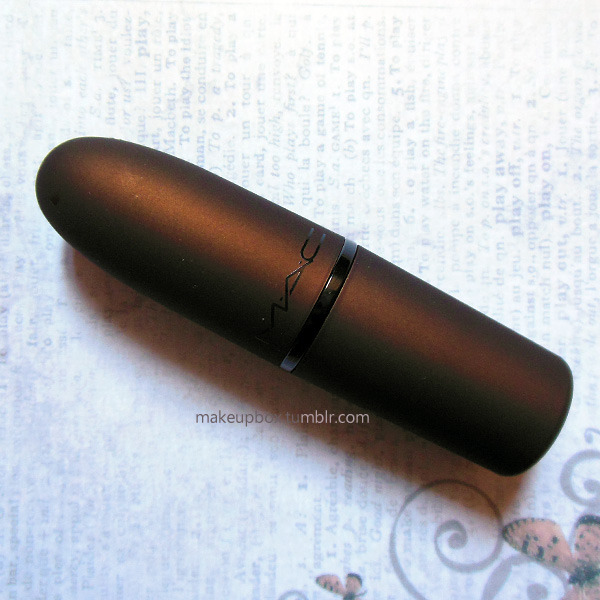
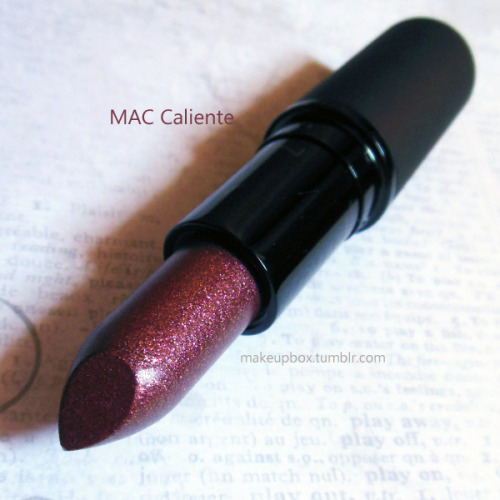
Then when I happened to pass by a MAC counter during lunch the other day, the new display was out, and go seduced by the incredibly gorgeous dark rubberized metallic casing, so I decided to swatch a little, and fell in love with these 2 products.