Friday, February 22, 2013

Cobalt Wing: Graphic "Duochrome" Liner and Poppy-red Lips (for a funky Valentine's)


Say you're doing away with the whole dinner and flowers thing, and having fun at the club or jazzing it up with the girls (or boys) this Valentine's. 
Who needs another neutral, barely-there makeup look? You want all eyes on you baby!
This is a very fun way to wear a classic red lip and liner retro "Bombshell" look, and while I picked blue because I have brown eyes, you can EASILY adapt this to any other color. This is good for any skin tone and most eye shapes, including mature skins and hooded lids. If you have mono-lids, the liner might not show up quite as well.
What you'll need are:
  • Nude beige shadow (you can use pressed powder, really)
  • A matte soft-brown (I got both shades from the 88 Warm palette)
  • Gel liner in a dark shade (I used a blackened blue; Japanese brand KATE's Gel Liner in BU-1)
  • Matching pearlescent shadow in a bright medium-tone (I used a metallic violet-blue, Kat von Shade Shifter in Stockholm)

Wednesday, February 13, 2013

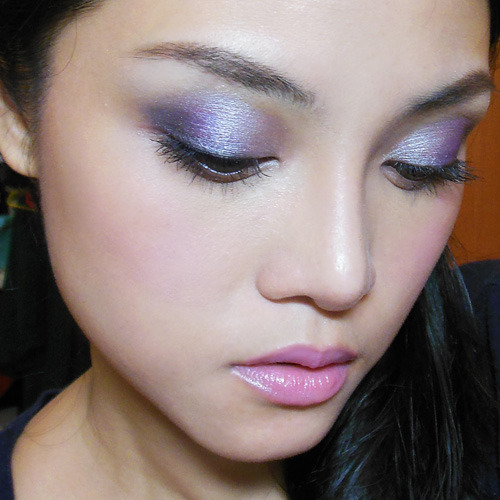
Romantic Contoured Lavender

--
Lavender is a universally-flattering color for most eye and skin colors, and I always consider it one of those shades that functions like a neutral because it goes with everything and everyone. A contoured, pearlescent lavender eye like this one can look sultry and dreamy at the same time (as seen on Jessica Rabbit), AND you can change the entire look just by switching out your lip color.
Some tips:
  • What you want to be careful of, if you have uneven skin tone or a lot of red/pink in your skin, is to pick purples that lean more silver or blue. 
  • If you have mature lids, go with slightly less metallic/shimmery shadows than I used because a high-sheen can emphasize lines.
  • If you have very dark skin, pick a purple that is richer and stronger as a soft pastel can look chalky
  • If you are layering it over a grey/silver base like I did here (See below), remember that you need to go with a slightly more pink-toned shade than you want because the blue undertones in the grey base will make a purple look blue. 
image
I used the 88 Shimmer palette, but you can find soft pinks and purples EVERYWHERE so don't feel you need to purchase a brand new palette for this.


image

Step 1: Apply your base all over the lid up to the socket line, but don't wing it out at the outer corners. You want to keep the eye shape quite round and doe-like for this.
Then use a small brush to run the grey cream shadow along the outer half of the lower lash line as well. (I used Maybelline Color Tattoo in Audacious Asphalt.)


image
Step 2: From the 88 Shimmer palette, I picked a lavender and cool pink in the 2 center columns and mixed them together on a brush.
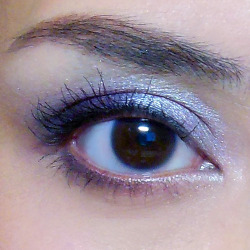
Then I applied this mixture onto the outer half of the lids, below. As you can see the mixture goes on a straight lavender because the grey cancels out the pink/red tones. If I'd used just the purple, my shadow would look almost blue.

image


 image

Step 3: Next I picked a warm-toned paler pink and applied that onto the inner half of the lids, blending into the pink-purple from earlier. Bring this down the inner corners to the lower lid as well. This creates a brightness at the inner corners of your eye, and is great if you have close-set eyes.

image


image

Step 4: To finish the shadow, just apply a little charcoal or black shadow right to the outer corners. I did not bother to sweep it upwards along the socket line but if you have hooded or mono-lids and want to emphasize your socket a bit more, you can do that.


image

Step 5: For extra definition at the lash line, I applied a thin line of black pencil to the outer half of the lids and then used the same shadow brush from earlier to soften and blend it out.
Then I finished with black mascara.


image
Step 6: Because I'm going with a cooler toned lip for this look, I chose a raspberry pink blush. Try something like Nyx Pinky which looks like a super-bright fuchsia, but goes on quite pretty. If you want you can apply just a little matte bronzer around the edges of your face and temples, jawline to add some dimension back to your face.


image
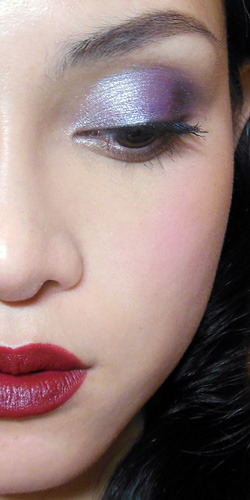
Step 7: For the lips, you have the option of using a soft pastel blue-based pink like Revlon's Strawberry Shortcake Lip Butter, OR you can apply a deep dark liver-red (MAC Diva). The dark lip instantly turns the look into a rather "Noir" one, and I didn't touch the eyeshadow or the blush at all.

Monday, February 11, 2013

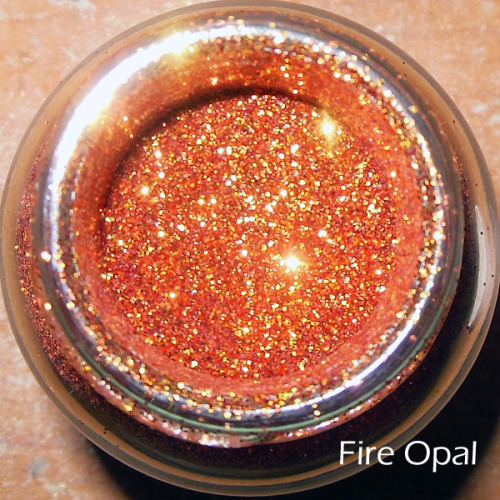
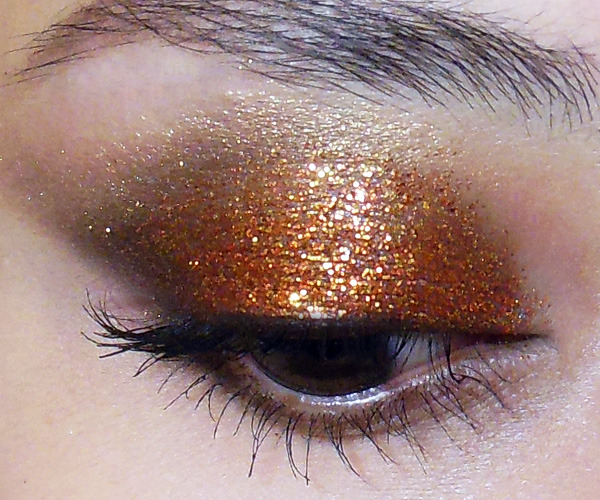
Fire Opal: Sparkly Burnished-Gold Lids (usin Martha Stewart Crafts Glitter!)


I mentioned in an earlier post that I found some of the most gorgeous ultra-fine glitters at the craft store. 
They're from Martha Stewart Crafts, and come in the most beautiful shades. These aren't micro-glitters but they're certainly the same size as most cosmetic grade glitters from brands like MAC and Lime Crime. The best thing is each 1.5oz glass jar costs less than US$10. The shade I'm using today is Fire Opal, a beautiful blend of pale gold and coppery-bronze.
Disclaimer: I'm not encouraging you to pick craft glitters over cosmetic-grade glitters. I personally only choose glitters that are very fine, round-cut and 100% polyester, and I always test to make sure they don't bleed in solvents and on the skin, regardless of whether they are from a makeup brand or a craft store.Always proceed with caution and be your own judge!
--

image


Step 1: First apply a brown base. You can use Maybelline Color Tattoo in Bad to the Bronze, or something like MAC Groundwork. You want to blend slightly past the socket line, and also wing it out at the outer corners, pulling towards the end of the brows.


image

Step 2: While your base has not dried, quickly use a flat brush to pack glitter onto most of the lid, except for the outermost corners, where you will apply a little dark chocolate brown shadow (L'oreal Infallibale Shadow in Endless Chocolat - the name might be different in the US; any deep brown will do) for definition.


image
Step 3: With the same chocolate brown shadow, run lightly along the outer 2/3 of the lower lash line for a little definition.
Along the edges of the brown, use a soft peach-golden shade like MAC Gleam or Expensive Pink to gently blend and fade the color.


image
Step 4: Finish with black mascara!

Thursday, February 7, 2013

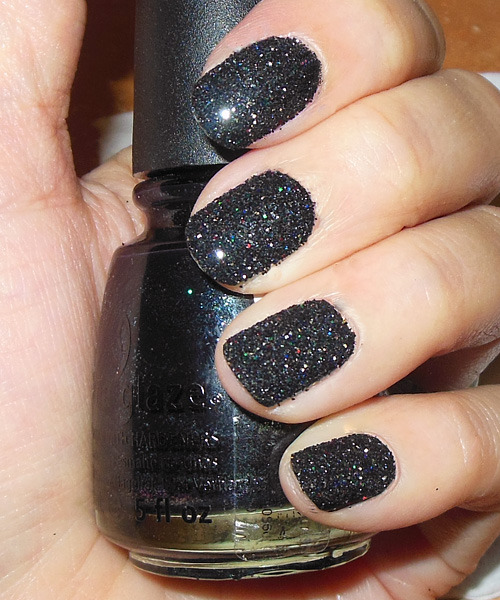
Gravel Nails: Emboss Powder Nail Look!


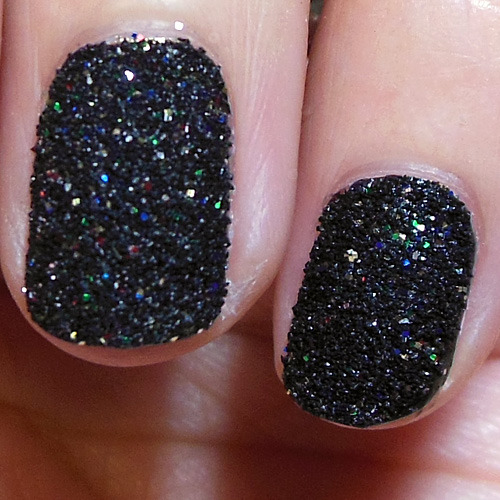
Always fun to dig around in the art supply store for things that you can use. My latest trip yielded black glitter emboss powder from ZIG.
Similar to caviar nails and velvet nails, it's really just coating your nails with a nail varnish in a matching shade, and then dipping it (while wet) into your embossing medium of choice.
Emboss nails usually stay nice-looking for about a couple of days and then most of the textured particles will wear or drop off, so having a very opaque polish beneath will help to hide that.


image
To get the exact same look, you can get plain black emboss powder and mix in a little multicolored glitter, or else just look for an emboss powder that is "sparkle black" or "glitter black".
You also want to get a piece of napkin and a soft brush that you can use to dust off excess emboss powder.


Step 1: After letting your base coat set, apply 1-2 coats of black polish (if it's opaque a single coat will be enough) onto your nail, working one finger at a time. I used China Glaze Smoke and Ashes.


image

Step 2:  Quickly, while the polish is still damp, dip your nail into the emboss powder.
image


image

Step 3: Using a clean napkin, gently press over the nail to press the emboss powder and glitter into the polish. Emboss powder is going to fleck and rub off over the next 1-2 days, but you can reduce this and improve how it looks by doing this pressing step. 


Step 4: There isn't much of a point to applying a topcoat because a lot of the powder will still come off even with topcoat over it, but if you really want to, just paint it on, wait for 10 seconds, and then press your napkin over your nail again to recreate that cool textured surface.


IMPORTANT: Be very careful if you have a habit of rubbing your eyes! You don't want emboss powder in there.