Showing posts with label metallic eyeshadow. Show all posts

Sunday, July 5, 2015

Satiny-Neutral Daily Look Tutorial: Tom Ford Nude Dip


I was requested to do a tutorial using the Tom Ford Eye Color Quad in 03 Nude Dip. 
This palette is different from all the other regular ones in terms of formula. The textures of the 4 shades are a lot more silky and pearlescent, whereas the original palettes were composed of more powdery satin and sparkle shades.


These 4 shades are highly metallic and at first look - similar to Japanese eyeshadow formulas. However, those are very sheer. The Nude Dip formula is translucent but also much more pigmented and buildable. 

You get a golden-ivory, a tawny shell-pink, a taupe, and a chocolate brown shade.

Below is a simple tutorial using all 4 shades, although I do often use just 2-3 shades for daily looks.


This is a very subtle palette and the colors all blend seamlessly together. But I would say you shouldn't expect dramatic variations in looks because the shades are all pretty soft and neutral. You will get lovely dimension and a beautiful gleam to the lids though.

If you're a fan of shimmery shades, this is a PERFECT wedding palette.

As with most of Tom Ford's formulas there is minimal fallout (there will almost always be some with most shadows but his has some of the least), and the colors and textures are flattering even for mature lids. This palette is more pearlescent though, so if you have a lot of lines on your lids, it might not be the most flattering palette for you to pick out of his range.


I still highly recommend it though. I have a few other faves in the Eye Color Quad range, but this is definitely up there with Cognac Sable and Lavender Lust among my absolutely must-haves.

This used to be a limited edition palette but good thing they've decided to make it permanent.


Sunday, March 1, 2015

MAC Bao Bao Wan Collection Highlight - Bao Bao's Jewels Veluxe Pearlfusion Shadow


The MAC x Bao Bao Wan collection is a mix of shimmering metallics and clashing opaque costume jewelry tones. Among all the loud, neon, fun, and - dare I say "trash over class" - shades designed in collaboration with the Chinese socialite-cum-jewelry-designer, there IS one item which stands out as being quite chic and universally appealing.

MAC Bao Bao Wan nail lacquers


MAC Bao Bao Wan lipsticks

The Bao Bao's Jewels Veluxe Pearlfusion Shadow palette is a shimmering collection of metal shades, from a pale fleshy pink to a deep steel grey.

Now at SGD$75 for 4g, the Veluxe Pearlfusion palettes do not offer you any "bulk savings" over regular full-size single shadows. And if you're using refill pans, then these are actually a step up in price. So the only reason to get these would be if you absolutely love a majority of the shades.

MAC Bao Bao's Jewels swatches
Here's a shade breakdown:

  • Pale Pink - the one dud in the palette; this shade is very gritty and will fall apart on your brush and fingers; be prepared for low payoff and high fall-out.
  • Gold - medium yellow-gold; very smooth and semi-opaque; low fall-out.
  • Pink Bronze - "pink bronze" is just a nicer way to say "copper"; this is a true orange-based copper, and the payoff is beautiful, but the shade itself might come off quite brassy and orange on many light to medium skins. Low fall-out.
  • Dark Brown - a great charcoal-brown with a low silver sheen; this goes on smoothly and blends beautifully. Makes a great liner or definer shade and complements the other colors in the palette well. Moderate fall-out.
  • Steel Grey - The only cooler-toned shade in the bunch, this color is silky and quite dimensional, but also has high fall-out.
You can get away with Pale Pink by applying it damp, and as for the excessive fall-out you get, I can only say this is one of those palettes you need to use BEFORE you apply your foundation and concealer.

If you don't mind these two negatives, and you like the colors, then I would say this is a palette worth checking out. But remember, it's not really a palette for subtle eye looks.

MAC Bao Bao Wan eye look
 You can see from all my pics that there is fall-out under the eyes from applying the shades. I did actually wipe my skin lightly before the shot above, but apparently that was not enough.

To recreate this smoky winged metallic eye, you simple need to:

1. Apply Dark Brown, Rose Bronze and Gold in succession from the outer corner of the eye inwards. The colors should slightly overlap one another so there is a seamless ombre effect.


2. Using a small lip brush, I applied the Steel Grey shade to the lower lash line damp for more control and intensity, and then the Pale Pink to the inner corners around the tear-duct, and down the center of the eye for a subtle highlight.


3. Then I used black liner to define the lash line and rim them. With a look so strong, it always helps to have a bit of black or dark-brown (depending on your coloring) for definition, or it can actually de-emphasize your lashes.


The Bao Bao Wan collection launches 6 March at MAC Ngee Ann City and 12 March at Tangs. 

Monday, February 11, 2013

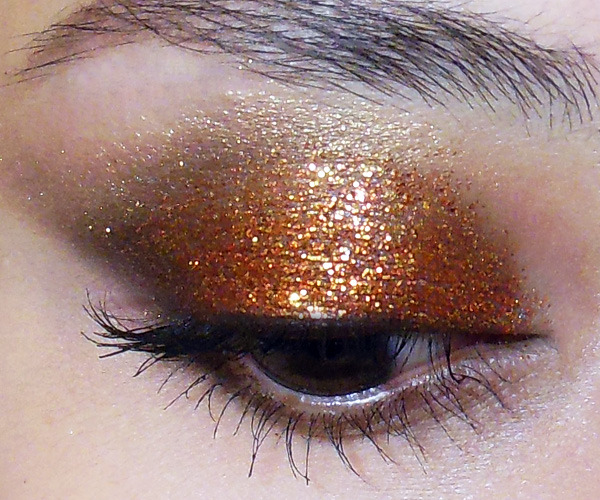
Fire Opal: Sparkly Burnished-Gold Lids (usin Martha Stewart Crafts Glitter!)


I mentioned in an earlier post that I found some of the most gorgeous ultra-fine glitters at the craft store. 
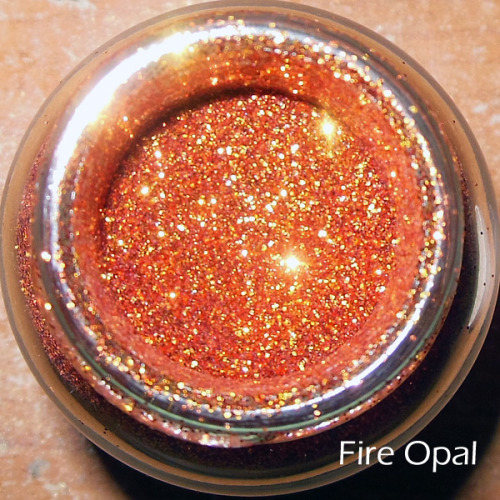
They're from Martha Stewart Crafts, and come in the most beautiful shades. These aren't micro-glitters but they're certainly the same size as most cosmetic grade glitters from brands like MAC and Lime Crime. The best thing is each 1.5oz glass jar costs less than US$10. The shade I'm using today is Fire Opal, a beautiful blend of pale gold and coppery-bronze.
Disclaimer: I'm not encouraging you to pick craft glitters over cosmetic-grade glitters. I personally only choose glitters that are very fine, round-cut and 100% polyester, and I always test to make sure they don't bleed in solvents and on the skin, regardless of whether they are from a makeup brand or a craft store.Always proceed with caution and be your own judge!
--

image


Step 1: First apply a brown base. You can use Maybelline Color Tattoo in Bad to the Bronze, or something like MAC Groundwork. You want to blend slightly past the socket line, and also wing it out at the outer corners, pulling towards the end of the brows.


image

Step 2: While your base has not dried, quickly use a flat brush to pack glitter onto most of the lid, except for the outermost corners, where you will apply a little dark chocolate brown shadow (L'oreal Infallibale Shadow in Endless Chocolat - the name might be different in the US; any deep brown will do) for definition.


image
Step 3: With the same chocolate brown shadow, run lightly along the outer 2/3 of the lower lash line for a little definition.
Along the edges of the brown, use a soft peach-golden shade like MAC Gleam or Expensive Pink to gently blend and fade the color.


image
Step 4: Finish with black mascara!

Friday, August 10, 2012

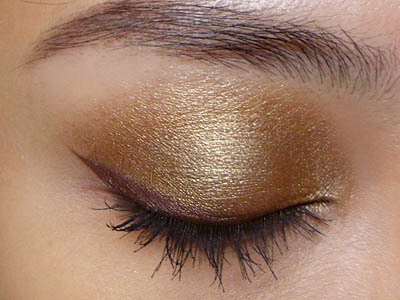
Low-cost Burnished Bronze Look for Work/Schoool: Coastal Scents Bungalow Gold

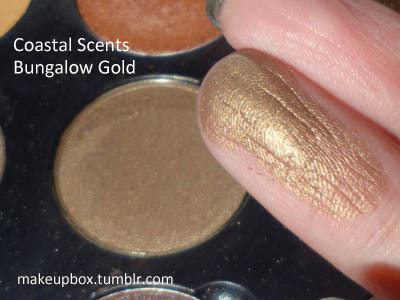
The entire look was done using extremely affordable products. I'm featuring some of my favorite products today. The images on the site aren't often accurate so I swatched them above for viewing.


  • Coastal Scents Hot Pot in Bungalow Gold - this is one of the newer Hot Pots, a beautiful shimmery metallic-bronze shade
  • Coastal Scents Hot Pot in Chocolate Brown - also known previously as S35, this is a deep taupe shade with a faintest hint of plum; often compared to MAC Satin Taupe, although this is deeper and has more grey
  • I also used Maybelline's Gel Liner in 02, which is a shimmery chocolate.

Step 1:  Begin by first using a flat angled brush to line the upper lash line from outside in using a deep taupe shadow, angling diagonally downward so there is a slight wing. Run in along the outer half of the lower lash line as well.


Step 2: Use a soft blending brush to buff a rich bronze shadow over the entire lid. Blend up beyond the socket line. Then use the angled brush to run the bronze shade all along the lower lash line as well. 


Step 3: Now for the liner. Since you've already laid down an angled line earlier using the dark brown shadow, it should be a piece of cake going over it with the brown gel liner now. 

This should give you a very neat but not-too-harsh line.


Step 4: Finish by curling your lashes and applying black mascara. I'm using Maybelline Great Lash Black. Any black mascara you like will do.


Monday, September 19, 2011

Fall Look: Gilded Antique Lids with Kitten Lips (Coastal Scents Antique Gold Mica with MAC Kinda Sexy Matte Lipstick)

Metallic textures can play up very muted or deep colors for Fall.
Fall doesn't need to be a time of monochromatic shades. As you start to deepen up the colors, look out for stronger textures like metallics, that can give a lush and gilded finish to very jewel-toned and neutral shades.

Step 1: Apply MAC Blooz pencil or any soft metallic navy pencil along the upper lash line and the outer half of the lower lashes. It should be thicker on the outer halves of the upper lids, as it would be if you were applying winged liner.

Step 2: With a short bristled smudger brush, pack a dark navy blue  shadow over the navy pencil. Don't smoke out the color too much. I'm using Poison by Stage Makeup, but you can use MAC Deep Truth as well. Just avoid anything too black or you won't get the beautiful deep blue sheen.
Step 3: Pack a deep tarnished antique-bronze over the entire lids, above the blue. You can over lap the blue JUST a little, but not too much or you will muddy the colors. Blend towards the outer corners, following the downward curve of your socket line towards the navy flick. Run along the inner half of lower lashes as well. I used Coastal Scents Antique Gold mica here.
If you find pigments hard to control and messy to use, try MAC Sumptuous Olive.
Step 4: To keep the lash line blue, apply navy mascara. I don't own colored mascara so I applied black mascara and then picked up navy blue shadow with a fluffy brush and wiggled it gently over my top and bottom lashes to coat them with a little blue.

Finished Looks with flash; Coastal Scents Antique Gold mica pigment with MAC Blooz pencil and  Stage Makeup Poison eyeshadow
 To finish off, I wanted muted cheeks and lips but not to erase the color altogether, so I used MAC Mineralize Skinfinish Natural in Dark as a subtle bronzer on the cheeks, and MAC Kinda Sexy Matte Lipstick for a kittenish lip.

Tuesday, April 26, 2011

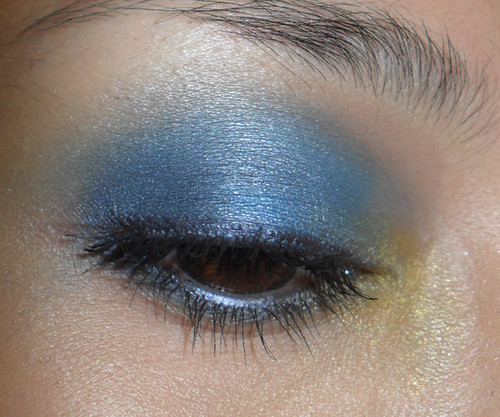
Simple Blue Smoky Eye (120 Palette)


Finished Look.
---

Below, the steps:

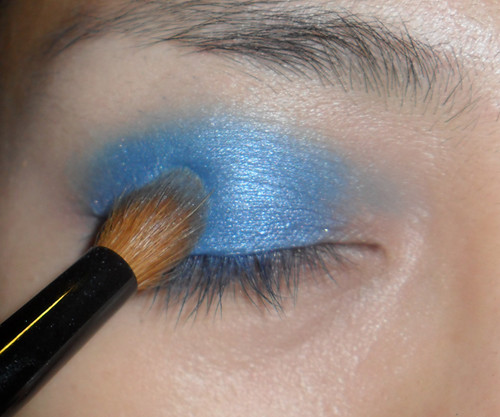
1. As always, prime your lids first, then apply a metallic deep ocean blue over your entire lids from lash to socket.
---


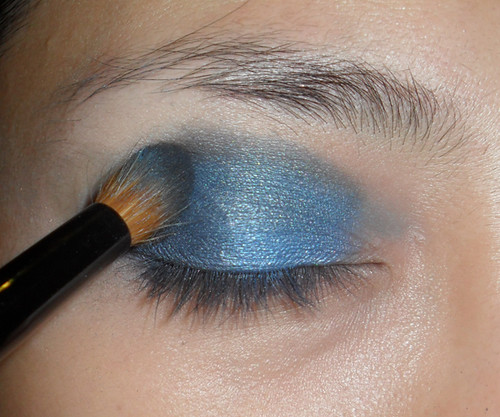
2. Apply matte black just around the edges of the shadow, avoiding the inner corners. Then blend it into the blue with a soft brush so that it combines into a deep navy.
---


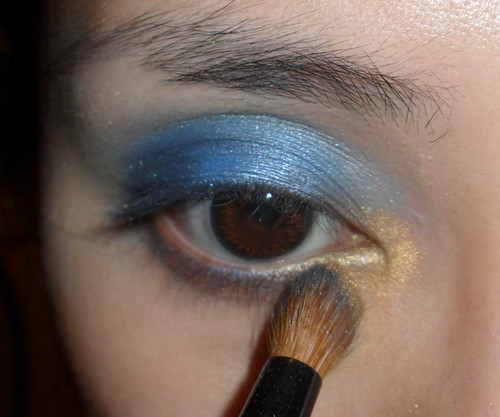
3. Dust an amber gold into the inner corners for some contrast and brightening.
---


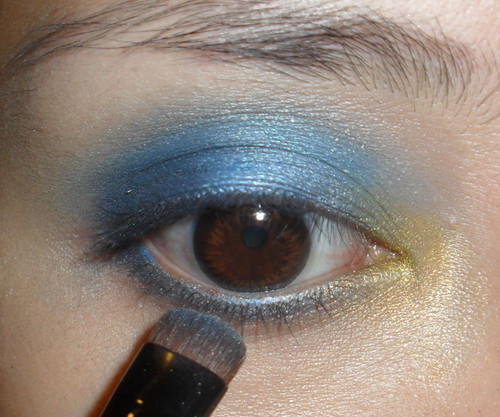
4. Then with a smudger brush, sweep the deep ocean blue along the lower lashlines, until they meet the amber about 2/3 in.
---


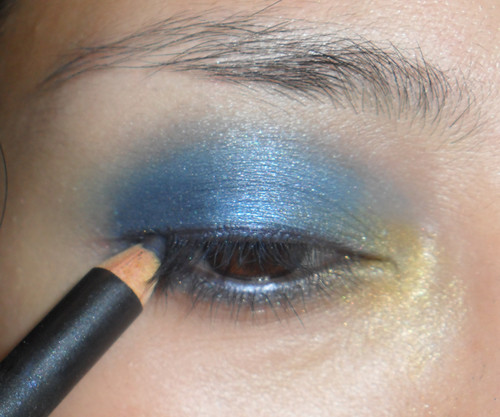
5. With navy black, trace the lash-line and waterline. (I'm using MAC Blooz.)
---


6. Then apply generous amounts of black mascara to top and bottom lashes to finish the look.

Monday, February 28, 2011

Home-brew: "Goddess" pigment


Who says brown is boring?


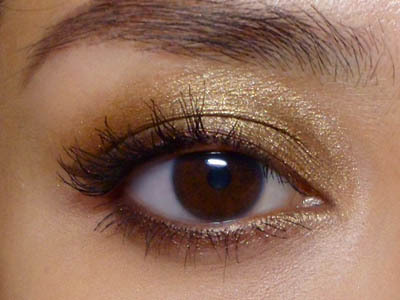
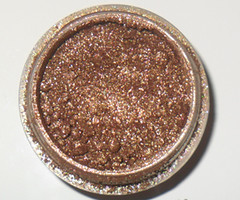
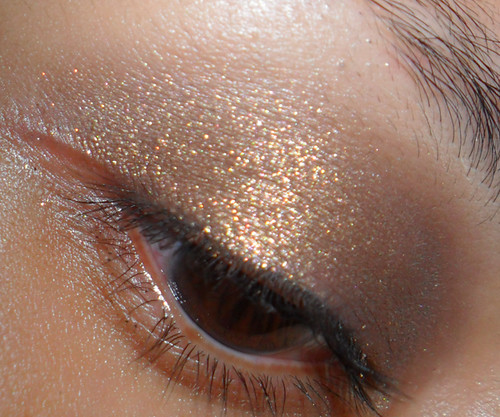
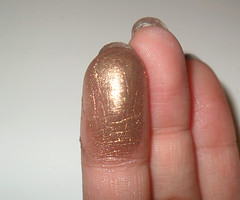
Meet my favorite custom-blend pigment, which I’ve named “Goddess”. It’s earthy, but it’s a strong, gold-flecked high-sheen metallic brown which is never boring to wear.


In fact, it’s not always appropriate for the day, especially if you work in a more formal corporate environment where too much sparkle is frowned upon.
Ah, well… I’ll look forward to the weekends.

I mixed this up on a whim and then realized I didn’t note down what pigments I used and in what proportion, so now I’d be very hard-pressed to replicate this ever again.
Woe, me.