Thursday, December 29, 2011

Fresh Bloom: Indigo and Green with Orange Lips (Lime Crime My Beautiful Rocket)


What goes with a bright orange lip? 
Well warm Fall colors like russets and golds would look good, but you can also swing the other way and do contrasting shades in bright tones. To keep things soft, I am using shimmer instead of matte, which would be a bit stronger.

Step 1: I'm using a shimmery dusty-purple for the outer 2/3 of the lid. 

Step 2: Using a soft golden green, I fill in the inner corners of the lid, blending just slightly into the blue. (The Body Shop #44 Single Eyeshadow)

Step 3: Line the upper lash line with a purple pencil (Bourjois Regard Effet Metallise #78 Bleu Chatoyant). Add a pale golden green pencil (Bourjois Contour Clubbing Liner #44 Golden Grey Session) to the lower lash line.

Step 4: Apply black liquid liner along the upper lash line and then add a pair of false lashes. (Any that are not too cat-like and flared at the outer corners will do.)

On the cheeks:
NYX Cinnamon Blush -  a matte vermillion orange

On the lips: 
Lime Crime My Beautiful Rocket - a bright true-orange lipstick


Wednesday, December 28, 2011

Lavender Smoke: MAC Crystal, Shale, Grape and Macroviolet

Purple Smoke: MAC Crystal, Shale and Grape pigment, with Macroviolet Fluidline

This look layers mulitple shades of silvery purples for a look that's monochromatic but not monotonous. 
If you own Lime Crime's Chinchilla lipstick or like that middle-ground between purples and greys, this is a look that goes with it. 

Clockwise from top: MAC Crystal, MAC Shale, MAC Grape pigment, blend of MAC Frozen White pigment and Reflects Transparent Pink, Lime Crime Chinchilla lipstick, and MAC Palladium Metal X Cream Shadow

Step 1: Apply MAC Shale, or any smoky grey-purple to the two outer corners of the eyes, and along the lower lash line.


Step 2: Pack a soft silvery violet in the centre. MAC Crystal is a beautiful option because it's a duochrome light grey with a violet sheen. It's not the most pigmented shadow around, so you will need to pack and layer a few times to build up intensity.

Step 3:  Deepen the corners with a touch of Grape pigment (I'm using the limited edition Crushed Metal version, but you can use the normal one).

Step 4: Dip the brush tip into more grape pigment and then smoke out the edges of the eye look.

Step 5: Using a blunt tipped detail brush, apply a deep metallic purple gel liner (MAC Macroviolet) thickly along upper and lower lash lines. Build up the line so it looks thick and solid. Leave out any flicks and the outer corners.

Step 6: Curl lashes and apply mascara. Then dust a translucent glittery violet to the brow bones and tops of cheek bones. 

Saturday, December 24, 2011

The Lime Crime Chinchilla Experiment: Grey Lipstick Swatches, Mini-review and Look


[Pictured Left-to-Right: Lime Crime My Beautiful Rocket, Lime Crime Chinchilla]  

Some of you may recall a few months ago, I posted about Lime Crime's limited edition Chinchilla lipstick, which is the unlikeliest and most unexpected shade of grey.
Well what does a girl do on Cyber Monday while stocking up on staples like Great Pink Planet and Countessa Fluorescent? She drops an extra "experimental" lipstick into her cart for the heck of it.
Well that experiment took a long time to ship, but has finally arrived.
---
When I opened the tube, I wasn't too sure what to make of it. The first thing I thought was, "This isn't really grey." Well, it is, kinda.
I would describe it as a smoky lavender. Equal parts purple and grey. So I compared it to my other purple lipsticks for reference. As you can see below, even NYX Power looks pink in comparison, so if you're not very comfortable with that shade on your lips, you will most likely not like this one.

Swatches from L-to-R: MAC Sheen Supreme in Asian Flower, Lime Crime Airborne Unicorn, NYX Power, and Lime Crime Chinchilla


---
Now the important question: how does it look on the lips??
On its own, I wouldn't call it the most wearable lipstick around. The formula is great; very creamy and opaque, with that lovely vanilla scent. But it will take some getting used to when you look in the mirror for the first few times.
I definitely don't find it ugly, but I can't quite imagine this being too flattering on anyone who isn't at least medium-fair in skin tone. If you are deeper than about NW30-NC35, this might really look weird. If you are very pale with minimal or no ruddiness in your skin this is likely to look quite beautiful. In an odd way.
This is definitely a statement lip without having to be really loud.
With that said, here's a picture of a smoky, monochromatic look featuring Chinchilla on NC25 skin. I've found this lipstick looks more "wearable" with muted cool-toned shades like greys, charcoals, and deep purples as these bring out the purple tones of the lipstick. If you want it to really look grey, pair it with stronger, or warmer shades as the lipstick will look even more muted in contrast.
Topping it with a gloss will also make the shade a lot more wearable.
---

Edgier Monochrome Look (above) -
On lids: MAC Crystal eyeshadow, Shale eyeshadow, and Grape pigment.
On lips: Lime Crime Chinchilla
On cheeks: TheBalm Bahama Mama as contour
---

Softer Look (above) -
Add to cheeks: NYX Dusty Rose Blush on apples
Add to lips: Kiehl's Lip Gloss in Mahvelous Mauve dabbed on lightly
---
Verdict?
Definitely interesting, but I'll just stick with my more "conventional" Lime Crime colors (neon orange and electric pink) for everyday wear, though I will be pulling this out from time to time, and wondering if I just might have the guts to wear it out.
The color is so unique as a lipstick that I can't really call the look beautiful or ugly. Maybe my mind can't grasp how lips could be that color, and is simultaneously attracted by the dusty lavender shade and repulsed by the alien-ness of the color worn on my lips.
Takes time to get used to, and definitely not for the faint of heart, because you will likely find yourself the only one who will really appreciate it. (The only word the BF could think of to describe this was "scary".)

Thursday, December 22, 2011

Cabaret Mod: Dramatic Antique Gold Graphic Liner


This look hinges on 2 things: A highly metallic liquid liner or pigment, and a set of very long, very spiky lashes. It's obviously not a subtle day look, but for night, it can be extremely dramatic.

I used:
MAC Reflects Antique Gold pigment (a golden-taupe micro-glitter)
Black liquid liner
Sasa Lashes #03 Sexy

Step 1: Begin with a thick swatch of black liquid liner. If you're new to this, do 2 strokes the way I did below. (1) made by laying the brush along the curve of the lower lash line (tip pointing outwards) and gently setting it down along your upper lid. If your brush is very wet, you can either blot lightly on the back of your hand so that you don't get a big blob of black for your flick, or (2) you can first swipe the centre of your lids to get rid of excess first. This ensures that you have maximum control and precision when you do your outer flicks.

Step 2: After the 2 lines, you can slowly connect the 2 outer points of the black lines earlier, curving gently to follow your lash line a little. When you are safisfied with the outer portion of the wing, continue into the inner corners last, just as your brush has the least amount of product left. This will give you the finest line possible, which is exactly what you want.

Step 3: With a metallic liner or glitter liner (you can create your own like I did by mixing glitter sealant and a metallic bronze pigment/glitter) and a flat angled brush, draw a line diagonally from the outer most tip of the flick to the inner corners of your eyes. The line should be almost straight. Fill in the space between this and the black line, and then layer on more product to get an opaque, foiled metal strip along your lids.

 Step 4: Run the bronze along the outer halves of your bottom lashes, and then apply a strip of very long, spiky lashes. They should be shorter on the inner corners and longer on the outer so the overall look is still slightly cat eyed. I'm not using a super flared lash like the Eylure Nicola because that would obscure the dramatic wing.

Place on the center of your lashes after the glue has dried at least 1-2 minutes, then firmly tuck the ends in. If you need, run over the base of the lash band with black liquid liner again, just to make sure there is no glue showing.


Step 5: Run a pale yellow, white, or beige pencil along the inner rims of your lower lash line, and then apply black mascara to bottom lashes. These lashes can really obscure and darken your eye, closing them off and making them appear smaller, so adding this bit helps to brighten them up a little again.


Step 6: To finish, I decided to go for a pale, milky pink (NYX Strawberry Milk Round Lipstick) on the lips and a hot pink flush (NYX Pinky) on the cheeks. By all means switch around to find colors you're comfortable with, because this eye goes with literally any lip shade.


Sunday, December 18, 2011

Modern Gothic Romance (Inspired by Jordan Liberty)

Black liner, hot pink cheeks, and Noir lips, with slate grey nails
Is "wearable Goth" makeup an oxymoron? 
Not exactly. 
This is not really Goth in the modern sense of the word, but rather, pulls from the late-medieval Gothic age, with its strange blend of opulence and dark dramatism. It's not always about matching over-the-top black lips and eyes. 
Sometimes, beauty is as much what you do, as what you choose not to do.

For this look which is inspired by Jordan Liberty, the eyes are extremely clean and more reminiscent of a 50s kitten eye than anything overtly "Goth", and the only touch of drama comes from the flicked liner and long flared lashes. The lips are the only thing that is slightly edgy about the look, blending black with a dark metallic purple for a 3D lip.

To pull everything back so I don't look like a reanimated corpse, I threw in an intense pink flush on the cheeks for a doll-like twist.

Step 1: Apply a matte beige to the lids, and a slightly warmer medium toned apricot (both from the Wet n Wild Greed Palette) to the outer halves of the socket line for very subtle definition. As we want the look to be very clean, the eye lids should not be discolored.

Step 2: With a flat liner brush, apply black gel liner (Maybelline Lasting Drama) to the lids. As always, draw in the flick first, then the lash line. This allows you to really control the length and angle better.

The finished liner should give your eyes a slightly exotic tilt but not be so thick or angled upwards that you look like you're channeling a Sophia Loren look.

Step 3: False lashes. I applied very full synthetic lashes (Fairy Lash #10 from Sasa), longer at the outer corners than the inner. The longer outer edges will lift your eyes upward. (Try something like Red Cherry 043s for a similar shape, although these are not as full.)

The outer edge angle of your lashes should follow the curve of your liner earlier.

Step 4: Apply a hot pink blush (NYX Pinky) high on the cheeks. Pull it in further towards the center of your face than you would normally wear, just to give it a bit more of a doll-like look. And I hate to say this, but you CAN go a bit heavier than usual, as it needs to balance out the strong black lips.

Step 5: This is the scary part. Use a black liner to rim the edges of your lips. If you have small lips like me, leaving the center of the cupids bow bare so you don't close off your whole mouth.

Step 5: Fill in the outsides with black lipstick (L.A. Girl Creme Lipstick in Dreamer), and then run a dark metallic purple (Make Up Store Magic lipstick) in the center of the lips and blend outward slightly. If you can't find a dark purple metallic lipstick, the EASY way to do this is to dab MAC Grape pigment around the center of your lips and then press them together to distribute. Then apply a tiny touch of Vaseline or Rosebud Salve to return some shine without making the lip look glossy.

You can always choose to go all-black on the lips, as long as you keep the overall texture creamy, not matte. The look you're going for is enigmatic, but still pretty and soft. (Well, as soft as a look can be with black lipstick anyway.)

On the Nails: Revlon Top Speed Nail Enamel in 810 Hazy

Friday, December 16, 2011

Cherry-Picking: MAC Metal - X Cream Shadow in Palladium


I was looking for a light, neutral Paint Pot when I walked into MAC. I wanted something that could neutralize the lid shade a little while intensifying metallic eye shadows. This shade would need to have a pearl finish, be glitter-free, tacky enough to grab powders, but not so creamy that it creases.
In fact, I knew a Paint Pot would work, but when I swatched the only pale shade available - Painterly - on the back of my hand, it looked muddy, flat, uneven, and all in all, like too much of the wrong shade of concealer.

Then stacked helter-skelter on a little unglamourous tray, without even a rack to call their own, were what looked like cream color bases embossed with metal stripes (the stripes are less "regular" and more like filed metal than the publicity image above, but I digress).

These were the new Metal-X Cream Shadows for the Winter 2011 season.


Now I'd heard about the Metal-X collection some time ago, but pretty much all of them were horror stories about how hard and poorly-pigmented they were, and how they creased on the lid. Are the new ones reformulated or the same as the not-so-popular originals?

Well, as shadows, I don't have that much to say about them other than that I've never had any intention of buying a Paint Pot or Metal-X Shadow to wear solo on the lids since they don't give the sort of color pay off and consistency that I want. I was looking for a good pearlized base in a generous size. And these are it.

The texture is harder than a Cream Color Base, and more long-lasting on the lids. They don't set like Paint Pots and they aren't as pigmented, but then they blend out more evenly and have a slightly silkier texture. They do crease, so you've been warned. Not as bad as Cream Color Bases, but they still crease slightly. If you want something budge-proof because you're not wearing shadow over it, then you need something that sets, like a Paint Pot.

There were a few colors I liked, but since I was specifically looking for a perfect base, I picked Palladium, a metallic champagne-ash without any glittery particles. It's the perfect cross between beige and silver, so it works with both cool and warm eye shadow shades without muddying them. I tested it on several colors while I was in the store; Club shadow, Blue Storm pigment, Sumptuous Olive shadow, etc, and all of them not only rubbed on really intense, but also stayed true to tone.

MAC Metal X Cream Shadow swatched on the finger.


If you've ever bought a pigment or shadow and wished it looked on your lids the way it looked in the container, then get this neutral champagne-ash Cream Shadow as a base.


To do a real test, I'm using 2 shades; 
  • MAC Blue Brown pigment - people either love or hate this shade because it's so beautiful in the tub (dark wine-brown with turquoise sheen, but can rub out to a red, bruise-like shade on the lids).
  • Tokidoki Stella shadow - enough said about this one... I'm not a fan of ANY of their eye shadows because the formulation is cheap and everything just falls right off your skin.


Swatch test: MAC Blue Brown pigment and Tokidoki Stella, solo on the left, worn over Palladium on right.

On its own, it's pretty, but maybe a tad too light to be worn solo on the lids unless you're just going for a lighten silvery gleam (like you are wearing gloss on your lids).


MAC Palladium Metal - X Cream Shadow as a light wash on the lids

All in all, I wouldn't say rush out to get these shadows as the shades are just ok. The pigmentation is sheer, and I prefer my shadows to be much stronger or highly buildable. But if you want a good eye shadow base, I highly suggest checking these out, as I don't always like how dry Paint Pots get, or how slippery Cream Color Bases can be, but these are nicely in-between.

Recommended Shades from this Collection:

  • Palladium - Pale champagne-ash
  • Fusion Gold - Light peach-pink with gold sheen
  • Venetian Tarnish - rich medium bronze brown (great for a quick, warm, smoky wash)
  • Gold Carbon - Dark cocoa-taupe

Thursday, December 15, 2011

Tokidoki 24 Karat Skate Deck Palette: Swatches and Mini-Review

I'm lucky enough to have a BF who doesn't actually mind being dragged around on my shopping trips. In fact, he's a regular at what I term "my shrine" (Sephora) which I have to visit whenever I'm in the vicinity of one. He will probably never understand why I need to stop by to pay my respects even if I am not getting a single thing, but he does win plenty of points for staying attentive while I prattle on about the formulation of the latest eye shadows or the sudden popularity of a certain lip gloss.

Now I'm a fan of quirky, slightly-morbid, cute-but-not toons like Gloomi Bear, so naturally, I was always drawn to Tokidoki packaging, even though I had never tried their products. So the BF was lovely enough to surprise me one day with the new Tokidoki 24 Karat Skate Deck Palette, which is a collection of 12 colorful shadows in a "skate" shaped cardboard case, inclusive of a cute silver character charm (Adios, if you happen to be a fan of Tokidoki).


Silver Adios charm in the Tokidoki 24 Karat Skate Deck Palette

Colors:
The shades within are a good mixture of lights, mediums, and darks, so it wins points for having variety. The textures are all shimmery/glittery though, so if you're looking for a mixture of matte and glimmer, this is not the palette for you.

Texture:
I have to say that from the moment I opened the case, it was apparent that the shadows would be chalky and low in pigmentation. Unfortunately, my local Sephora does not have a tester on display so there pretty much no way to find out until you purchase it.
It also has fallout-galore when applied as if.
Without a base, the color doesn't go on evenly, adheres quite poorly to the skin even with repeat applications (see below image), and almost doesn't show up. A quick wipe with a sheet of tissue would remove most of it.

Tokidoki Ametista shadow, swatched over a base (left), and applied directly onto skin (right).

Swatches (top row):
The shades themselves are quite pretty, but the pigmentation is weak due tot he chalkiness of the whole formula.
(Left-to-Right): Unicorno (white with glimmer), Stella (metallic silver), Ametista (deep rosy mauve), Cuore  (pale white-pink), Duna (light gold taupe), and Sabbia (white with pale gold sheen)

(Left-to-Right): Goccia (deep navy), Adios Star (black with silver sparks), Tempesta (smoky violet), Granata (smoky olive green), Camo (deep chocolate brown) and 24 Karat (mustard gold).
 Just as a final comparison, I couldn't resist comparing it against the Urban Decay. All swatches below are left Urban Decay 15 Year Anniversary Palette, and the right swatches are corresponding shades from the Tokidoki palette.

As is apparent, the Urban Decay is much richer, and more multi-faceted than the Tokidoki, which for all its shimmer, looks very flat and patchy.

Verdict:
Give this a miss.

I've held off on a review as it was a thoughtful gift from a loved one, who secretly took notes while accompanying me on one of my "visits to my shrine", but now I feel a lot of heartache that he spent so much money on what is, to me, just a gimmicky product aimed more at ripping off fans and unsuspecting gift-givers than at delivering any value or quality to makeup aficionados.

I'd sum it up as an idea conceived by someone who obviously doesn't use eye shadow.

If you are a fan and collector of the brand and the art, by all means go ahead. It is a really cute gift, and I'm personally a fan of the art. But if that's their intent, then they should just sell the box and skip the shadows and the big price tag.

I am a makeup collector, but more than that, I am also a makeup user. This means if it can't make me look good and feel good, then it doesn't matter how good it looks sitting in its container. It's not worth as much as the well-used $5 Wet n Wild palette sitting on my counter.

Monday, December 12, 2011

The Weekend Face: Barry M 146 Dolly Pink Lip Paint


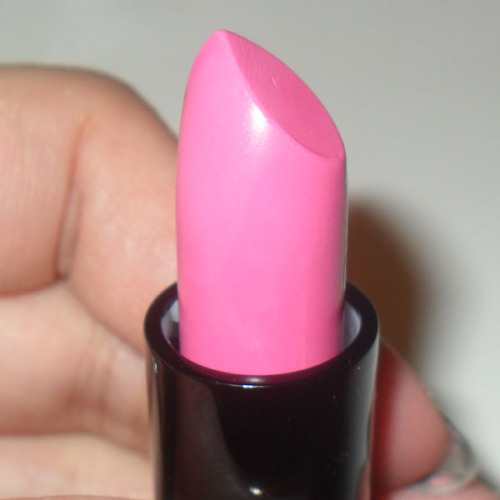
If you've ever wondered about the fate of that gorgeous tube of bright, candy pink lipstick, you'll be glad to know it's been well-loved. It's no longer summer, but I still can't help whipping it out from time to time. There's nothing like a standout lipstick for looking "done" without spending a whole lot of time on your face.

Barry M 146 Dolly Pink Lip Paint
Dressed-up Face in 5 Minutes:
  • Dior Nude Foundation #21
  • MAC Studio Finish Concealer NC25 + NC30
  • Make Up For Ever HD Powder 
  • MAC Well Dressed blush
  • Wet n Wild Greed Palette: peach-gold shimmer shade on lids, black along lash line
  • Bourjois Volumizer Mascara

Saturday, December 10, 2011

Dragonfly Wings: Iridescent Smoky Eye


For those of you who want to veer away from the usual stately, smoky colors this holiday season, an iridescent, multi-faceted smoky eye can work just as well with that little black dress. (In fact, it would probably be the focal point of your entire look.)

I'm using some shades from the Urban Decay 15 Year Anniversary Collection and The Body Shop, but feel free to use alternatives you own.
What you'll need to get this look:
  • A creamy black base: I used the black half of ELF's Cream Shadow Duo in Licorice
  • A medium purple with blue highlights (Urban Decay Omen)
  • A deep gunmetal grey shadow (Urban Decay Ace)
  • A translucent duochrome white with pale green sheen (The Body Shop #08)
Step 1: Apply a dark base to the lid, going up just above the socket line. This does not need to be very dark or opaque. You just need a base for shadow to cling to.

Step 2: Apply a blue-violet shade to the outer edges of the black base, along the upper areas of the socket. Run along the lower lash line with a fine brush as well.

Step 3: Pack the dark metallic grey to the lid under the purple. Smoke out the edges between the grey and purple so there are no harsh lines.

Step 4: The fun part is applying a wash of iridescent green over the dark grey to transform the color. I used The Body Shop's Single Eyeshadow in #08 which is a white with a green sheen (similar in effect to MAC Vanilla or Pink Opal pigment) on the inner half of the grey shadow only. Reach around the inner corners to the bottom lash line slightly as well.

The finished eye lid should look something like this, with green on the inner halves, dark grey on the outer halves, and soft purple framing everything.

Step 5: Apply black kohl along the water line and black mascara on the top and bottom lashes. Voila!