Showing posts with label colorful eyeshadow. Show all posts

Monday, May 27, 2013

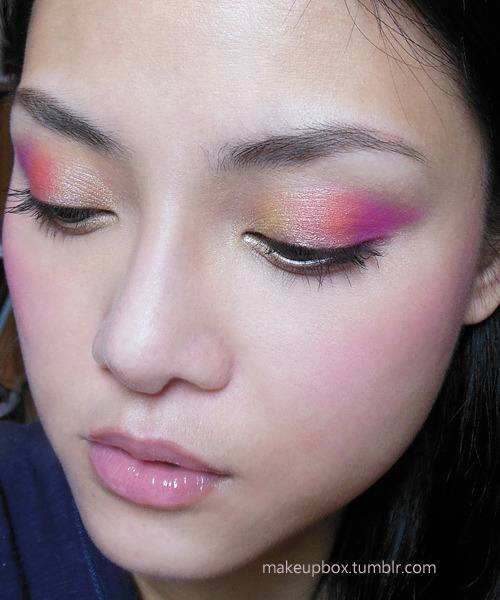
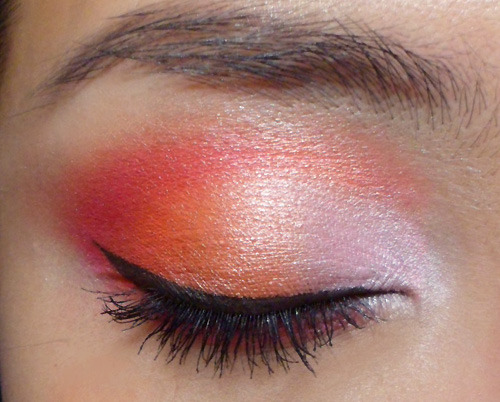
The Summer Wing: Easy Gold, Coral and Neon-Pink Winged Eyes


This is an easy gradient winged eye and actually more flattering than you might think neon pink shadow would be.
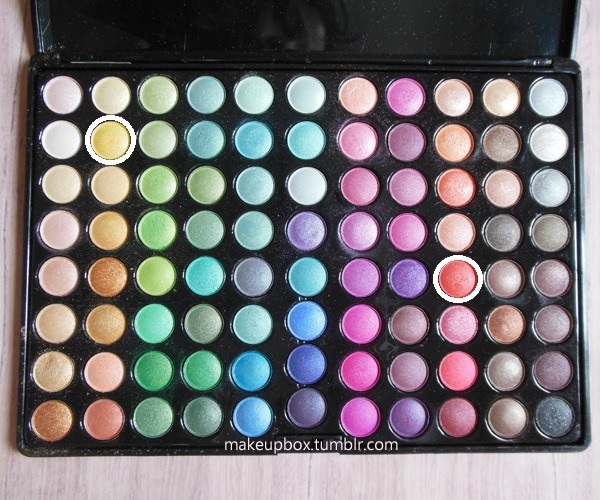
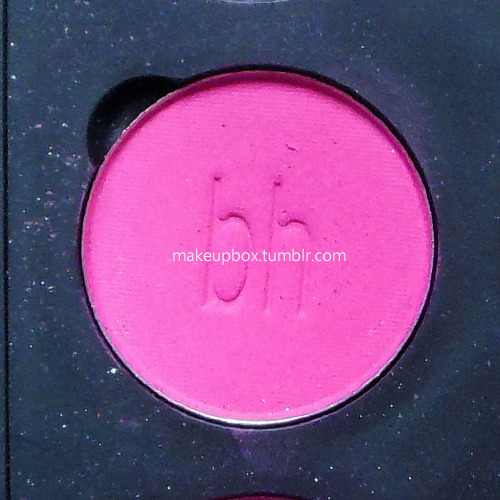
The 3 main shades are yellow, coral, and fuchsia, but the key to the look is that I used 2 shimmers in the 88 Shimmer palette for the yellow and coral, then switched to a matte neon pink (BH Cosmetics WM20) at the outer corners. 
This creates more strength to the look, although you can also use one of the fuchsias in the shimmer palette if you want to save the trouble. A matte is just more flattering when you're wearing a neon pink on the lids, in my opinion.

Friday, April 12, 2013

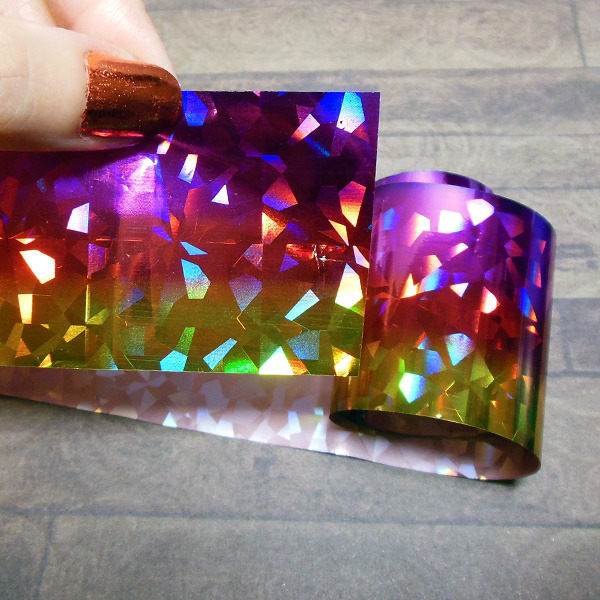
Holographia: Dramatic Foiled Ombre Lids (Yellow-red-pink) with Transfer Foil!


Transfer foils were created for arts and crafts. Then some genius decided to use it on nails. Not long after, some people thought it might be a good idea to attempt it on the lips.
(That didn't go too well, because while it looked cool when it was done perfectly - a la Katy Perry - very few people ever managed to do it perfectly. Tons of women ended up with disappointing patchy, cracked-looking lips.)
Since I've got tons of foil (I buy mine from dollarnailart.com), I naturally wondered about using it for other things. It is BRILLIANT as a dramatic transfer tattoo on the body, But what about the eyes?

The Adhesive:
While there isn't anything harmful about applying the water-based nail foil adhesive onto your hands and body in general, applying it to the eye was another thing altogether. Because companies are so hush-hush about the ingredients of their glues, I could only guess at what ingredients Shizzle Lips and Glitzy Lips used in their "lip approved" skin-safe glues and whether they were mostly similar to nail foil glues.
You only need to know that you can use lash adhesive (if you have a strong and thick formula like Duo, add a tiny drop of water to thin it out before applying with a brush or it will be too hard to spread nicely).

 
The Foils:
It's the same thing no matter where you buy it from. These are layers of reflective or holographic ink that isn't toxic or reactive in their dry state. Whether you pay $1 at Dollarnailart.com or $29.90 for Glitzy Lips, it is EXACTLY THE SAME THING and they work the same way.
The strip I chose was unfortunately part of a jumbo pack from eBay, which doesn't have a name or number. You can substitute any other color foil though I recommend a strip that has a similar ombre gradient if you want the same effect I got. At dollarnailart.com, a similar alternative would be Wrapping Paper or Wildberry Splash.


Saturday, January 26, 2013

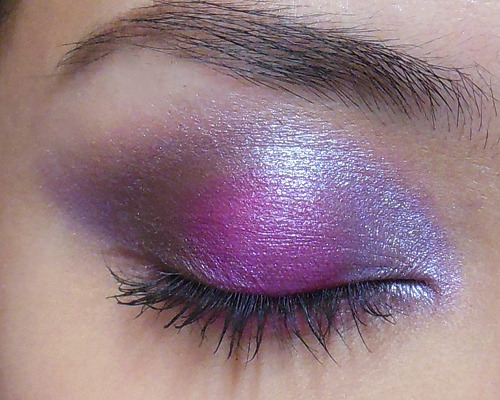
Twilight-Bloom: Intense Pink, Lavender and Cocoa Eyeshadow Tutorial (88 Shimmer Palette)


This color combination just reminded me of some exotic, poisonous bloom surrounded by dark woods.

 Good for:
  • All eye colors
  • Medium-fair to Dark skintones
  • Double-lids (it could still work for some mono-lids if you have quite a bit of lid space, but otherwise it might not be as flattering)
  • Those with little lines/dryness around the eye area (those with more mature skin can swop to completely-matte shades in similar colors)

You will need:
  • A brown base (pencil, cream shadow or gel liner would work)
  • A rich hot-pink or fuchsia shadow 
  • A medium lavender
  • A deep chocolate brown
  • Mascara


Step 1: First use your finger to apply a light layer of brown base over the entire lid. Don't blend it out too far or pack it on too thick. It's just meant to deepen and provide an adhesive base to the colors.


Step 2: Pack the intense hot pink onto the center of the lid, right in the middle of the brown base. 


Step 3: Using the same brush, just flip to the other side and pick up some of the lavender. Pack that onto the inner 1/3 of the lid, beside the pink, and then sweep it lightly up along the arc of the socket line, to the center of the eye. (If you have mono or hooded lids, leave out the lavender upward-arc.)


Step 3: To add some definition and contour, use a dark brown on the outer 1/3 of the lids, and then follow the socket line once again, arcing inwards to the center of the eye.
On the lower lash line, run a little of the fuchsia shade along the lash line, keeping it soft and hazy. (If you want a less dramatic look, leave this out or use the brown instead of pink.) 


Step 4: Finish by picking up a little of the lavender from earlier and then using that to extend the outer edges of the brown into a very soft wing. Be very light-handed with this. If you want the look to be a little more subtle, leave out this step.


Step 5: [Optional] Line the lower lash line with brown. This gives definition if you are used to lining your lower lash line. You don't need to. Leaving this step out keeps the look more hazy and dreamy. 

Thursday, April 12, 2012

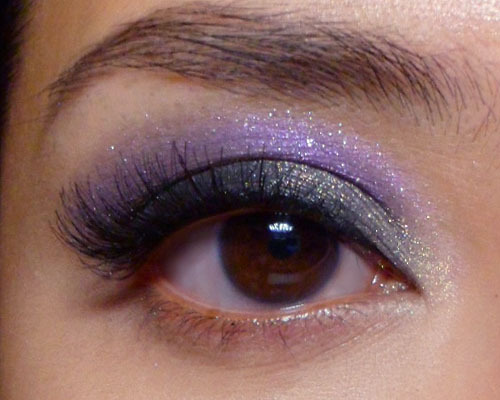
Spring Night: Smoky Duochrome Eye (all drugstore products!)


A smoky eye and false lashes do not necessarily mean a heavy look if you layer on some shine and subtle color.
Here, I used:
  • elf Black Licorice cream shadow duo (black shade)
  • Wet n Wild ColorIcon in Greed (sparkly black and gray-gold shade)
  • Essence Colour & Shine eyeshadow in 03 Wear It (baked sparkly purple)
  • Bourjois Liner Pinceau 16 Hour liquid liner in black
  • Ardell 120 Demi lashes

Step 1: Apply the black base in an even layer, sheering out above the socket line.

Step 2: Dab the tips of a brush into black shadow and then pack it gently along the lash line. Don't run this over the entire crease area as you need to leave space for the silver-gold.

Step 3: With the silvery-gold shade in the Wet n Wild palette (or any soft grey you have), run just above the black shadow in a thin strip. You may need to go over a couple of times to build up intensity. Try to keep the color within the socket line.

Step 4: Run a sparkly purple along the socket line, framing the rest of the eye makeup. You can smoke this color out a bit more since it's the outermost shade.

Step 5: Apply black liquid liner at the base of your upper lashes, and then apply wispy false lashes. To keep the look lighter and more lifted upwards, I'm not applying anything on the bottom lash line. Not even mascara.


Saturday, March 31, 2012

Tangerine Cocktail: Pink and Coral Spring Eyeshadow (120 Palette 2nd Edition)


Orange and coral is not a shade most people will want to wear on their eyes, but when you pair it with a pastel amd a deeper fuchsia it just looks so tropical, fresh and fun.
I haven't been giving my 120 palette much love recently, so I decided to whip it out since it has so many shade options. You don't have to have a 120 palette or the same one to do this look. You just need a:
  • pale pink
  • bright orange
  • warm coral (red-orange)
  • deep magenta pink

Step 1: Pack the pale pink in the inner third of the lids.

Step 2: Apply a bright range down the center of the lids, and then curve inwards along the socket line to hug the pale pink and define your eye contours.

Step 3: Apply a deeper coral-orange in the outer parts of the lids and then run inwards along the socket line, above the bright orange applied earlier. 

Step 4: Apply a deep magenta pink in the outer corners and sweep up along the outermost arch of the socket line. The magenta will look fuchsia over the bright orange, which is the effect you want. (If you use a fuchsia it will just look coral.)

Step 5: Run the magenta along the outer halves of the lower lash line as well, to tie the colors together.

Step 6: Use a black gel liner and run it along the upper lash line, as long as along the water line, ending it in a slight flick.

Finish with mascara!

Thursday, March 22, 2012

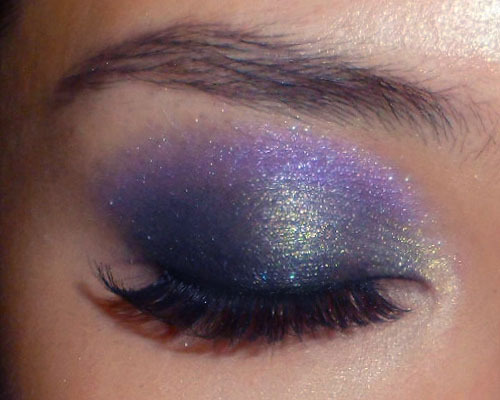
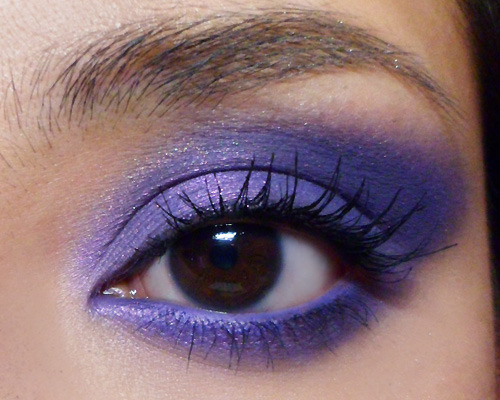
Ultra-Violet: Smoky Iridescent-Purple Shadow Tutorial


I've been into a lot of strong shadows and textures on the eyes lately for some reason, so after doing red glitter, the next thing that caught my fancy was iridescent violet of course. 
This is actually a really simple look using only 2 shadows, and 2 pencils. The shape and texture (pearl-matte) are the key things for bringing out the depth in the shades, as I wanted to do a look that was monochromatic, but still had depth and contouring.

 Step 1: To keep the look a little fresher and lighter, I dusted a pale silvery-pink iridescent powder (MAC Iridescent Loose Powder in Silver Dusk) over the cheekbones and brow bones.


Step 2: With a slightly damp brush, I packed a deep smoky matte purple with subtle gold sparkles (Everyday Minerals Live Austin Live shadow) and swept it in an arc along the socket line, from OUTSIDE-in so the color is thickest and most intense on the outer ends. Then smoky out the top edges so there are no harsh lines.


Step 3: Using a brighter medium-violet (MAC Parfait Amour) with slight purple-pink duochrome effect, I packed it over the lid area under the crease, blending into the deeper purple so there are no gaps or lines. Then run boldly along the lids as well.


Step 4: The key step that subtly intensifies the look. Run a matte purple pencil (Revlon Matte Luxurious Color Kohl Eyeliner in 05 Very Violet) along the water line and beyond. Then run over with a sweep of MAC Parfait Amour to set and intensify it. As the top of the eye is so dramatic, it's ok to go thicker and stronger on the bottom lash line to balance it out.


Finishing touch: Add black pencil to the tightline (Milani Liquif' Eye Pencil in Black- I'm loving this uber-black, long-wearing pencil right now), and then curl lashes and apply black mascara (Smashbox Lash DNA Mascara).

You can pair this with a nude lip for a mysterious club look, or slick on scarlet lip gloss for an updated 80's look!

Thursday, March 1, 2012

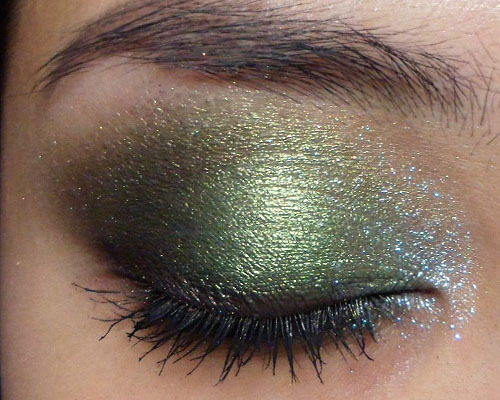
Rich Green Smoke: Evening Eye using Coastal Scents Kiwi Green


Coastal Scents Kiwi Green Hot Pot with Raisin Berry for contour, and MAC Reflects Transparent Teal in inner corners

I'm on my Coastal Scents kick, and wanted to do a strong green look, which I haven't done in awhile.
Some people do not enjoy wearing green but if you pair it with the right shades to make it richer and add more depth, it is incredibly flattering on all skin tones. This is also a great look for brown eyes.


Step 1: Apply a mossy green base to the lids. I used MAC Paint Pot in Moss Scape, but  any olive green or khaki pencil or cream shadow would work.

Step 2: Gently brush on a rich metallic forest-green like Coastal Scents Kiwi Green Hot Pot.

Step 3: To add some depth, I used a burgundy-brown, Coastal Scents Raisin Berry, to deepen the outer corners and along the hollow of the eye socket. You can use a regular brown but the green will make it olive/khaki, so I used a burgundy instead as it shows up richer.
See the rest of the tutorial here!

Wednesday, January 4, 2012

Easy Weekend Eye: Pink-Violet Duochrome

Get a Pink and Violet Duochrome Eye with MAC Stars n Rockets and Flashtrack shadows
Pink and Purple are right up there in many "Favorites" lists when it comes to makeup colors. But what about Purple-in-Pink?

This look features a bright magenta pink with a violet-blue duochrome shift. I'm not sure about you but I find this color to be just a little too dramatic and reminiscent of the 80's on most days, so I seldom touch it. But when you temper it with a little blue and black at the lash lines, and heaps of blending, the overall effect can be quite modern and smoldering even.

I used an old mica from I Nuovi called Amethyst (I believe they've discontinued this in their Dust collection), but this is not a hard color to find. Urban Decay Deluxe Shadow in Fishnet and MAC Stars n Rockets are pretty much identical to this.

The other 2 key componenets to this look are a strong, creamy black kohl or kajal, and navy blue shadow (I used MAC Flashtrack but any shimmery deep navy will do equally well.


Step 1: Apply the black gel or kohl liner very thickly to the upper and lower lash lines. Don't worry about getting it neat as it will be covered over later. Just make sure it is very black, very dense, and quite thick. You will likely need to reapply after you're done with your eye shadows.

Step 2: Run a deep navy blue shimmer along the lower lash line to get a smoky finish. Do not apply the blue shadow to the water line. You want to keep the liner very black there.

Step 3: Pack the star of the show, a bright duochrome magenta to the lids, up just past the socket line. As the pink goes over the black liner from earlier, it'll transform into a lovely dark blue sheen.

Step 4: Dab your brush into a blend of both the magenta duochrome and the navy shade from earlier, and very lightly buff it along the outermost section of your socket line to add a bit of depth and contour. At this point, you may want to touch up the black kohl or liner along the water line, as it would probably have shifted and faded a little. (A second layer also helps to keep it on better.)

Step 5: Finish with lashings of black mascara. I wanted to keep everything still looking smoldering by keeping all the darkness just to the inner rims of the eyes, so I skipped false lashes here, but if you really want to go to town with this, you can definitely pop on falsies.