Sunday, July 22, 2012

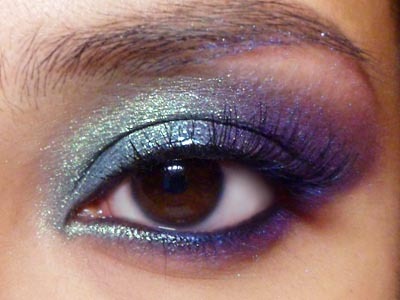
Twilight Fae: Dramatic Hologram Eyes


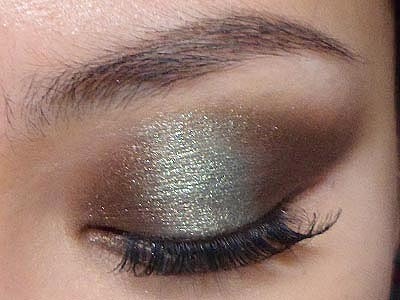
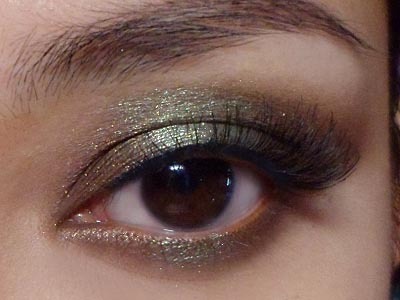
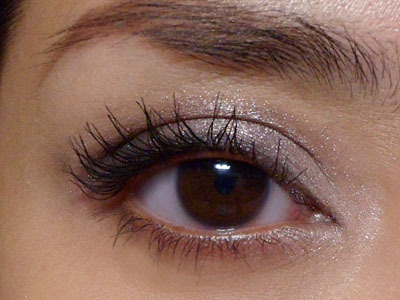
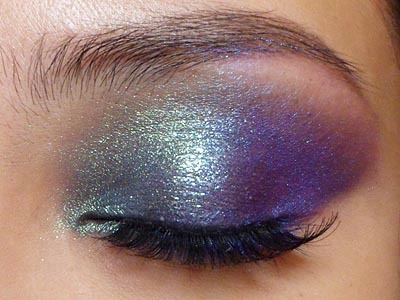
For those of you craving some excitement for Summer nights, here's a colorful and dramatic smoky eye which is actually pretty easy to create. To tone it down for day, just keep the shadow within the socket area instead of blending it out and up as far as I did.
There were 3 main products I used:
  • Black kajal (any very creamy and smudgy black cream shadow or pencil will work)
  • Translucent green sparkle (I used a discontinued mica from TKB called Starlight Green, which has been replaced with Starbright Green. The Body Shop also has a single shadow highlight #08 which is exactly the same thing but in pressed form.)
  • Pink/purple duochrome with blue sheen (I Nuovi Amethyst dust; this is like a loose version of MAC Stars n Rockets shadow.)

And yes, these swatches above look NOTHING like how they appear on my lids, but that's why it's so fun working with duochromes and a black base!


Step 1: First apply black kajal or paint very thickly all over the lids, up to the socket line. 
--
Step 2: Using a synthetic concealer brush (or any synthetic paint brush), softly smoke out the edges so there are no hard lines, and bring the color up and out. 


Step 3: Apply the kajal to the lower lash line and water line as well, and smudge out lightly. The finished look should now be like the above image, which is a typical winged smoky eye shape.


Step 4: From here, we move on to the fun stuff. Lightly dust the translucent green highlight all the way from lower lash line up to the brow, but ONLY ON THE INNER HALVES of the lids.


Step 5: The shade that's going to make everything look holographic is the pink/violet/blue duochrome on the outer half of the eyes, top and bottom. When you pack it over the black, you will no longer see the pink, but the violet and blue is going to take on a sort of glow which is going to stand apart from the green and give the most interesting effect.


Step 6: This step is optional. I wet a flat brush with a little liner sealant (Ben Nye Liquiset), dabbed it into some aqua green translucent glitter, then pressed it right down the center of the lids. This echoes the green shadow, but adds a "wet" effect and gorgeous sparkle when you blink.


Step 7: To finish the look, I curled my lashes and then applied a strip of wispy lashes. Any type of lashes would work, including plain black mascara.



Thursday, July 19, 2012

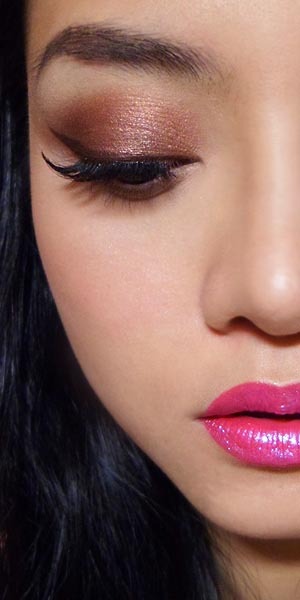
Electric Pink Glitter-Lips with Brown Eyes


This is a fun look that's flattering and dramatic. As with all glitter-lip looks, it is not going to be a good idea to eat a whole lot while you're wearing it.

Recommended for clubbing and cocktail parties where you'll mostly just be drinking through straws. 


Step 1: Apply a soft warm brown (I used MAC Sable) to the entire lid area, and then blend the color gently along the hollow of the socket line, pulling up slightly in a wing once you reach the other corners.


Step 2: Using a brown gel liner, draw on a flick at the outer corners following the angle of the lower lash line.


Step 3: Thicken the flick from the outer tip inwards, and then connect all along the upper lash line. Don't try to draw it all in a single stroke. Do short strokes and just connect and smooth it out.


Step 4: Finish the eye look by curling your lashes and then applying a strip of wispy false lashes. I'm using Ardell 120 Demis, which are longer at the outer corners.

You can leave your eye as is, or run a little beige or pale yellow/white pencil along the lower water-line.


Step 5: I applied a rich fuchsia to the lips (Revlon Colorburst Lipstick in Fuchsia), blotted, and then reapply. This gets a good stain on your lips so the color will be very saturated.


Step 6: With your finger or a flat synthetic brush, gently press a translucent duochrome blue glitter to the surface of the lips. Try any fine-grained glitter that reflects blue, such as MAC Reflects Blue pigment or Reflects Very Pink. 

On the cheeks, just keep it soft with a light pink. You've already got a dramatic lip going, so you don't want to have your cheeks be too bright at the same time.

Tuesday, July 17, 2012

Evergreen Metallic Winged Eyes (L'oreal Color Infallible Shadows in Permanent Kaki and Endless Chocolat)


Time to whip out some of my drugstore loves, after the recent features of high-end products!
Since I've been on something of a green kick recently, L'oreal Color Infallible Shadow Permanent Kaki (which had up to now been passed over repeatedly when I played around with the testers at the drugstore) suddenly caught my eye.

Now, let me first tell you not to trust what you see in the pot. The beauty of this beautifully-metallic sage-green gem only comes out when swatched on the skin.


You can wear this shade on its own as a soft wash as it's got some good dimension to it, but I wanted more contrast, so I'm pairing it with the rich chocolate shade in the range. (Once again, this brown looks a little red in the pot, but goes on a perfect neutral dark cocoa when swatched.)


Step 1: Because the best way to pack this binder-rich shadow (it's somewhere between a loose pigment and a cream) is to use your fingers, work it on gently in the outer 1/3 of your lids, going up just to the socket line but no further.


Step 2: This is where a brush comes in. Take a fluffy brush and quickly start blending the brown straight outwards into a wing. The binders in this shadow will set after awhile, so the faster you work, the easier it will be to blend.


Step 3: Using a flat brush, apply the brown to the lower lash line as well, pulling it out to meet the bottom of the wing.


Step 4: With your finger, carefully dab some shadow onto the inner corners. I'd usually use a brush for precision, but because it doesn't go on well with a brush, I used my hands. Just be very careful not to smudge any shadow all over.


Step 5: The star of the show is the green, but you won't need to use that much of it. I just gently patted it around the center of the lids and outwards lightly into the brown. Don't rub back and forth or you will muddy up the green and the brown. You want the green to stay very rich and "pure".


Step 6: Don't forget to dab a little onto the center of your lower lids as well, BUT if you have very prominent bags under your eyes, you might want to skip this, as applying a lighter shade in the center of the lid emphasizes contours more.


Step 7: For a touch more drama (but not too much), I applied natural-hair lashes (Ardell Wispies).


Friday, July 13, 2012

Chanel Illusion D'Ombre in 89 Vision (Super-simple Gold Wash)

If there is just one item that I will recommend from the high-end collections if you're in the market to splurge on something this Summer season, it is Chanel's Illusion D'Ombre in 89 Vision. 

And, yes - let me first say outright that this is ridiculously expensive but MUCH better than the equivalent from Shu Uemura. Plus, you get a lot more product than you would with Shu's new cream shadows, all in a sturdy glass pot with a brush as well.

As you can see from the swatches above, this is literally a pot of the most glorious sparkling gold flecks in a completely translucent base. If gold has always been too yellow for you to wear, you will not encounter that problem here because you're not going to get a wash of solid yellow-gold.
This is a veil of fine but intense fairy dust that is going to stay on your lids rather than dust right off onto your cheeks. The silky, almost-dry texture also means that you can smooth this on over existing shadows or powders.


This is probably the shortest tutorial I have.

Step 1: Smooth on with finger all the way from lash line up to the brow bone.


Step 2: Apply black liner (I used Milani Liquif' Eye) along the water line and extend into a short flick to add sultriness to the gold-laden look.


Step 3: Apply black mascara to finish.

And that is literally all you need for a traffic-stopping eye look that takes 5 minutes to create.

Monday, July 9, 2012

My Bright Summer Pink Lip of the Moment: NYX Xtreme Lip Cream in 01 Dolly Girl


Last year, Soft Matte Lip Creams were all the rage in the NYX line. I do like matte finishes, but sometimes there's nothing like a creamy texture to bring out all the ripe, glossy glory of a bright, hot, shade.

For me, NYX Xtreme Lip Creams go on thick and opaque like liquid lipsticks and are not sticky the way lip glosses are, but don't expect them to be super long-wearing. The finish is good though (in my opinion); like a very creamy and opaque lipstick that you apply with a doe-foot applicator.
Since the Summer fashion season for me usually means a return to stronger, brighter lips, I feel a need to highlight the shade 01 Dolly Girl. It's bright and very blue-based but deep enough to be flattering on many skin tones and to not look neon.

NYX Xtreme Lip Creams are cruelty-free and available for about $6 (or under) depending where you purchase them from.


Wednesday, July 4, 2012

BACK TO BASICS: Dummies' Guide to 2 Easy Shadow Applications

It struck me during a conversation with some friends today that some people are literally just getting started with makeup, and not necessarily comfortable with eye liner, contouring, crease-cutting, etc.

So I'm distilling this tutorial down to 2 EXTREMELY basic ways to get started with eye makeup. This can be done with different color combinations, but the general rule is;

1 pale shade: this is  your highlight, and should typically be as light or lighter than your skin tone. Easy-to-wear highlight shades have a shimmer that is beige, gold, peach, or pink, but a matte off-white or light beige like MAC Shroom would be great as well. 

1 medium/bright/smoky shade: this is your main lid shade and will be the color people notice about your look. You can go for anything but I always recommend something that is deeper and stronger than your skin tone, or your lids can look a bit puffy otherwise. If you have hooded eyes, mono-lids, puffy lids, then it's better to stick with a matte shade.

1 dark shade - this is your definer color. It's what is going to add darkness to your lash line and a little contour where needed. Typically, this shade will be a dark brown, charcoal or black regardless of what lid color and highlight you chose. If you want to avoid emphasizing lines, then go for a matte shade.

If you want something simple and neutral that can be worn anywhere without being too loud or dramatic, go for a trio or pick 3 shades that are similar to these:

 Wet n Wild Silent Treatment Palette, above

POP Beauty Park Avenue palette, above


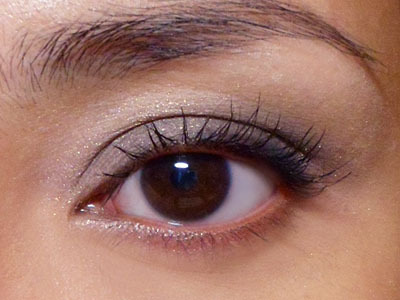
LOOK 1: The horizontal wash (using POP Beauty Park Avenue)


 Step 1: Apply the palest shade all the way from the base of your lashes up to the brown bones. This pale shade should not be too shimmery or metallic if you don't want an overly dramatic look.


Step 2: Apply the main lid color just across the lids from inner to outer corners. The color can stay very close to the lash line or go up to the hollow of your socket line.


Step 3: Finish by wiggling a flat brush along your lash line to deposit the darkest shade. This helps to add definition back to your lash line and serves as your liner, without having to use a separate product.
Finish with mascara.


LOOK 2: Vertical Blocking (Wet n Wild Silent Treatment Trio)

This look emphasizes the outer corners and pulls the eyes apart sightly.


Step 1: Instead of the lightest shade, start with the medium and apply it generously to the center of the lids, leaving just the inner-most and outer-nost corners bare.


Step 2: Contouring. In the outer ends of your eyes, pack the DARKEST shade on next. Just lay your shadow brush flat on the lid with the tips of the bristles tucked into the hollow point of your eye socket. Then wiggle it on the spot. 

Step 3: Then on the inner corners, do the same using the pale shade.


Step 4: Finish with the same step as in the first look. Run the darkest shade along your upper lash line. Then finish with black mascara.