Showing posts with label beauty trend. Show all posts

Tuesday, August 23, 2011

Weekend Hot Pink: NYX Cancun Pink Black Label Lipstick

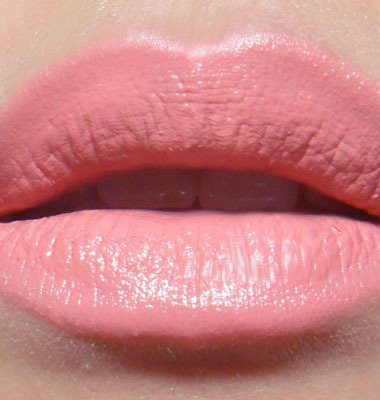
NYX Cancun Pink is a bright, blue-based pink that is creamy, pigmented, and (to me) extremely beautiful. While some love has been shown to Hot Pink from the same Black Label range as a creamy version of MAC Candy Yum Yum, Cancun Pink is more opaque.

The bonus is that it also does not stain the lips the way NYX Hot Pink and Candy Yum Yum do.

L-to-R: NYX Paris, NYX Cancun Pink, MAC Pink Nouveau


At just under $5 from Beautyjoint.com, it's definitely more expensive than the round lipsticks, but then this has been one of my favorite NYX purchases to date, and I think it would look wicked regardless of whether you have uber-pale or very deep skin tone. 

Wednesday, August 3, 2011

Featured Lip Shade: NYX Haute Melon!

MAC Melon pigment on lids with NYX Haute Melon on lips

I love hot blue-based pinks for summer because they look so striking, but I do occasionally stray towards the corals.
And one of the most beautiful corals I have found recently is NYX's Haute Melon, a bright raspberry coral which is more flattering than the usual yellow-based corals shades.

NYX Haute Melon lipstick
The texture is slightly sheer and extremely creamy, with no shimmer.
Best thing is, it's under US$2.

L-to-R: Revlon Kiss Me Coral, NYX Haute Melon, Nyx Matte Indie Flick
As you can see, Haute Melon is softer, glossier, sheerer, and slightly more pink (below). It's extremely wearable and forgiving if you're afraid of corals, and it's also REALLY affordable. (Of course, if you want a REALLY fiery coral that is going to pop when you take pictures, get NYX's Indie Flick Matte Lipstick.)


Click here for other products used in the look!

Tuesday, July 19, 2011

New Eyeshadow Storage


Smiggle is an Aussie stationery store, and I love how bright and cheery everything is. I'm not about to throw out all my document folders and pen holders just for them, but I couldn't resist getting two of these beautiful three-tiered stackable tins for organising and storing my eyeshadows in.

They come in black, green, silver, white, fuchsia, aqua, blue, deep purple (and I think yellow but I may be wrong). Of course, I HAD to pick the fuchsia and aqua!


They are not too large, but they can just about fit all my individual eyeshadows and some of the smaller palettes.


 Above, aqua-blue Smiggle tin containing 

Pink Smiggle tin containing gel liners, cream bases, and paints.

Each tier comes with a flat lid cap (see pink stack in top picture) which fits snugly but is not too hard to remove, so you can even use the top of each tin as a separate surface for placing products if you need more separation.

Very neat.

Monday, July 18, 2011

Color of the Moment: Getting that Nina Ricci F/W 2011 Milky-Salmon Lip!


Remember the gorgeous creamy-salmon lip color on the Nina Ricci F/W 2011 catwalk 
every magazine editor was raving about?

Pat McGrath just disclosed the formula. 
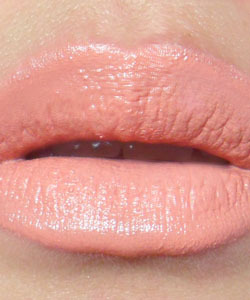
Mix concealer with a coral shade to get that perfect blend. I used MAC NW25 (it's more pink than an NC, and it has the best opacity and texture for the lips) with 2 coral-ey colors. One is more peach and one is more pink. It just depends on your skin tone and preference.


I tried all kinds of lip concealers, nude lipsticks, etc. MAC NW25 + Revlon Kiss Me Coral Super Lustrous Lipstick (bottom swatch) is a win.


If orange is not your thing, and you want to lean a little closer to pink, Rimmel's Pink Fame Color Show-Off Lipstick (hot coral-pink at top-left) gives an even brighter, pinker dupe when paired with a concealer. Replace the Revlon with this if you want a really true-to-catwalk version.


I do recommend using a paler or deeper concealer depending on your skin tone, and to always choose a slightly salmon shade regardless of whether your skin is warm or cool. It should not be too deep or dark or the effect is spoilt. 

To mimic the matte texture that McGrath did (and I did not), layer a single-ply of tissue over your lips, and dust over with translucent powder before applying another layer. You might want to scrape some product into a small jar and pre-mixing it so that you have a consistent shade for touching up.

Pair with bronzed skin for best effect!

Thursday, July 14, 2011

Lip Mix: Getting Revlon Stormy Pink and Peach Petal to Work!

Revlon Super Lustrous Lipgloss in Peach Petal (left), Revlon Matte Lipstick in Stormy Pink (right)

Anyone would tell you these look like 2 of the most gorgeous shades in existence. Peach Petal has been likened to MAC's Underage and Florabundance Lipglass, and Stormy Pink to Pink Nouveau.
But after I picked these up, I found the textures to be really hard to work with. 

Peach Petal tends to settle into every single groove and line on your lip, where they show up as ghastly lines of milky beige. Stormy Pink is so low in pigmentation and opacity that you need to layer several times for the color to build up to any sort of intensity. And by then, it's become cakey and uneven. 

So it suddenly struck me that I should try layering them together. 


It's still not 100% foolproof (it still sinks into lines just a smidgen), but you get a nice semi-sheer candy pink which is just a tad less blue toned and more creamy than Stormy Pink, and more even and wearable than either shade.
It even reminds me a bit of a deeper and glossier version of MAC's Viva Glam Gaga.


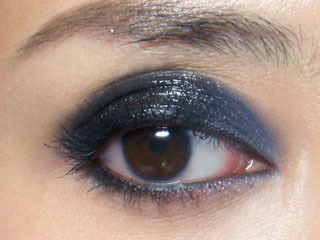
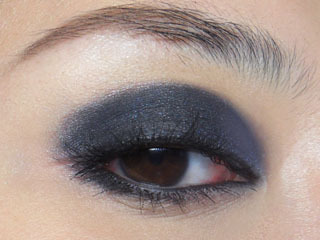
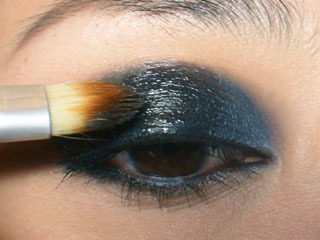
Blue-Black Vinyl Eye


Was thinking of doing a strong black eye with a twist.
Then I ended up doing it with TWO twists; deep blue on the inner corners, and gloss in the center of the lid. 
Be forewarned: This look can smear all over if you aren't careful and touch your lid while wearing it.
---
Step 1: Apply a black base to the lids, about 2/3 of the way in. You can use MAC Blackground Paintpot, or any cream liner, but that is going to be a lot more opaque and intense.


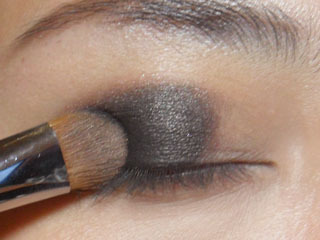
Step 2: Pack matte black shadow over the paintpot. Don't wing the ends or blend out the edges too much. You want the color to be concentrated within the socket area.

Step 3: With a deep true blue (MAC Freshwater is a good one, although I used I Nuovi Hype) fill in the empty area on the inner 1/3 of your eye. A matte would do just as well. If needed, apply another layer of matte black once more to intensify the color again.

Step 4: With a small, flat angled brush, apply the black matte shadow along the outer corners of the lower lash line as well. Then line the water line and tide line with black kohl. I finished with black liquid liner along the upper lash line and black mascara for extra intensity.

IMPORTANT: You can stop right at the step above for a night out. 
---

Step 5: But if you REALLY want to be a show-stopper, grab a clear gloss and a small synthetic concealer brush, and gently pat over just the center of the lids, and slightly outwards. Don't touch the blue areas. You want the contrast between the lacquered black and the metallic navy.

And the finished look. Don't bother with false lashes if you are doing the glossy eye. The makeup is too dark for most lashes to show, most lashes would slide off anyway, and you don't want to detract from the look ultimately.


Wednesday, July 13, 2011

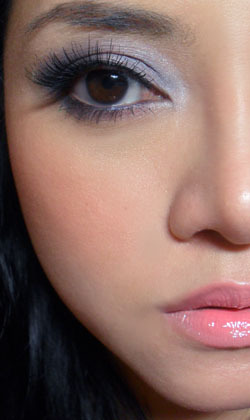
Smoked Silver-Violet with Peach-tinted Cheeks and Lips


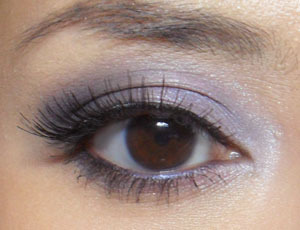
This is a look that composed of a tri-color eye, combining soft purple, grey, and navy, and the color combination is not only flattering for most skin tones, but also wicked on brown eyes.
In contrast, the cheeks and lips are a warm coral-peach in tone.
---
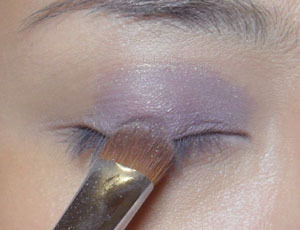
Step 1: Apply the soft purple to the inner 2/3 of the lids.

---
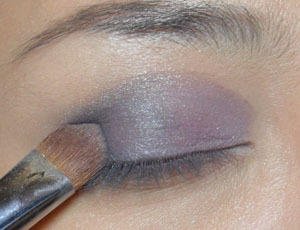
Step 2: Apply a soft grey to the outer half of the lids, blending into the purple.

---
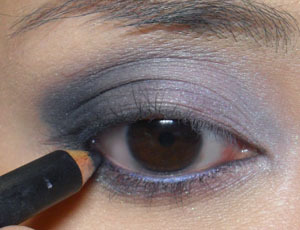
Step 3: With a dark navy, darken the outer corners and up along the socket line slightly. Then trace along the lower lash lines as well.
Finish with navy blue liner along the water lines.

---
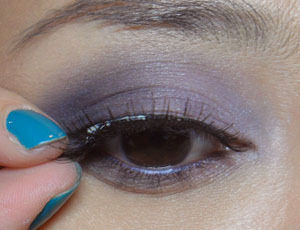
Step 4: Curl lashes, apply fake lashes, and then mascara on the lower lashes. I used longer lashes than usual today, just to emphasize the smokiness of the look without too much heavy color.

---
And the finished eye:

For the rest of the face, I used:
  • NYX Cinnamon blush (bright matte coral)
  • Heavy Rotation Nude Lipstick #03 (try MAC Myth or any other pale orange-based nude)
  • Revlon Super Lustrous Lipgloss in Coral Reef in just the center of the lips. Press lips together to spread and even out the color a little.

Thursday, July 7, 2011

Nails of the Moment: Matte Orange Creamsicle

Nails of the Moment: Matte Orange Creamsicle 
—-
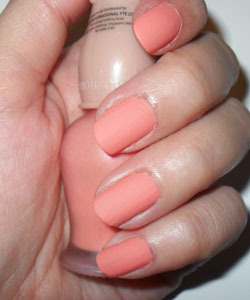
I’ve had my eye on creamy pastel orange/coral with a slight hint of pink for some time. The only thing more gorgeous than that is a MATTE creamy pastel coral.
I got mine from Korean brand Etude House (Matte polish #6), but if you can’t get hold of this online or in stores, L.A Girl has something similar in their matte nail enamel range, although slightly less peach, and more of a stronger orange.

The perfect lip to match? Lime Crime Cosmopop or maybe MAC Peachstock if you can’t wear anything too milky.


—-
I’ve had my eye on creamy pastel orange/coral with a slight hint of pink for some time. The only thing more gorgeous than that is a MATTE creamy pastel coral.
I got mine from Korean brand Etude House (Matte polish #6), but if you can’t get hold of this online or in stores, L.A Girl has something similar in their matte nail enamel range, although slightly less peach, and more of a stronger orange.

The perfect lip to match? Lime Crime Cosmopop or maybe MAC Peachstock if you can’t wear anything too milky.

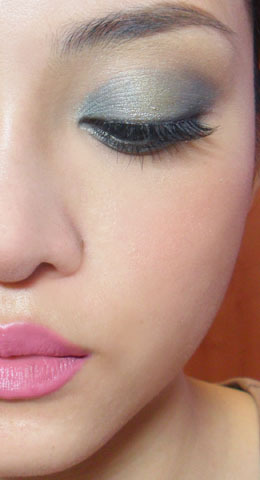
Sea Storm Eyes with Pink lips and cheeks

Sea Storm Eyes with Pink lips and cheeks

—-
This is a look featuring Sephora’s Colorful Palette #13 Jungle Chic.
I find the grey-green and khaki colors more reminiscent of a sea-storm than a jungle, but I’d say this is a nice palette to get, as the shades are quite lovely.
—-
Step 1: Seep the ochre-beige matte around the brown bones to clean up the area.

—-
Step 2: With the deepest gun-metal grey, add some contours around the outer V and gently into the socket line.

—-
Step 3: With the silvery medium-aqua shade, fill in the outer and inner corners of the lids. This will be the main color of the look. Sweep along the lower lash line as well.

—-
Step 4: Fill in the center of the lid with the lighter olive metallic. Then finish by applying a dark brown along the lash line and water line for definition.

—-
Step 5: Apply black liquid liner along the upper lash line, then false lashes or black mascara to finish. I want to keep the look soft, so I’m using wispy lashes rather than spike or dramatic ones.

—-
Finish with natural pink blush (Maybelline Pure Mineral N01 Original Rose) and barbie-pink matte lips (NYX Summer Breeze). You can use MAC Pink Nouveau if you want, as well. 


—-
This is a look featuring Sephora’s Colorful Palette #13 Jungle Chic, and NYX's Matte Lipstick in Summer Breeze (slightly warmer dupe for MAC's Pink Nouveau).
I find the grey-green and khaki colors more reminiscent of a sea-storm than a jungle, but I’d say this is a nice palette to get, as the shades are quite lovely.
—-
View the step-by-step tutorial on Makeupbox!

Friday, April 29, 2011

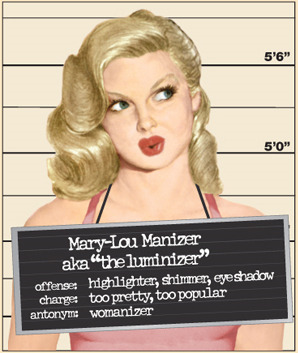
About: TheBalm's "Luminizer" (aka Mary-Lou Manizer, or wateva...)


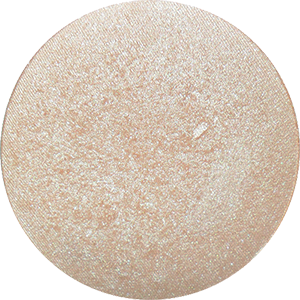
Unwieldy name aside, this is a lovely, LARGE compact of one of the most beautiful golden-ivory shades I've ever seen.
Reasons I love this:
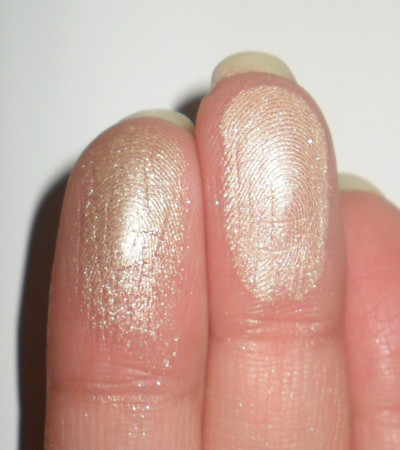
1. It's the most gorgeous pale-champagne shade with smooth-as-butter texture which is not glittery or chalky. It is able to mimic that translucent dewy look liquid or cream highlighters give, but is so much more portable and easier to work with. The shade is also flattering for most skin tones.
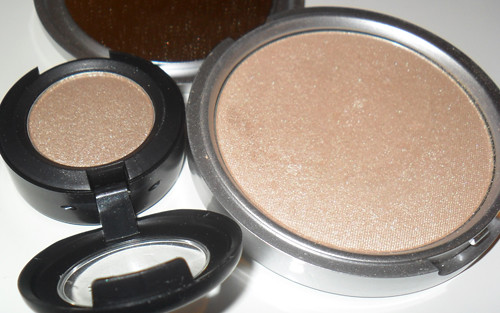
2. This is a pretty good dupe for MAC's Retrospeck (which has slightly deeper base tones but identical highlights). As seen below, it is finer-grained and more opaque (Retrospeck is a Lustre) so while you won't be able to get that same flecks-of-champagne effect, it's easier to work with, more pigmented, and gives a very natural sheen when sheered out.

3. Look at the amount you get. Both products are marked up here in Asia, but you get 8.5g of product in The Luminizer (5 x MAC shadows at 1.5g), and an ever-so-cute mirrored compact, for about 0.5 times the cost of a MAC shadow.

---
Tips for applying:
  1. I swipe this on my brow bones and cheekbones with a wedge sponge after applying my base, and before doing the rest of my makeup. By the time my setting powder goes over it, it's become a soft-focus highlighting sheen which emphasizes bone structure subtly.
  2. I sweep this over lids softly with black kitten liner. Apply red lipstick to complete the retro pin-up look.
  3. Dab this softly over the cupid's bow, and in inner corners of eyes to enhance your features.
  4. If you have light to medium skin, mix a tiny bit of this with your normal powder on a fluffy brush and apply over under-eye concealer for more illumination. THEN apply the rest of your makeup. (Caution: It may be easy to go overboard with this, so be careful and use a very light hand!)

Tuesday, April 26, 2011

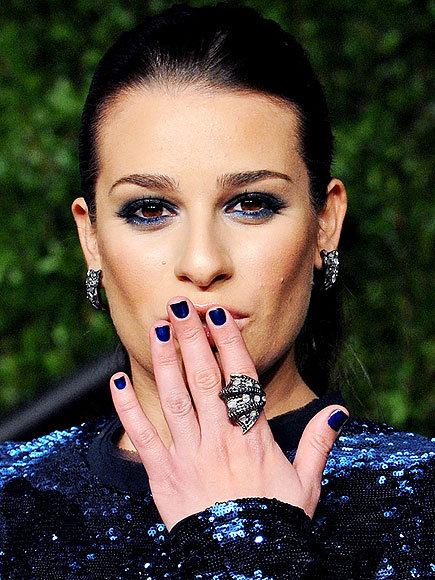
Lea Michele Red-Carpet Sapphire Look


Photo credits: People.com

I don't have any particular love for Lea Michele. I happen to be one of the freaks on this planet who has only watched 1 episode of Glee, and didn't feel compelled to follow up with more doses.

But I love this deep, dark sapphire eye. It brings out the warm, rich tones of her brown eyes and complements her olive skin. I have to say it's a little bit of a navy-overload with the matching dress, makeup, AND nails, but what the hey - the eyes are gorgeous.

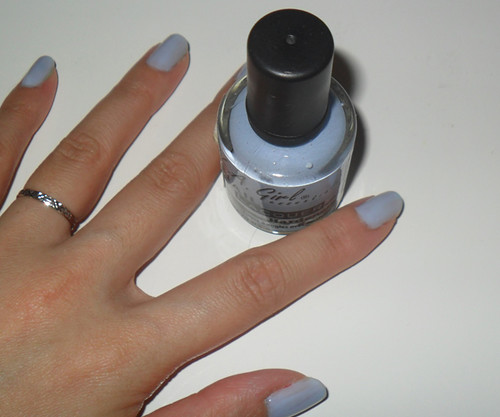
Current: Orchid Hush nails (L.A. Girl Robin Blue Creme)


L.A. Girl makes 2 items I love.

1. A true black creme lipstick which has a beautiful sheen and is surprisingly flattering (though I wouldn't wear it to work)

2. One of my favorite creme nail polish colors in the world, #329 Robin Blue Creme lacquer


#329 Robin blue is not really a robin's egg blue. I think someone needs to do some research before naming these shades.This has lavender undertones, not green.

It's a gorgeous muted Orchid tone, that elusive hybrid between grey-blue-lavender, which is lovely on most skins. It's not a fully opaque polish, by the way, so you will need at least 3 coats to make it even. But I wear this to work all the time with no problem. It's surprisingly neutral and muted, flattering on the skin, and does not look too outlandish for a corporate environment.

At the same time, it's an interesting color to look at.

I haven't been able to find a shade quite like it from any other brand, and I love that it's cheap and comes in a big bottle.

My gripe?
It doesn't last as well as Sally Hansen or O.P.I., etc. But then it's not expensive, so I can live with that.