Showing posts with label celebrity style. Show all posts

Tuesday, October 4, 2011

Makeup Brushes 101: Eye Brushes

My most-used brushes from L-to-R: Fine gel liner brush, flat angled brush, smudger brush, blender (oval), flat shader, pencil brush, small blender, and regular tapered blender.

I used to be a fan of "finger-painting". I.e. applying most of my eye shadows with my fingers. Part of it was laziness, and part of it was just ignorance about how the heat, moisture and oils from your fingers can destroy your shadows by sealing the surface over, and/or breeding and re-applying bacteria to your face.
If you've ever seen the surface of your shadow going darker, shinier, or sort of bumpy like tarmac after a few uses, you'll know what I'm talking about.

Unfortunately, this usually means the color pay-off (intensity) of the shadow is gone.

Now, I only use my fingers for loose pigments because those do not contain absorbent fillers like titanium dioxide and talc, which are the main reasons eye shadows "seal over" when touched with your fingers. For pressed shadows, there are plenty of good brushes you can find that will not break the bank or make a mess on your face.

The trick is getting familiar with how each shape and type of bristle works. The rule of thumb is you get more precision with firm, tightly packed brushes (smudgers, flat angled liner brushes, gel liner brushes), but you need looser, softer brushes for blending and smoking out colors. Brushes with a combination of these (soft bristles packed tight in a flattened/oval ferrule) is a great multi-tasker. More on this below.
---
If you're starting out in makeup or want to keep things simple and fuss-free, these are the essentials:

  • Small pointed liner brush (synthetic hair)
  • Smudger brush (natural)
  • Soft shader (natural/synthetic)

---

  • If you're starting out in makeup, gel liners are the easiest way to get very strong and controlled lines without a whole lot of skill. Pencils tend to be less long-wearing and don't always give as strong a line.
  • A good gel liner brush should have a small, tapered tip with a flattened ferrule (point of the barrel that holds the brushes) so you can use it flat for a thick line or side-ways for a thin one. Of course, this is only applicable if you use gel liners. For a good sense of relative size, look at the left-most brush (in a cap) in the top image. 
  • These are more versatile than the long ultra-fine brushes sold by many makeup brands, because those are harder to handle in general.
  • My ALL-TIME favorite is the one that comes with the Maybelline Lasting Drama gel liners. Good as the high-end brands, and so much cheaper because you're getting 2 products for one!


TIP: These are FANTASTIC as concealer brushes for hiding spots and blemishes because they are firm enough to pack on product, but small enough for precision.
---

  • This type of brush deserves a whole lot more love than it does. The name "smudger" is slightly misleading because I find it much more useful as a tool for applying dark shadows close to your lash line as a smoky liner. They usually have a flat, wide ferrule (barrel) and firm, natural bristles.
  • I feel that defining your lash line is very important when you're wearing lots of colors or shimmer on your lids, because all that makeup can really overwhelm your lashes and make your eyes less defined.
  • A good one should be firm when you press down on the tips, and the bristles should not bend easily, or you will get a mess when you try to apply shadow to small areas.
TIP: You can use this to apply a cut crease in your socket line.
---

'
  • Shader brushes are a staple for packing on color, as well as blending and softening looks. These are usually flattened and cut in a rounded paddle-shape. The bristles should be soft enough to hold and deposit a lot of pigments onto your lids, but firm enough to grab a lot of color. The most famous shader is probably MAC 217, but you can find this from most brands and price ranges.
  • Take note that the size can vary greatly from brand to brand, so I'd suggest something no wider than than your thumb nail as the really huge ones can mess up your eye look by muddying everything together.
TIP: Some makeup artists like to use these brushes to apply concealer for a very natural finish.

---
OPTIONAL BRUSHES DEPENDING ON YOUR NEEDS:

  • Flat angled brush
  • Flat shader brush
  • Fine detail brush
  • Tapered blending brush


  • Used similarly to the smudger brush, this gives a more precise line, but the short, stuff fibers tend not to grab as much pigment, so it works better (in my opinion) as a brow brush when I want to avoid overdoing my brows.

 ---

  •  The big, flat older-cousin of the soft shader, this type of brush is also good for packing on softer colors and pigments. Unlike the soft version above, the flat shader is not good for blending out colors and harsh lines because it's good for packing colors down, not ruffling them up.
---

  • A pointed tip is great for aplying color to the crease. Just dip the tip into shadow, then into the hollow of your socket and then sweep in and out along your socket line. Also good for applying highlight to the inner corners of eyes.
  • The second-last brush from the right looks like a rounder, softer version of the pencil/detail brush, but functions more like a mini-version of the below blending brush.
---

  • A staple for many people, the longer, tapered blender brush is very soft, and better for smoothinng and blending out color than for applying color because the super-soft bristles will not grab much pigment. My favorite alternate use for this is applying mineral powder concealer onto spots by lightly stippling down. 
---
Do note that I collected my brushes from a whole mix of places, including Sigma and Sephora, and these are the ones that I consider to have good brushes for good value, although Coastal Scents has a good range of smaller detail brushes and smudgers.

Monday, August 29, 2011

Lime Crime Countessa Fluorescent Dupe: Barry M Vibrant Pink Review and Swatches!

 Barry M Lip Paint 62 Vibrant Pink


I've always considered Lime Crime's Countessa Fluorescent the Queen of Barbie Pinks. It's different from hot electric pinks and fuchsias like MAC's Candy Yum Yum in that it is a truer pink (as opposed to blue-based), not as deep, and almost highlighter-bright on the lips. 


Imagine my delight when my Barry M package included one that was extremely similar in shade. 
 Meet Barry M Vibrant Pink (left) and Lime Crime Countessa Fluorescent (right).


Barry M Vibrant Pink is something of a satin finish (similar to MAC Pink Nouveau), which means it is opaque and tacky, with a muted sheen - which I love. This is my favorite texture of all MAC lipsticks because it imparts great color, lasts really long, but doesn't feel as dry as a full matte lipstick.


Swatch comparison; Lime Crime Countessa Fluorescent (left) and Barry M 62 Vibrant Pink (right)


The right side of my hand is a little more shaded, or the two swatches would look even more similar. I was quite surprised to realize the Barry M was actually more opaque and intense than the Lime Crime, which is more of a creamy Amplified finish. If you like demi-matte finishes that last a long while, get Barry M Vibrant Pink. If you want a bit more moisture, get Lime Crime Countessa Fluorescent.


The other difference is also that if you want to be really picky about it, the Barry M is just a hint deeper and more cool-toned. But just worn on the lips individually, the difference is not visible at all.


Barbie Pink vs Hot Pink: Barry M Lip Paints in 62 Vibrant Pink (left) and 52 Shocking Pink (right).

Just for purposes of comparison, here is Barry M's Vibrant Pink swatched against Barry M  Shocking Pink, the widely-acknowledged Candy Yum Yum dupe. As you can see, Vibrant Pink is more lustrous and reflective, whereas Shocking Pink is a deeper, cooler-based, more intense matte-pink. 


Do note that all the neon pinks do stain the lips, without exception. (If you've found any of these neon pinks that don't stain, let me know!) I believe it's the nature of the liquid dyes needed to get that intense highlighter-pink effect, as more subdued pinks I own, like MAC Pink Nouveau, do not do this.


The main drawback for this lip shade? It can make teeth look dull and yellow, so watch out there!

Barry M Vibrant Pink can be purchased internationally on Barrym.com for £4.49 each.

Monday, July 25, 2011

Dawn Storm: Wet n Wild “Greed” Palette


I’m a little late on the Coloricon train, but I finally got a few from Nonpareil.com, and I’ve been loving them so far.
The first one I decided to try was the 6-color #246 Greed palette, below. I think the shades are gorgeous. The pigmentation of the matte shades is higher on touch, but if you apply them with a brush, over primed lids, the metallics perform just as well, and are really gorgeous.


(Wet n Wild Coloricon 246 Greed)


One tip: Try to avoid applying or touching these with your fingers or you could end up hardening and “sealing” the metallic shades.

Click here for the step-by-step!

Friday, July 22, 2011

Leather, Silver and Denim: Neutral Eye for Day


For many people, neutral means "taupe", "brown", "grey", black", "beige". It means safe, reliable, and flattering for most skin tones.

Well, I wanted a departure from the usual combination of coordinated shades (like brown, on brown, on more brown), so I went for the colors of everyday items that we would consider as "neutrals" of a sort. Silver jewelery, dark blue denim, soft tan leather.

---
Step 1: As the shades are quite soft, it would be good to apply a good base so that you can really showcase the sheen and colors. 
Pack MAC Patina on the inner 1/3 of the lids and lower lash line.

Step 2: Pack a soft steel shade in the center of the lids. I chose MAC Electra because it is not too harsh and white, and not too deep for the center of the lids to pop.

Step 3: In the outer corners, apply a dark matte navy with a small blender, and extend down along the outer half of the lower lash line as well. I used Revlon Riviera Blue. You can use a black or grey, but those shades would not bring out silver and blue tones as well.

With a clean, soft blending brush, smoke out the outer corners of the navy so it becomes a slightly wing. If you want a more dramatic and contoured look, don't smoke it out.


Step 4: Apply black liner and mascara to finish the look. 

The final look should be defined and interesting to look at, but flattering to most eye and skin colors, and not too dramatic for day time wear.

Wednesday, July 20, 2011

Quick and Dirty: Smoky Turquoise and Black Eye


When I say quick and dirty, I really mean quick and dirty. You will need a 
  • white/beige/pale-yellow liner (matte), 
  • false lashes or mascara, 
  • a deep charcoal grey matte shadow, and 
  • a satiny deep-turquoise blue.


Step 1: Apply the dark moss-grey matte shade in an upright triangle at the outer corner of the eyes. (Basically, do your outer V and then fill it in.)

Step 2: Apply a rich jewel-blue to the rest of the lid, within the socket area. Be sure to pack on the color rather than sweeping and swirling your brush, for maximum intensity.

 Step 3: Finally, run the moss-grey shadow generously along the lower lash line, apply false lashes (optional), black mascara to top and bottom lashes, and then gently line the waterline with a pale matte pencil to finish.

Products used happened to mostly be from Make Up Store:
Make Up Store Microshadow in Boarding (deep aqua-blue satin)
Make Up Store Microshadow in Moss (dark matte grey with an olive lean)
Make Up Store Eye Pencil in Vanilla Matt
L'oreal Voluminous Carbon Black

Tuesday, July 19, 2011

New Eyeshadow Storage


Smiggle is an Aussie stationery store, and I love how bright and cheery everything is. I'm not about to throw out all my document folders and pen holders just for them, but I couldn't resist getting two of these beautiful three-tiered stackable tins for organising and storing my eyeshadows in.

They come in black, green, silver, white, fuchsia, aqua, blue, deep purple (and I think yellow but I may be wrong). Of course, I HAD to pick the fuchsia and aqua!


They are not too large, but they can just about fit all my individual eyeshadows and some of the smaller palettes.


 Above, aqua-blue Smiggle tin containing 

Pink Smiggle tin containing gel liners, cream bases, and paints.

Each tier comes with a flat lid cap (see pink stack in top picture) which fits snugly but is not too hard to remove, so you can even use the top of each tin as a separate surface for placing products if you need more separation.

Very neat.

Saturday, July 16, 2011

I Hit Pan!!! (And the Reasons I Started a Makeup Blog)

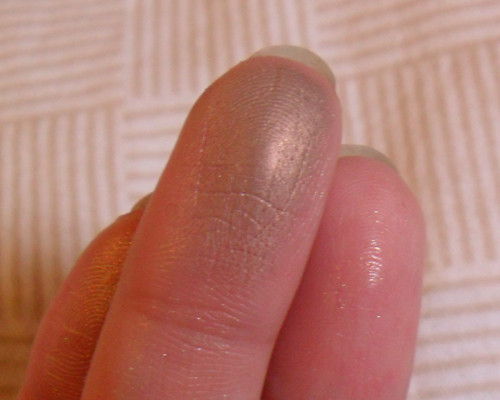
MAC Patina shadow, above

To many an obsessive makeup hoarder/collector, that image signifies Satisfaction. 
(And I must say a bit of disbelief that we actually managed to use anything often enough to see the pan.)

I am one of those people who cycle between envy at those who manage to make a significant dent in their makeup items, and also terror at the thought of running out of the things I love.

Maybe I'm just OCD. When I use an eyeshadow palette, I'll inadvertently try to rotate between shades so no one color shows a bigger dent than the others. When I love a product, I'll start looking for an alternative for it so that I don't use it up. (Yeah, it's not logical.) And I also tend to get bored of wearing the same color nail polish or eye shadow consecutively. So I almost never do. 
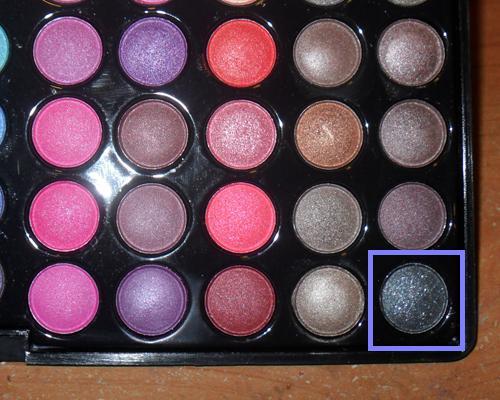
I have a shelf dedicated to backups of favorites which I am not even close to finishing.

Strangely, I love "pan porn". I'll trawl the web occasionally, looking for images of half-finished items and wondering at how others manage to use the same items so consistently and feeling an odd admiration for them. The only things I can use repeatedly each day, and constantly finish through the years, are lipsticks and mascaras. 
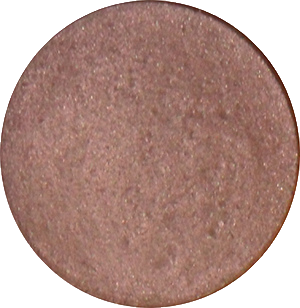
Which leads me to two of the reasons I started a makeup blog:
  1. Use up more makeup
  2. Use more colorful makeup
I think it's time to get more pan porn of my own.

Thursday, July 14, 2011

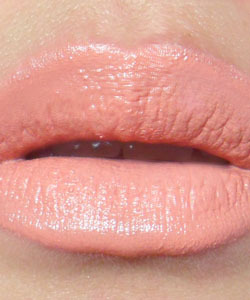
Lip Mix: Getting Revlon Stormy Pink and Peach Petal to Work!

Revlon Super Lustrous Lipgloss in Peach Petal (left), Revlon Matte Lipstick in Stormy Pink (right)

Anyone would tell you these look like 2 of the most gorgeous shades in existence. Peach Petal has been likened to MAC's Underage and Florabundance Lipglass, and Stormy Pink to Pink Nouveau.
But after I picked these up, I found the textures to be really hard to work with. 

Peach Petal tends to settle into every single groove and line on your lip, where they show up as ghastly lines of milky beige. Stormy Pink is so low in pigmentation and opacity that you need to layer several times for the color to build up to any sort of intensity. And by then, it's become cakey and uneven. 

So it suddenly struck me that I should try layering them together. 


It's still not 100% foolproof (it still sinks into lines just a smidgen), but you get a nice semi-sheer candy pink which is just a tad less blue toned and more creamy than Stormy Pink, and more even and wearable than either shade.
It even reminds me a bit of a deeper and glossier version of MAC's Viva Glam Gaga.


Thursday, July 7, 2011

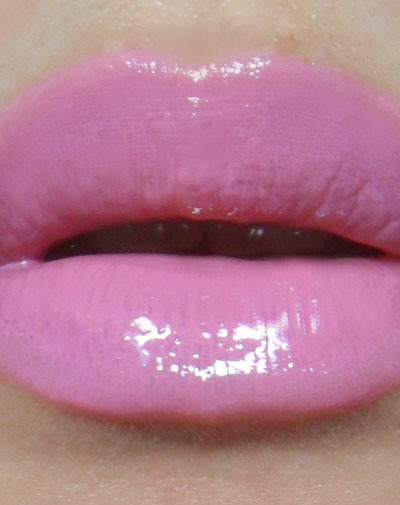
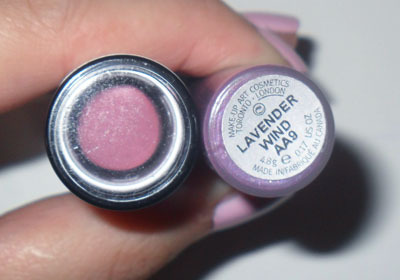
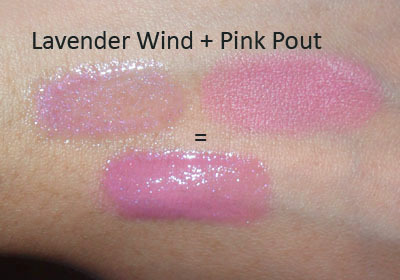
Lip Mix of the Day: Revlon Pink Pout + MAC Lavender Wind Lipglass

Lip Mix of the Day: Revlon Pink Pout + MAC Lavender Wind Lipglass
—-

Pink Pout is a beautiful and affordable soft-mauve which is sheerer than you would expect most matte lipsticks to be. And on some skins, it can look a little chalky and washed out.
Lavender Wind (Limited Edition**), like most other interesting, shimmery, sheer glosses, can sort of disappear on the lips, making you wonder what the whole point was in the first place. **MAC Oyster Girl is a nice replacement if you don’t have Lavender Wind. It’s also a nicer gloss on its own anyway.
So I just layered the translucent shimmer gloss over the matte lipstick. Recommended if you’re ready to graduate from barely there cool-toned lip products, but not quite sure about full-on lip color yet.


—-

Pink Pout is a beautiful and affordable soft-mauve which is sheerer than you would expect most matte lipsticks to be. And on some skins, it can look a little chalky and washed out.

Lavender Wind (Limited Edition**), like most other interesting, shimmery, sheer glosses, can sort of disappear on the lips, making you wonder what the whole point was in the first place. **MAC Oyster Girl is a nice replacement if you don’t have Lavender Wind. It’s also a nicer gloss on its own anyway.

So I just layered the translucent shimmer gloss over the matte lipstick. Recommended if you’re ready to graduate from barely there cool-toned lip products, but not quite sure about full-on lip color yet.

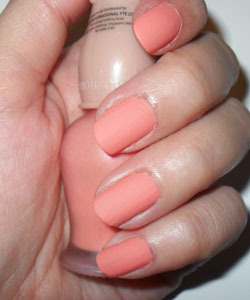
Nails of the Moment: Matte Orange Creamsicle

Nails of the Moment: Matte Orange Creamsicle 
—-
I’ve had my eye on creamy pastel orange/coral with a slight hint of pink for some time. The only thing more gorgeous than that is a MATTE creamy pastel coral.
I got mine from Korean brand Etude House (Matte polish #6), but if you can’t get hold of this online or in stores, L.A Girl has something similar in their matte nail enamel range, although slightly less peach, and more of a stronger orange.

The perfect lip to match? Lime Crime Cosmopop or maybe MAC Peachstock if you can’t wear anything too milky.


—-
I’ve had my eye on creamy pastel orange/coral with a slight hint of pink for some time. The only thing more gorgeous than that is a MATTE creamy pastel coral.
I got mine from Korean brand Etude House (Matte polish #6), but if you can’t get hold of this online or in stores, L.A Girl has something similar in their matte nail enamel range, although slightly less peach, and more of a stronger orange.

The perfect lip to match? Lime Crime Cosmopop or maybe MAC Peachstock if you can’t wear anything too milky.

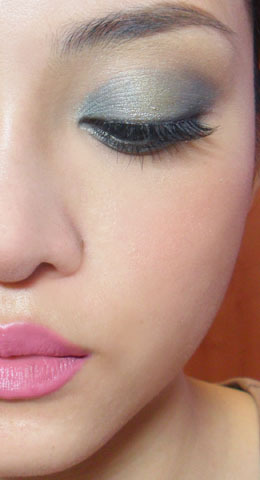
Sea Storm Eyes with Pink lips and cheeks

Sea Storm Eyes with Pink lips and cheeks

—-
This is a look featuring Sephora’s Colorful Palette #13 Jungle Chic.
I find the grey-green and khaki colors more reminiscent of a sea-storm than a jungle, but I’d say this is a nice palette to get, as the shades are quite lovely.
—-
Step 1: Seep the ochre-beige matte around the brown bones to clean up the area.

—-
Step 2: With the deepest gun-metal grey, add some contours around the outer V and gently into the socket line.

—-
Step 3: With the silvery medium-aqua shade, fill in the outer and inner corners of the lids. This will be the main color of the look. Sweep along the lower lash line as well.

—-
Step 4: Fill in the center of the lid with the lighter olive metallic. Then finish by applying a dark brown along the lash line and water line for definition.

—-
Step 5: Apply black liquid liner along the upper lash line, then false lashes or black mascara to finish. I want to keep the look soft, so I’m using wispy lashes rather than spike or dramatic ones.

—-
Finish with natural pink blush (Maybelline Pure Mineral N01 Original Rose) and barbie-pink matte lips (NYX Summer Breeze). You can use MAC Pink Nouveau if you want, as well. 


—-
This is a look featuring Sephora’s Colorful Palette #13 Jungle Chic, and NYX's Matte Lipstick in Summer Breeze (slightly warmer dupe for MAC's Pink Nouveau).
I find the grey-green and khaki colors more reminiscent of a sea-storm than a jungle, but I’d say this is a nice palette to get, as the shades are quite lovely.

—-
View the step-by-step tutorial on Makeupbox!

Friday, April 29, 2011


1. Katy's foundation coverage looks quite full in the video, and a polished look was achieved using highlighter rather than a dewy base. You will need medium-coverage foundation (Bourjois Healthy Mix in #52) and a soft beige/champagne highlighter (TheBalm "The Luminizer").

2. This is a very classic contoured eye, shaded in the outer V and along the socket line. There are 2 colors needed. A pearlescent peach-based gold and a basic grey/black. (I used the 88 Shimmer palette.)


3. Using the black shade, first pack into the outer corner of lids, then in an arc along the socket, stopping before reaching the center. Then trace all along the top lash line, and 2/3 of bottom lash line. It will look dramatic now, but you're going to blending it out soon.


Read More!

Tuesday, April 26, 2011

5 Days, 5 Ways: MAC Patina shadow (Frost)


MAC Patina may not stand out on the eyeshadow racks beside its more dramatic relatives, but this rich medium frappuccino-brown with subtle copper-red highlights (below) is oh-so-beautiful to wear.


If I had to own just one single MAC eyeshadow for the rest of my life, it would be this in a heartbeat. There are some other pretty lovely shades, but nothing I reach for on such a regular basis.

O Patina, how do I love thee? Let me count the ways...

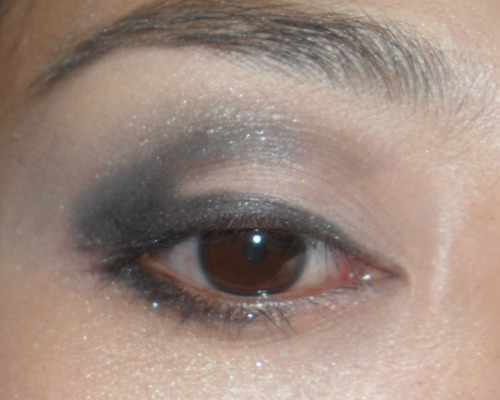
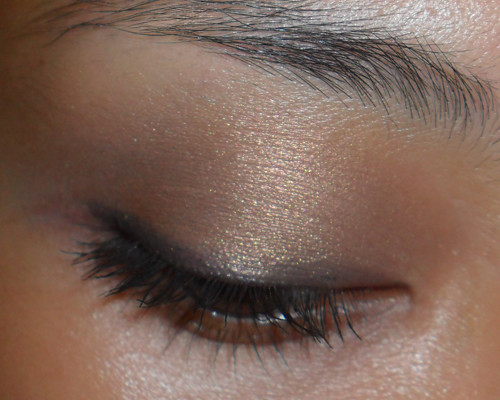
Day 1: As a simple, rich wash of color over lined lids.


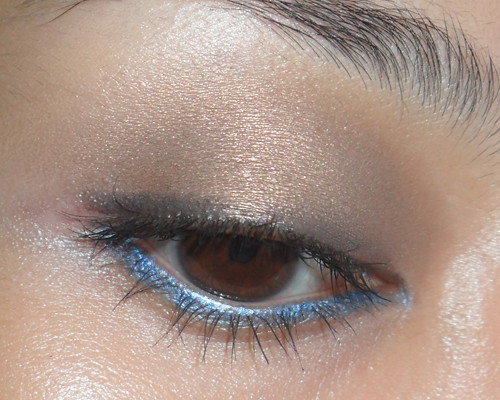
Day 2: Spiced up with colorful eyeliner along the lower lash line. (And yes, just about every color liner will work with Patina.)


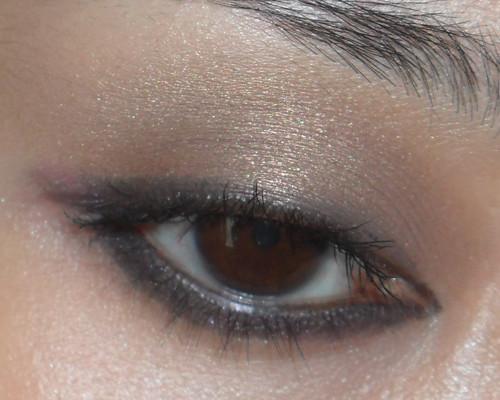
Day 3: Out for dinner and drinks with lots of black, smudgy reverse liner on the bottom lash line. (This photographs subtler than it really is.)


Day 4: Clean and simple. Worn as a bronze liner, traced over black pencil with a dense smudge brush.


Day 5: Kick off your weekend with a little more color. Worn with vanilla liner on the bottom lash line, and navy shadow on the outer corner.


Now have you tried Patina?
---

A SPECIAL INTRODUCTORY NOTE ON "5 DAYS, 5 WAYS":
I came up with 5 Days, 5 Ways specifically as a means to
  • use more products, rather than buy more products
  • highlight some very versatile items which I believe are worth investing in
  • challenge myself to think out of the box
Feel free to have fun with this idea, and I'd love to see photo-replies!